1
Thank you for purchasing this DENON product. To ensure proper operation, please read this owner’s manual carefully before using the product.
After reading them, be sure to keep them for future reference.
Getting started
Basic version
············································································3
Connections
···················································································4
Important information ···································································4
Connecting an HDMI-compatible device ······································6
Connecting a TV············································································8
Connecting a Blu-ray Disc player/DVD player ·······························9
Connecting a set-top box (Satellite tuner/Cable TV) ·····················9
Connecting a digital camcorder ··················································10
Connecting a control dock for iPod ·············································10
Connecting an antenna ·······························································11
Connecting a CD player ······························································11
Connecting an external control device········································12
Settings
························································································13
Set up speakers (Audyssey
®
Auto Setup) ·································13
Playback (Basic operation)
·························································20
Important information ·································································20
Playing a Blu-ray Disc player/DVD player ····································21
Playing a CD player ·····································································21
Playing an iPod
®
·········································································22
Tuning in radio stations ·······························································25
Selecting a listening mode (Surround mode)
··························27
Selecting a listening mode··························································27
Advanced version
·······························································31
Speaker installation/connection (Advanced connection)
·······32
Install ··························································································32
Connect ······················································································34
Set up speakers ··········································································39
Playback (Advanced operation)
·················································41
Convenient functions ··································································41
Playback in ZONE2 (Separate room)
········································45
Audio output ···············································································45
Playback ······················································································45
Quick select function ··································································46
Sleep timer function ···································································46
How to make detailed settings
··················································47
Menu map ··················································································47
Examples of menu screen displays ············································48
Examples of menu and front display ··········································49
Inputting characters ···································································50
Audio Adjust ···············································································52
Information ·················································································58
System Setup ·············································································59
Input Setup ·················································································68
Operating the connected devices by remote control unit
······74
Operating AV devices ·································································74
Registering preset codes ····························································75
Operating devices ·······································································77
Specifying the zone used with the main remote control unit ·····79
Resetting the remote control unit···············································79
Information
·············································································80
Part names and functions
···························································81
Front panel ··················································································81
Display ························································································82
Rear panel ···················································································83
Remote control unit ····································································84
Other information
·······································································86
Trademark information································································86
Surround ·····················································································87
Relationship between video signals and monitor output ············91
Explanation of terms ···································································92
Troubleshooting
··········································································94
Resetting the microprocessor ····················································96
Specifications
··············································································97
Getting started
··············································································1
Accessories ··················································································1
Features ························································································2
Cautions on handling ····································································2
Accessories
Check that the following parts are supplied with the product.
q
Getting Started
........................................................................
1
w
CD-ROM (Owner’s manual)
....................................................
1
e
Warranty (for North America model only)
................................
1
r
Service network list
.................................................................
1
t
Remote control unit (RC-1156)
................................................
1
y
R6/AA batteries
.......................................................................
2
u
Setup microphone (DM-A409)
.................................................
1
i
AM loop antenna
.....................................................................
1
o
FM indoor antenna
..................................................................
1
t
i
o
u
Contents
 1
1 2
2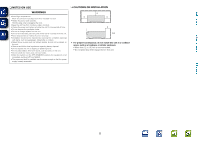 3
3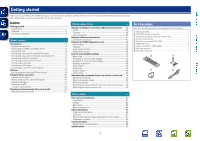 4
4 5
5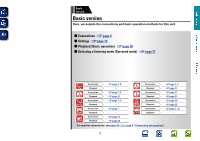 6
6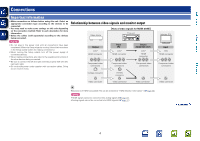 7
7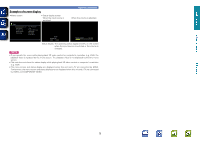 8
8 9
9 10
10