Denon AVR-5805MK2 Owners Manual - Page 4
Table Of Contents - avr review
 |
UPC - 081757507400
View all Denon AVR-5805MK2 manuals
Add to My Manuals
Save this manual to your list of manuals |
Page 4 highlights
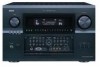
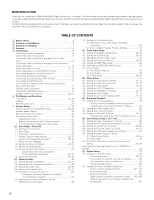
2 INTRODUCTION Thank you for choosing the DENON AVR-5805 Digital Surround A / V receiver. This remarkable component has been engineered to provide superb surround sound listening with home theater sources such as DVD, as well as providing outstanding high fidelity reproduction of your favorite music sources. As this product is provided with an immense array of features, we recommend that before you begin hookup and operation that you review the contents of this manual before proceeding. TABLE OF CONTENTS z Before Using 6 x Cautions on Installation 6 c Cautions on Handling 7 v Features 7~9 b Connections 9 Connecting Audio Components 10 Connecting Video Components 11 Connecting video components equipped with S-Video jacks 12 Connecting video components equipped with Component Video video jacks 13 Video Conversion Function 13, 14 Connecting equipment with HDMI terminals 14 Connecting equipment with DVI terminals 15 Connecting the antenna terminals 16 Connecting the external input (EXT.IN) jacks 16 Connecting the ZONE2 jacks 17 Connecting a component with video and audio jacks to the V.AUX input jacks 17 DENON LINK connections 18 Connecting IEEE1394 devices 19 Speaker system connections 20, 21 n Part Names and Functions Front panel 22, 23 Display 24 Remote control unit 25 m System Setup 26 System setup items and default values 26~28 Speaker system layout 29 Before setting up the system 30 Auto Setup / Room EQ 30 Measurement flow 31 Before performing the Auto Setup procedure 32 (I) Connecting the microphone for Auto Setup 32 [1] Auto Setup / Room EQ 33 1-1. Setting the Auto Setup 33 (II) Extra Setup 34 (III) Preliminary measurements 35 (IV) Speaker System measurement 36, 37 (V) Check of the measurement result 38, 39 About the error message 39 1-2. Setting the Room EQ Setup 40, 41 1-3. Setting the Direct Mode 41 1-4. Setting the MIC Input Select 42 Specifications and setup procedure for Non-DENON microphone 42, 43 1-5. Check the Parameter 43~46 [2] Speaker Setup 46 2-1. Setting the type of speakers 46, 47 2-2. Setting the low frequency distribution 48 2-3. Setting the Delay Time 49, 50 2-4. Setting the Channel Level 51, 52 2-5. Setting the Crossover Frequency 53 Setting the crossover frequency individually for the different channels 54 2-6. Selecting the Surround Speakers for the different surround modes 55 2-7. Setting the THX Audio Setup [1] Setting for using a THX Ultra2 compatible subwoofer 56 [2] Surround Back Speaker Position Settings 57 [3] Audio Input Setup 58 3-1. Setting the Digital In Assignment 58, 59 3-2. Setting the EXT.IN Setup 60, 61 3-3. Setting the Input Function Level 62 3-4. Setting the Function Rename 63, 64 3-5. Setting the IEEE1394 Assign 65 3-6. Selecting the IEEE1394 Auto Function 66 3-7. Tuner Presets [1] Auto Preset Memory 67 [2] Preset Skip 68 [3] Preset Name 69, 70 [4] Video Setup 71 4-1. Setting the Component In Assign 71, 72 4-2. Setting the Video Convert Mode 72, 73 4-3. Setting the Video Scaler 73, 74 4-4. Setting the 3D Y/C Separation 74 4-5. Setting the HDMI/DVI In Assign 75, 76 4-6. Setting the Audio Delay 76, 77 4-7. Setting the On Screen Display (OSD 77, 78 [5] Advanced Playback 78 5-1. Setting the 2ch Direct/Stereo 79 Setting the front B speakers when the surround mode is set to the 2-channel Direct or Stereo 79 5-2. Setting the Dolby Digital Setup 80 5-3. Setting Auto Surround Mode 81 5-4. Setting the Manual EQ Setup 82, 83 Procedure for copying the "Flat" correction curve........84 [6] Zone Setup (Zone2 = 5.1/7.1ch 85 6-1. Setting the type of speakers for Zone2 86 6-2. Setting the low frequency distribution for Zone2 87 6-3. Setting the Delay Time for Zone2 88, 89 6-4. Setting the Channel Level for Zone2 90, 91 6-5. Setting the Crossover Frequency for Zone2 92 6-6. Setting the Video Setup for Zone2 [1] Video Convert Mode 93, 94 [2] Audio Delay 94 6-7. Zone3 and Zone4 tone control and channel level setting 95, 96 Zone Setup setting when Zone2 is set to STEREO or MONO 96 [7] Option Setup 97 7-1. Setting the Channel Setup 97 Channel setup flow 97, 98 The number of channels that can be selected 99 The subwoofer output composition 99 Connecting the preouts 100 7-2. Setting the Power Amplifier Assignment 101 Power amplifier assignment flow 101, 102 Amp Assign mode 103 Bi-Amp connection 103 Table of power amplifier assignment modes ......103~105 Table of channels to which power amplifiers can be assigned 105 4
-
 1
1 -
 2
2 -
 3
3 -
 4
4 -
 5
5 -
 6
6 -
 7
7 -
 8
8 -
 9
9 -
 10
10 -
11
-
12
-
13
-
14
-
15
-
16
-
17
-
18
-
19
-
20
-
21
-
22
-
23
-
24
-
25
-
26
-
27
-
28
-
29
-
30
-
31
-
32
-
33
-
34
-
35
-
36
-
37
-
38
-
39
-
40
-
41
-
42
-
43
-
44
-
45
-
46
-
47
-
48
-
49
-
50
-
51
-
52
-
53
-
54
-
55
-
56
-
57
-
58
-
59
-
60
-
61
-
62
-
63
-
64
-
65
-
66
-
67
-
68
-
69
-
70
-
71
-
72
-
73
-
74
-
75
-
76
-
77
-
78
-
79
-
80
-
81
-
82
-
83
-
84
-
85
-
86
-
87
-
88
-
89
-
90
-
91
-
92
-
93
-
94
-
95
-
96
-
97
-
98
-
99
-
100
-
101
-
102
-
103
-
104
-
105
-
106
-
107
-
108
-
109
-
110
-
111
-
112
-
113
-
114
-
115
-
116
-
117
-
118
-
119
-
120
-
121
-
122
-
123
-
124
-
125
-
126
-
127
-
128
-
129
-
130
-
131
-
132
-
133
-
134
-
135
-
136
-
137
-
138
-
139
-
140
-
141
-
142
-
143
-
144
-
145
-
146
-
147
-
148
-
149
-
150
-
151
-
152
-
153
-
154
-
155
-
156
-
157
-
158
-
159
-
160
-
161
-
162
-
163
-
164
-
165
-
166
-
167
-
168
-
169
-
170
-
171
-
172
-
173
-
174
-
175
-
176
-
177
-
178
-
179
-
180
-
181
-
182
-
183
-
184
-
185
-
186
-
187
-
188
-
189
-
190
-
191
-
192
 |
 |
