Dewalt DCD996P2 Instruction Manual - Page 13
Three-Speed Gearing Fig. 3-5, Worklight Fig. 6 - lowes
 |
View all Dewalt DCD996P2 manuals
Add to My Manuals
Save this manual to your list of manuals |
Page 13 highlights
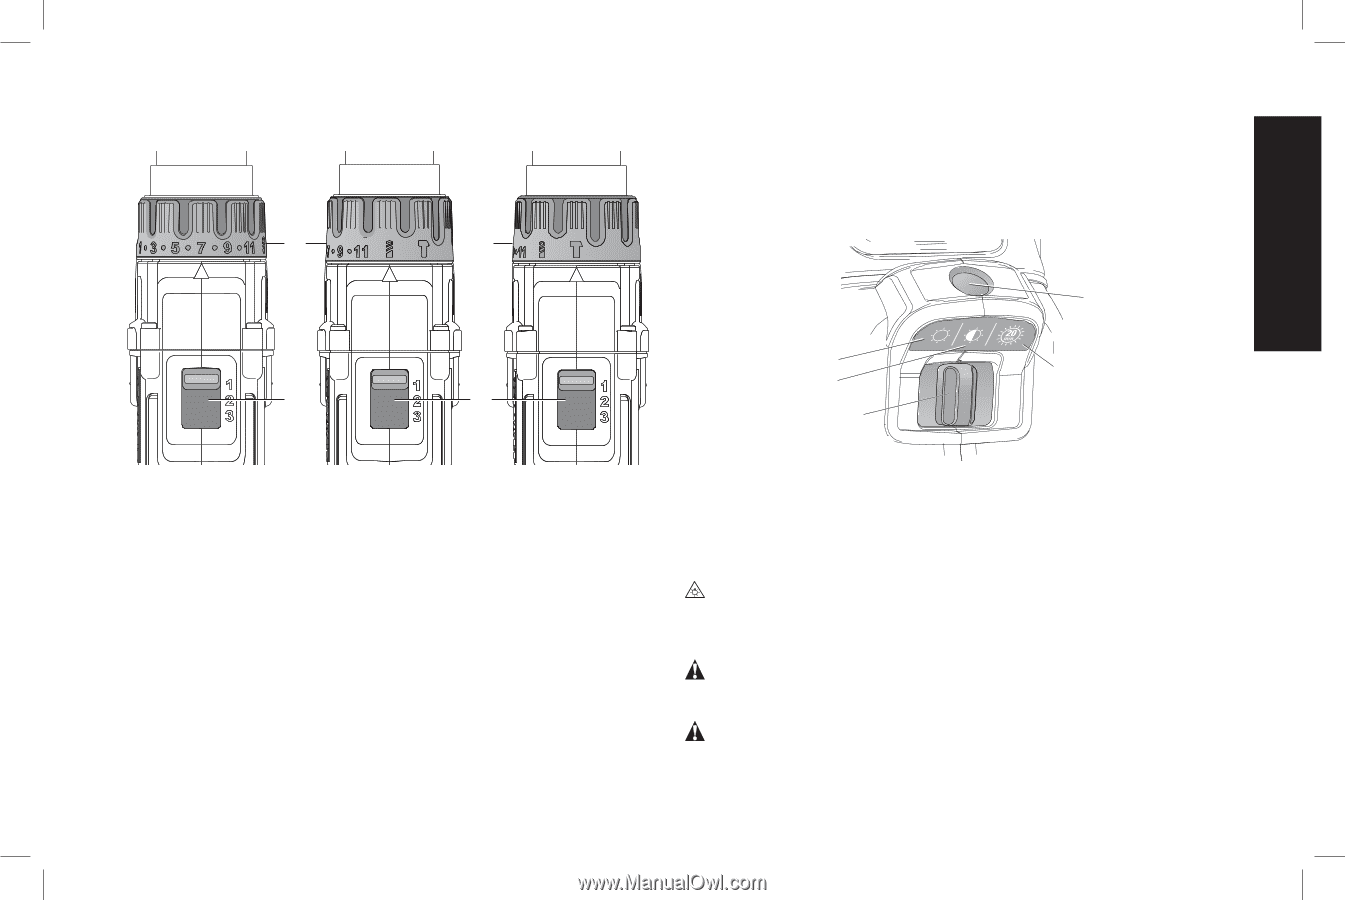
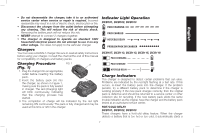
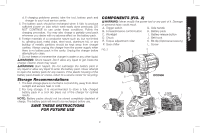
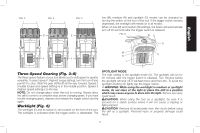
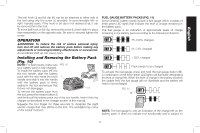
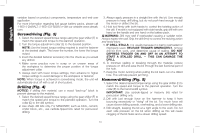
English FIG. 3 FIG. 4 E FIG. 5 E F F low (M), medium (N) and spotlight (O) modes can be changed by moving the switch on the foot of the tool. If the trigger switch remains depressed, the worklight will remain on in all modes. When on low (M) and medium (N) settings, the beam will automatically turn off 20 seconds after the trigger switch is released. FIG. 6 E M O N L Three-Speed Gearing (Fig. 3-5) The three-speed feature of your tool allows you to shift gears for greater versatility. To select speed 1 (highest torque setting), turn the tool off and permit it to stop. Slide the gear shifter (F) all the way forward. Speed 2 (middle torque and speed setting) is in the middle position. Speed 3 (highest speed setting) is to the rear. NOTE: Do not change gears when the tool is running. Always allow the drill to come to a complete stop before changing gears. If you have trouble changing gears, depress and release the trigger switch and try again. Worklight (Fig. 6) The worklight (E) and its switch (L) are located on the foot of the tool. The worklight is activated when the trigger switch is depressed. The SPOTLIGHT MODE The high setting is the spotlight mode (O). The spotlight will run for 20 minutes after the trigger switch is released. Two minutes before the spotlight will shut off, it will flash twice and then dim. To avoid the spotlight shutting off, lightly tap the trigger switch. WARNING: While using the worklight in medium or spotlight mode, do not stare at the light or place the drill in a position which may cause anyone to stare into the light. Serious eye injury could result. CAUTION: When using the tool as a spotlight, be sure it is secured on a stable surface where it will not cause a tripping or falling hazard. CAUTION: Remove all accessories from the chuck before using the drill as a spotlight. Personal injury or property damage could result. 11
-
 1
1 -
2
-
3
-
4
-
5
-
6
-
7
-
 8
8 -
 9
9 -
 10
10 -
 11
11 -
 12
12 -
 13
13 -
 14
14 -
 15
15 -
 16
16 -
 17
17 -
 18
18 -
19
-
20
-
21
-
22
-
23
-
24
-
25
-
26
-
27
-
28
-
29
-
30
-
31
-
32
-
33
-
34
-
35
-
36
-
37
-
38
-
39
-
40
-
41
-
42
-
43
-
44
-
45
-
46
-
47
-
48
-
49
-
50
-
51
-
52
-
53
-
54
-
55
-
56
-
57
-
58
-
59
-
60
 |
 |