Dewalt DW074KD Instruction Manual - Page 7
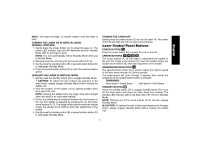
Laser Control Panel Buttons
 |
View all Dewalt DW074KD manuals
Add to My Manuals
Save this manual to your list of manuals |
Page 7 highlights
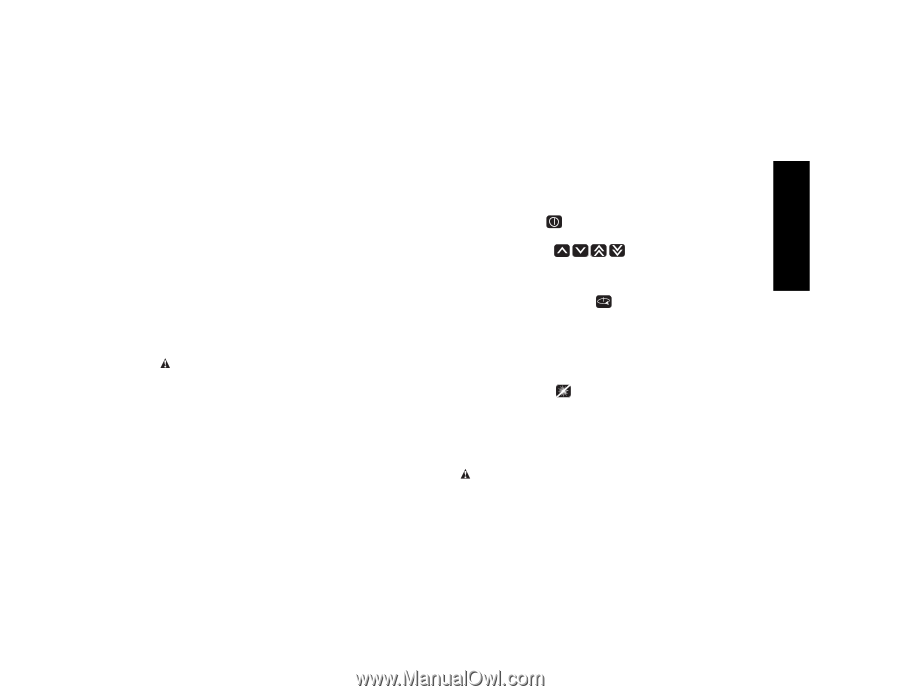
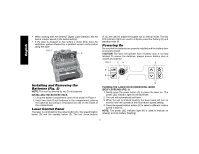
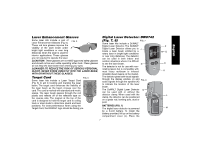
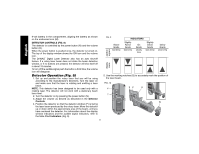
English NOTE: The head will begin or resume rotation once the laser is level. TURNING THE LASER ON IN VERTICAL MODE (MANUAL LEVELING) 1. Gently press the power button (C) to power the laser on. The power LED indicator light (H) will illuminate and the Standby Mode LED (I) will begin to flash. NOTE: The unit automatically enters Standby Mode when put in Vertical Mode. 2. Manually level the unit using the four arrow buttons (F, G). 3. Gently press the standby button (E) or speed/rotation button (D) to disengage Standby Mode. 4. Press the speed/rotation button (D) to select the desired rotation speed. LEVELING THE LASER IN VERTICAL MODE 1. Gently press the standby button (E) to engage Standby Mode. CAUTION: To reduce the risk of direct eye exposure to the laser beam, always engage Standby Mode before viewing the bubble vial. 2. View the position of the bubble vial by sighting straight down from above the unit. NOTE: Viewing the bubble from any angle other than straight down will result in an inaccurate reading. 3. Center the bubble exactly midpoint between the hatchmarks on the vial. The bubble is adjusted by pressing the up and down arrow buttons (F, G). The single arrow buttons move the bubble slowly; the double arrow buttons allow fast adjustment of the bubble. 4. Gently press the standby button (E) or speed/rotation button (D) to disengage Standby Mode. TURNING THE LASER OFF Gently press the power button (C) to turn the laser off. The power LED indicator light (H) will no longer be illuminated. Laser Control Panel Buttons POWER BUTTON Press the power button (H) to power the unit on and off. ARROW BUTTONS The arrow buttons (F, G) are used to adjust/level the bubble in the vial. The single arrow buttons (F) move the bubble slowly; the double arrow buttons (G) allow fast adjustment of the bubble. SPEED/ROTATION BUTTON The speed/rotation button (D) is used to adjust the rotation speed of the laser beam through its 3 preset speeds. The head speed will cycle through 3 speeds, then repeat the sequence as the speed/rotation button is pressed. REMEMBER: Slow speed = Bright Beam Fast Speed = Solid Beam STANDBY BUTTON Press the standby button (E) to engage Standby Mode. This turns off the laser beam and stops the laser head from rotating. The standby LED indicator light (I) will flash when the unit is in Standby Mode. NOTE: Pressing any of the arrow buttons (F, G) will also engage Standby Mode. CAUTION: To reduce the risk of direct eye exposure to the laser beam, always engage Standby Mode before viewing the bubble vial. 5
-
 1
1 -
 2
2 -
 3
3 -
 4
4 -
 5
5 -
 6
6 -
 7
7 -
 8
8 -
 9
9 -
 10
10 -
 11
11 -
 12
12 -
13
-
14
-
15
-
16
-
17
-
18
-
19
-
20
-
21
-
22
-
23
-
24
-
25
-
26
-
27
-
28
-
29
-
30
-
31
-
32
-
33
-
34
-
35
-
36
-
37
-
38
-
39
-
40
-
41
-
42
-
43
-
44
-
45
-
46
-
47
-
48
 |
 |