Dewalt DW079KDT Instruction Manual - Page 14
English
 |
View all Dewalt DW079KDT manuals
Add to My Manuals
Save this manual to your list of manuals |
Page 14 highlights
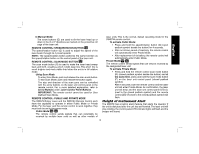
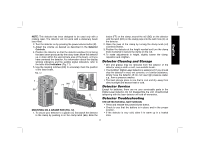
English Using Manual Slope Mode: The DW079 Manual Slope Mode allows the self-leveling function to be disabled in one axis (direction) so that the laser can be sloped in that axis. The other axis will continue to self-level, ensuring that the laser beam is only sloping in the expected direction. Entering and exiting Manual Slope Mode: • To activate Manual Slope Mode, press and hold the remote control manual mode button (N) for 3 seconds. • To re-engage full self-leveling, press and hold the manual mode button again for 3 seconds. Setting the Slope Direction: • When Manual Slope Mode is activated, the unit automatically engages Manual Y Mode. This allows the operator to slope the laser in the direction of the Y-axis, as indicated by the "gunsights" on the rollcage. In certain situations, it may be desirable to slope the laser in the X-axis. The direction of Manual Slope Mode can be changed back and forth between the Y- and X-axes as follows: • Immediately (within 5 seconds) after entering Manual Slope Mode, press and hold the remote control right arrow button to activate Manual X Mode. • The unit can be changed back to Manual Y Mode by immediately pressing and holding the remote control left arrow button. • To change the direction of Manual Slope Mode at a later time, re-engage full self-leveling, then activate Manual Slope Mode again and go through the axis selection procedure outlined above. The X and Y LED indicator lights on the laser unit control panel (Fig. 3, K, J) will indicate the manual slope direction that is selected. The manually controlled axis is identified by a turned-off LED, and the self-leveling axis is identified by a lighted LED. Setting the Amount of Slope: Once Manual Slope Mode is activated, the amount of slope can be manually adjusted using any of the following methods: • Use the laser control panel up and down arrow buttons (Fig. 3, G, H) to tilt the laser rotor head up and down. OR • Use the remote control up and down arrow buttons (Fig. 3, O) to tilt the laser rotor head up and down. OR • The entire laser unit can be tipped up and down by setting it on a sloped surface. Make sure the laser unit is positioned so the direction of manual sloping is lined up in the same direction as the sloped surface. REMOTE CONTROL: ARROW BUTTONS The arrow buttons (O, P) are used for different functions depending on the operating mode of the laser unit. In Self-Leveling Horizontal Mode: The up and down arrows (O) adjust the length of the laser line in Scan Mode. The left and right arrows (P) adjust the direction of the laser beam in Scan Mode or Pointing Mode (0 rpm). In Self-Leveling Vertical Mode: The up and down arrows (O) adjust the position of the laser line in Scan Mode. The left and right arrows (P) move the laser beam left and right. 12
-
 1
1 -
2
-
3
-
4
-
5
-
6
-
7
-
8
-
 9
9 -
 10
10 -
 11
11 -
 12
12 -
 13
13 -
 14
14 -
 15
15 -
 16
16 -
 17
17 -
 18
18 -
 19
19 -
20
-
21
-
22
-
23
-
24
-
25
-
26
-
27
-
28
-
29
-
30
-
31
-
32
-
33
-
34
-
35
-
36
-
37
-
38
-
39
-
40
-
41
-
42
-
43
-
44
-
45
-
46
-
47
-
48
-
49
-
50
-
51
-
52
-
53
-
54
-
55
-
56
-
57
-
58
-
59
-
60
-
61
-
62
-
63
-
64
-
65
-
66
-
67
-
68
-
69
-
70
-
71
-
72
-
73
-
74
-
75
-
76
 |
 |