Dewalt DW897 Instruction Manual - Page 6
Reassembly of Nibbler Head, Checking Punch Engagement, Punch Engagement Adjustment, Die Replacement
 |
View all Dewalt DW897 manuals
Add to My Manuals
Save this manual to your list of manuals |
Page 6 highlights
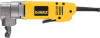
DW 897-220 5/2/02 1:48 PM Page 3 English up to 1/8" (3mm). To remove the punch, loosen the head set screw about 4-5 turns (See Figure 2). Slide the shoe assembly from the head. Unscrew the punch from the connecting rod bushing. Punch may be resharpened carefully on a bench grinder with a fine grit wheel. Be careful that the punch does not become shorter than the minimum length of 2.44 inches (2-7/16 inches or 61mm). Punches shorter than this will not engage the die sufficiently and must be replaced. The ground face must be square to the punch axis. After grinding, carefully stone the ground edges to remove burrs. Do not round over corners. Figure 2 HEAD CAM SHAFT HEAD Figure 3 CAM SHAFT PUNCH CONNECTING ROD BUSHING PUNCH GUIDE SHOE SET SCREW DIE PUNCH SHOE WEAR PLATE PUNCH GUIDE DIE Reassembly of Nibbler Head Screw the punch fully into the connecting rod bushing. Slide the shoe assembly over the end of the punch and into the head. NOTE: Lubrication groove in punch face must not be exposed at front of shoe. Turn the shoe to desired cut orientation. Tighten set screw. Next, check punch engagement. Checking Punch Engagement Since the punch length is now changed, the punch engagement may have to be adjusted. Check punch engagement by placing a flat blade screwdriver in the cam shaft slot and turning the shaft. (See Figure 2) Punch should dip .020" to .04" (.5 to 1.0mm) into the die at the full down stroke position. Too much punch dip into the die will result in a loss of capacity (bottom of punch will not clear die enough on up stroke.) Punch Engagement Adjustment If the punch engagement should need adjustment, loosen the set screw and rotate shoe either clockwise (punch deeper into die) or counterclockwise (punch out of die). Tighten set screw firmly. Turn cam shaft with screwdriver in slot to check punch engagement (moving punch fully down). Repeat as necessary. Die Replacement If the die becomes dull, replace it. Replace old die by removing two screws at the front (Figure 2). Install new die and tighten screws. Recheck punch engagement and adjust punch depth if necessary. Wear Plate This tool is equipped with a wear plate to increase the life of the shoe (See Figure 3). The wear plate fits between the shoe and the punch. Anytime the punch, punch guide or die is removed, inspect 3
-
 1
1 -
 2
2 -
 3
3 -
 4
4 -
 5
5 -
 6
6 -
 7
7 -
 8
8 -
 9
9 -
 10
10 -
 11
11 -
 12
12 -
13
-
14
-
15
-
16
-
17
-
18
 |
 |
