Dymo LabelWriter® 450 Professional Label Printer for PC and Mac® Use - Page 12
Label and Tape Editors, Choosing a Label, Design Toolbar, Choosing a Printer
 |
View all Dymo LabelWriter® 450 Professional Label Printer for PC and Mac® manuals
Add to My Manuals
Save this manual to your list of manuals |
Page 12 highlights
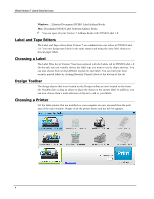
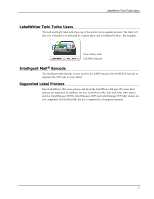
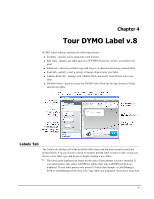
What Version 7 Users Need to Know Windows: ...\Libraries\Documents\DYMO Label\Address Books Mac: Documents/DYMO Label Software/Address Books You can open all your Version 7 Address Books with DYMO Label v.8. Label and Tape Editors The Label and Tape editors from Version 7 are combined into one editor in DYMO Label v.8. You now design tape labels in the same manner and using the same label objects as die-cut paper labels. Choosing a Label The Label Files list in Version 7 has been replaced with the Labels tab in DYMO Label v.8. On this tab, you can visually choose the label type you want to use by shape and size. You can also choose from several different layouts for each label. You can find your most recently printed labels by clicking Recently Printed Labels at the bottom of the tab. Design Toolbar The design objects that were located on the Design toolbar are now located on the Insert tab. Double-click or drag an object to place the object on the current label. In addition, you can now choose from a wide selection of clip art to add to your labels. Choosing a Printer All the label printers that are installed on your computer are now accessed from the print area of the main window. Simply click the printer shown and the full list appears. 4
-
 1
1 -
2
-
3
-
4
-
5
-
6
-
 7
7 -
 8
8 -
 9
9 -
 10
10 -
 11
11 -
 12
12 -
 13
13 -
 14
14 -
 15
15 -
 16
16 -
 17
17 -
18
-
19
-
20
-
21
-
22
-
23
-
24
-
25
-
26
-
27
-
28
-
29
-
30
-
31
-
32
-
33
-
34
-
35
-
36
-
37
-
38
-
39
-
40
-
41
-
42
-
43
-
44
-
45
-
46
-
47
-
48
-
49
-
50
-
51
-
52
-
53
-
54
-
55
-
56
-
57
-
58
-
59
-
60
-
61
-
62
-
63
-
64
-
65
-
66
-
67
-
68
-
69
-
70
-
71
-
72
-
73
-
74
-
75
-
76
-
77
-
78
-
79
-
80
-
81
-
82
-
83
-
84
-
85
-
86
-
87
-
88
-
89
-
90
-
91
-
92
-
93
-
94
-
95
-
96
-
97
-
98
-
99
-
100
-
101
-
102
-
103
-
104
-
105
-
106
-
107
-
108
-
109
-
110
-
111
-
112
-
113
-
114
-
115
-
116
-
117
-
118
-
119
-
120
-
121
-
122
 |
 |
