Dynex DX-CLTR01 Quick Setup Guide (English) - Page 1
Dynex DX-CLTR01 Manual
 |
View all Dynex DX-CLTR01 manuals
Add to My Manuals
Save this manual to your list of manuals |
Page 1 highlights
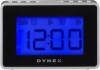
DX-CLTR01 Travel Clock Radio QUICK SETUP GUIDE Package contents • Travel clock radio with digital FM radio • AAA batteries (3) • Quick Setup Guide Features Front view 1 ALM 1 2 ALM 2 3 CLOCK SET 4 SNOOZE 5 PRESET/MEM 6 TUNE - / I>I 8 RADIO/ON/OFF/ 9 SLEEP 10 VOL - 11 VOL + Back view 12 Speaker 13 Stand 14 FM antenna* 15 Battery compartment cover * The FM antenna is located in the battery compartment, which you need to open to deploy the antenna. Installing the batteries 1 Slide the battery compartment cover down and remove it. 2 Insert three AAA batteries (included) into the compartment. Make sure that the + and - symbols on the batteries align with the + and - symbols in the battery compartment. 3 Replace the cover. Setting the time 1 Press and hold the CLOCK SET button for approximately three seconds. The hour digit will flash on the display. 2 Press the TUNE+ or TUNE- button to set the current hour. 3 Press the CLOCK SET button to save the hour setting. The minute digit will flash on the display. 4 Press the TUNE+ or TUNE- button to set the minutes. 5 Press the CLOCK SET button again to save the minute setting. Using your clock radio 1 Press and hold the RADIO/ON/OFF/ button more than two seconds to turn your clock radio on. 2 Press the RADIO/ON/OFF/ button more than two seconds again to put your clock radio into standby mode. 3 Press the RADIO/ON/OFF/ button twice within 0.5 second to lock your clock radio's buttons.
-
 1
1 -
 2
2
 |
 |
