Dynex DX-CRMN1 Setup Guide - Page 1
Dynex DX-CRMN1 - Mini Memory Card Reader/Writer Manual
 |
UPC - 600603113499
View all Dynex DX-CRMN1 manuals
Add to My Manuals
Save this manual to your list of manuals |
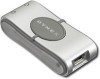
Page 1 highlights
DX-CRMN1 Mini Memory Card Reader/Writer Quick Setup Guide Mini lecteur/enregistreur de cartes mémoire DX-CRMN1 Guide d'installation rapide Mini lector/grabador de tarjetas de memoria DX-CRMN1 Guía de instalación rápida Data LED indicator DEL de transfert de données Indicador LED de datos Power LED indicator DEL d'alimentation Indicador LED de alimentación SD/SDHC/MMC SD/SDHC/MMC SD/SDHC/MMC MicroSD/M2 MicroSD/M2 MicroSD/M2 USB cable jack Prise pour câble USB Toma para cable USB Package contents • Mini Memory Card Reader/Writer • Mini USB 5-pin cable • Quick Setup Guide • Utilities and Documentation CD System requirements • Windows 2000, Windows XP, Windows Vista, Windows 7, or Mac OS 10. x or higher. Connecting the card reader To connect your card reader, plug the small end of the included USB cable into the card reader and the other end into an available USB port on a computer. Your computer automatically installs the correct driver. New drive icons appear in My Computer/Computer or Windows Explorer. To access a media card using Macintosh OS 10. x or higher: 1 Remove the card slot cover from the card reader. 2 Insert a card into the appropriate slot. A new drive icon appears on your desktop. Caution: Cards must be inserted into the correct slot and in the correct direction. Failure to do so may result in damage to your card and /or card reader. 3 When you have finished working with the files on the memory card, drag the disc icon to the Trash or click the disc icon and select Eject from the File Menu.The data LED on the memory card reader turns off. Caution: Do not remove memory cards while the data LED on the reader is flashing. Doing so may result in a loss of data or damage to your memory card. SD/SDHC/MMC Slot Insert Secure Digital High Capacity (SDHC), Secure Digital (SD), miniSD, Multi Media Card (MMC) and RS-MMC cards into this slot. Power LED Lights green when the card reader is connected to the computer. Data LED Lights green when a card is inserted into the appropriate slot. The data LED flashes when data is being transferred from the card or written to the card. Using the card reader To access a media card using Windows: 1 Remove the card slot cover from the card reader. 2 Insert a card into the appropriate slot. A new drive icon appears in My Computer/Computer or Windows Explorer (Windows 7). Caution: Cards must be inserted into the correct slot and in the correct direction. Failure to do so may result in damage to your card and/or card reader. 3 Open My Computer/Computer or or Windows Explorer, then double- click the appropriate drive icon to access the data on the memory card. 4 When you have finished working with the files on the memory card, right-click the memory card reader icon in My Computer/Computer or Windows Explorer, then select Eject. The data LED on the memory card reader turns off. Caution: Do not remove memory cards while the data LED on the reader is flashing. Doing so may result in a loss of data or damage to your memory card. MicroSD/M2 Slot Insert microSD,T-Flash cards, or Memory Stick Micro (M2) into this slot with the gold contact area facing up. No adapter is required. 1-year limited warranty Visit www.dynexproducts.com for details. For additional information, see the user guide included on the Utilities and Documentation CD. Garantie limitée de 1 ans Allez sur le site www.dynexproducts.com pour toute information complémentaire. Pour toute information complémentaire, voir le guide de l'utilisateur inclus sur le CD avec utilitaires et de documentation. Garantía limitada de 1 años Visite www.dynexproducts.com para más información. Para información adicional, consulte la guía del usuario en el CD de aplicaciones y documentación.
-
 1
1 -
 2
2
 |
 |
