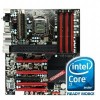
EVGA 141-BL-E760-A1 User Guide - Page 16
Installing the CPU Fan
 |
UPC - 843368010157
View all EVGA 141-BL-E760-A1 manuals
Add to My Manuals
Save this manual to your list of manuals |
Page 16 highlights
EVGA X58 SLI CLASSIFIED Motherboard 5. Align the notches in the processor with the notches on the socket. 6. Lower the processor straight down into the socket with out tilting or sliding it into the socket Make sure the CPU is fully seated and level in the socket. 7. Close the load plate over the CPU and press down while you close and engage the socket lever. 8. The CPU installation is complete. Align notches with notches on the CPU Installing the CPU Fan There are many different fan types that can be used with this motherboard. Follow the instruction that came with your fan assembly. Be sure that the fan orientation is correct for your chassis type and your fan assembly. 18

EVGA X58 SLI CLASSIFIED Motherboard
18
5.
Align the notches in the processor
with the notches on the socket.
6.
Lower the processor straight down
into the socket with out tilting or
sliding it into the socket
Make sure the CPU is fully seated and
level in the socket.
7.
Close the load plate over the CPU and
press down while you close and
engage the socket lever.
8.
The CPU installation is complete.
Installing the CPU Fan
There are many different fan types that can be used with this motherboard.
Follow the instruction that came with your fan assembly. Be sure that the fan
orientation is correct for your chassis type and your fan assembly.
Align notches with notches on the CPU


