EdgeStar CBR1501SG Owner's Manual - Page 9
Installing the Door Handle, Installing and Removing the Shelves
 |
View all EdgeStar CBR1501SG manuals
Add to My Manuals
Save this manual to your list of manuals |
Page 9 highlights
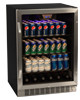
Installing the Door Handle To install the door handle: 1. Open the door and carefully pull the door gasket around the area where the handle is to be installed. 2. Carefully remove the two pre-installed decorative plugs from the front of the door. Note: some beverage coolers do not have decorative plugs installed. 3. Insert each Phillips head screw through the gasket side of the door until the screw pass through the door. 4. Align the handle with the screws and tighten using a Phillips head screwdriver until the handle is flush against the door frame. CAUTION: Do not over-tighten the screws as this may cause damage to the handle or to the stainless steel door 5. Carefully press the door gasket into its original position. Installing and Removing the Shelves To prevent damaging the door gasket, make sure to open the door all the way before pulling the shelves out of their track. To install the shelves: 1. Open the door completely. 2. Slide the shelf on the shelf track and slowly push back until it stops. 3. Install the plastic notches. To remove the shelves: 1. Open the door completely. 2. If necessary, make sure you remove all the contents sitting on the shelf. 3. Remove both of the plastic notches with a screwdriver. 4. Continue to pull the shelf forward until it is completely removed from the inner compartment. EdgeStar Built-in Beverage Cooler 6
-
 1
1 -
2
-
3
-
 4
4 -
 5
5 -
 6
6 -
 7
7 -
 8
8 -
 9
9 -
 10
10 -
 11
11 -
 12
12 -
 13
13 -
 14
14 -
15
-
16
-
17
-
18
 |
 |
