EdgeStar CWR531SZ Owner's Manual - Page 11
Removing and Installing Decorative Plugs
 |
View all EdgeStar CWR531SZ manuals
Add to My Manuals
Save this manual to your list of manuals |
Page 11 highlights
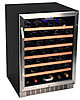
Removing and Installing Decorative Plugs Follow the instructions below to remove the decorative plugs from the door. IMPORTANT: Before you begin, unplug the refrigerator. 1. Open the door and carefully pull the door gasket from the top left corner until you have exposed the two holes which correspond with the decorative plugs. Note: A small Flathead screwdriver is required. 2. Insert the Flathead screwdriver through the gasket side of the door into the decorative plug slot. You may need to use a flashlight to help guide you through this process. 3. Carefully turn the screwdriver clockwise to remove the two preinstalled decorative plugs from the front of the door. Reinsert the decorative plugs to the right side of the door using this same procedure. 4. Remove the decorative plastic cap from the top left corner of the door and insert it onto the right top corner. 5. After the cap is inserted carefully press the door gasket into its original position. EdgeStar Wine Refrigerator 8
-
 1
1 -
2
-
3
-
4
-
5
-
 6
6 -
 7
7 -
 8
8 -
 9
9 -
 10
10 -
 11
11 -
 12
12 -
 13
13 -
 14
14 -
 15
15 -
 16
16 -
17
-
18
 |
 |
