EdgeStar KC7000SSOD Owner's Manual - Page 11
Built-In Installation
 |
View all EdgeStar KC7000SSOD manuals
Add to My Manuals
Save this manual to your list of manuals |
Page 11 highlights
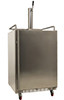
Built-In Installation Helpful Guide: • Please visit Kegerator.com to view a detailed video of a built-in installation of this product. Important Notes: • Choose a location that has ambient temperatures above 50°F and below 95°F. Operation outside these temperatures may result in lowered efficiency or cause other adverse effects. • This unit is designed to be installed outdoors but must be in an area protected from the elements, e.g., wind, rain, water spray or drips. • The kegerator should not be located next to ovens, grills or other high heat sources. • Do not kink or pinch the power supply cord between the kegerator and wall or cabinet. Important Note: • Please refer to the dispense kit installation guide to complete the full assembly of the kegerator. EdgeStar Built-in Kegerator A built-in installation allows the kegerator to be placed under counter. This installation requires several more steps and considerations than a free-standing install. Countertop Opening For Dispense Kit. Once the location of the kegerator installation is determined the first step is to create an opening in the counter for the dispense kit lines to pass through. Mark off a spot on the countertop where the opening will be created. Align that spot so it will be directly above the opening of the kegerator that will be placed under the counter. You will need to drill or cut (depending on the material of your countertop) an opening into your counter the same size as the opening of the top of the kegerator. Do not cut it larger than that size as the dispense tower will be optimized for that size hole. Installation Requirements Once an opening is created in the countertop the next step is to install the cabinet. When installing the kegerator under a counter, follow the recommended spacing dimensions shown below. • Make sure the guard rail, drip tray, and installation pegs are NOT installed on the top of the cabinet. These items will create an obstacle for the cabinet to be installed under counter. • Move the kegerator so the opening on the top of the cabinet is aligned with the opening in the counter. • The kegerator should be installed on a firm and level surface that will be able to support the entire weight of a fully loaded unit. It is important for the kegerator to be level in order to work properly. If needed, you can adjust the height of the kegerator by rotating the feet. See the "Leveling the Kegerator" section. • A standard electrical supply (115 VAC only, 60 Hz), properly grounded in accordance with National Electrical Code and local codes and ordinances is required. Enclose Space Between Cabinet and Countertop Once the cabinet is installed and the two openings of the cabinet and countertop are aligned you will want to seal off the open space that will be created above the kegerator cabinet and under the countertop. If this open space is not sealed the cabinet will lose its cold air and will not work or cool as efficiently. To close the opening you will want to run a short connecting tube from the cabinet to the countertop. There is not an accessory included for this connection with the unit. Common materials for this connection include PVC pipe or rubber lining. 8
-
 1
1 -
2
-
3
-
4
-
5
-
 6
6 -
 7
7 -
 8
8 -
 9
9 -
 10
10 -
 11
11 -
 12
12 -
 13
13 -
 14
14 -
 15
15 -
 16
16 -
17
-
18
-
19
 |
 |
