Electrolux E30EW85ESS Use and Care Manual - Page 35
Starting Self-clean Cycle
 |
View all Electrolux E30EW85ESS manuals
Add to My Manuals
Save this manual to your list of manuals |
Page 35 highlights
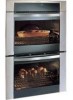
Care & Cleaning 35 STARTING SELF-CLEAN CYCLE The (or ), (or ) and (or ) pad controls the Self-Cleaning feature. If you are planning to use the oven immediately after a self-clean cycle remember to allow time for the oven to cool down and the oven door to unlock. This normally takes about one hour. A 3 hours self-cean cycle will actually take about 4 hours to complete. *It is recommend to use a or (2 hours) cycle for light soils, a or (3 hours) cycle for average soils, and a or (4 hours) cycle for heavy soils (to assure satisfactory results). During the self-cleaning cycle, the outside of the appliance can become very hot to the touch. DO NOT leave small children unattended near the appliance; they may be burned if they touch the hot oven door surfaces. DO NOT force the oven door open. This can damage the automatic door locking system. Use care when opening the oven door after the self-cleaning cycle. Stand to the side of the oven when opening the door to allow hot air or steam to escape. The oven may still be VERY HOT. To start an immediate upper oven Self-Cleaning cycle or to set a delay start time of 4:30 o'clock and shut off automatically (example provided is a default 3 hour SelfClean cycle) 1. Be sure the clock is set with the correct time of day, the oven is empty and the oven door is closed. 2. Press or . (Note: To use the lower oven instead of the upper oven, press or at this time.) 3. Press or . "3:00", "CLn" will appear, "UPPER" and "CLEAN" will flash in the display (Figure 1). The control will automatically clean for a 3 hour period (default self-cleaning cycle time). Note: 2 hours of Self-Cleaning time may be chosen by pressing (or ) or 4 hours by pressing the (or ) at this time. 4. Press . "DOOR" and "LOCKED" will flash; "UPPER" and "CLn" will appear in the display and the clock will return to the time of day (Figure 2). UPPER WARM ROAST BAKE LOCKED DELAY CONV BROIL TIMED UPPER TIMER REMOVE LOWER DOOR RACKS CLEAN Figure 1 CONV BROIL TIMED WARM BAKE DELAY LOWER ROAST LOCKED UPPER WARM ROAST BAKE LOCKED DELAY CONV BROIL TIMED UPPER TIMER REMOVE LOWER DOOR RACKS CLEAN Figure 2 CONV BROIL TIMED WARM BAKE DELAY LOWER ROAST LOCKED UPPER CLEAN REMOVE RACKS Figure 3 NOTE: If "REMOVE" and "RACKS" appear in the display (Figure 3). Press remove the oven racks, the oven rack supports and go back to step 2. or ,
-
 1
1 -
2
-
3
-
4
-
5
-
6
-
7
-
8
-
9
-
10
-
11
-
12
-
13
-
14
-
15
-
16
-
17
-
18
-
19
-
20
-
21
-
22
-
23
-
24
-
25
-
26
-
27
-
28
-
29
-
 30
30 -
 31
31 -
 32
32 -
 33
33 -
 34
34 -
 35
35 -
 36
36 -
 37
37 -
 38
38 -
 39
39 -
 40
40 -
41
-
42
-
43
-
44
 |
 |
