Electrolux E36GC65ESS Installation Instructions - Page 7
Preparing for Installation - manual
 |
UPC - 012505539480
View all Electrolux E36GC65ESS manuals
Add to My Manuals
Save this manual to your list of manuals |
Page 7 highlights
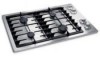
Preparing for Installation ii!iiii!!ii!ii; VERIFYPACKAGECONTENTS TT • Use & Care Manual • Hold Down Bracket Kit • Grate/Burner Cap Pack • Burner Set • Gas Pressure Regulator • LP Conversion Kit • Cleaning Kit • Grill Drip Pan (E46GC67ESS only) • Grill U-Burner (E46GC67ESS only) • Grill Heat Control Channels (E46GC67ESS only) • Grill (E46GC67ESS only) • Grease Control Box (E46GC67ESS only) iiii)J;)i!i CABINET/COUNTERTOPPREPARATION The installation of this built-in appliance must be completed by a qualified appliance technician or contractor. Proper installation is the owner's responsibility. Carefully check the location where the cooktop is to be installed. The cooktop should be placed for convenient access, but away from drafts that may be caused by open doors and windows or by HVAC duct outlets. Make certain that gas and electrical power can be provided in the selected locations. Plan the installation so that all minimum clearances are met or exceeded. Dimensions shown provide minimum clearances, unless otherwise noted. iJii]ii!iii!)_ iiii!Tii!i!i_iiA iiiiiiii!]_ iiii)il))i!))ii)iiiii iiiii]!;!i!¸i!ill )
-
 1
1 -
 2
2 -
 3
3 -
 4
4 -
 5
5 -
 6
6 -
 7
7 -
 8
8 -
 9
9 -
 10
10 -
 11
11 -
 12
12 -
13
-
14
-
15
-
16
-
17
-
18
-
19
-
20
 |
 |
