Electrolux EFDE210TIW Complete Owner s Guide English - Page 11
Other Features
 |
View all Electrolux EFDE210TIW manuals
Add to My Manuals
Save this manual to your list of manuals |
Page 11 highlights
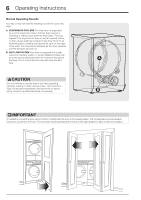
Other Features Operating Instructions 11 cycle count down/ delay start timer chime indicator delay start My Favorites My Favorites maintenance indicators Start/Pause status display end of cycle indicator control lock indicator control lock key combination My Favorites After some time of initial usage, the dryer will automatically remember the 3 most used cycles with their settings and options. To cycle through this list continue to press the My Favorites button. Press Start after your desired cycle appears. Delay Start Press delay start to select a dry time convenient to your schedule or during off peak energy hours. The delay time selected will be displayed and begin counting down when you select Start. Control Lock To avoid having someone accidentally start or stop the dryer, press dry time and wrinkle release at the same time and hold until the indicator is lit. To unlock the controls, press dry time and wrinkle release at the same time and hold until the indicator is no longer lit. Status Display/Status Lights The estimated total cycle time will be displayed when the cycle is selected. The estimated remaining cycle time is displayed during the cycle. Drum Light The drum light will come on whenever the door is opened to illuminate the drum during loading and unloading. Closing the door turns off the light. Reversible Door Your dryer is equipped with a reversible door. The door can be hinged on the right or left side. NOTE For step-by-step instructions on DOOR REVERSAL, refer to the Installation Instructions supplied with this dryer. Drying Rack (on select models) Use the drying rack for items which should not be tumble dried. Insert the rack into the dryer drum and lower the front two "legs" into the openings on the lint filter grille. front legs lint filter grille Place items to be dried on top of the rack, leaving space between items and not allowing them to hang over the sides or through the holes. Select the low heat setting for items containing plastic, foam rubber, rubber-like materials, feathers or down. When items are dry, remove the rack and store it in a convenient location. NOTE If your model did not come supplied from the factory with a drying rack you may order one.
-
 1
1 -
2
-
3
-
4
-
5
-
 6
6 -
 7
7 -
 8
8 -
 9
9 -
 10
10 -
 11
11 -
 12
12 -
 13
13 -
 14
14 -
 15
15 -
 16
16 -
17
-
18
 |
 |
