Electrolux EI27EW45JS Installation Instructions (All Languages) - Page 6
Install the Anti-tip Mounting Screws
 |
View all Electrolux EI27EW45JS manuals
Add to My Manuals
Save this manual to your list of manuals |
Page 6 highlights
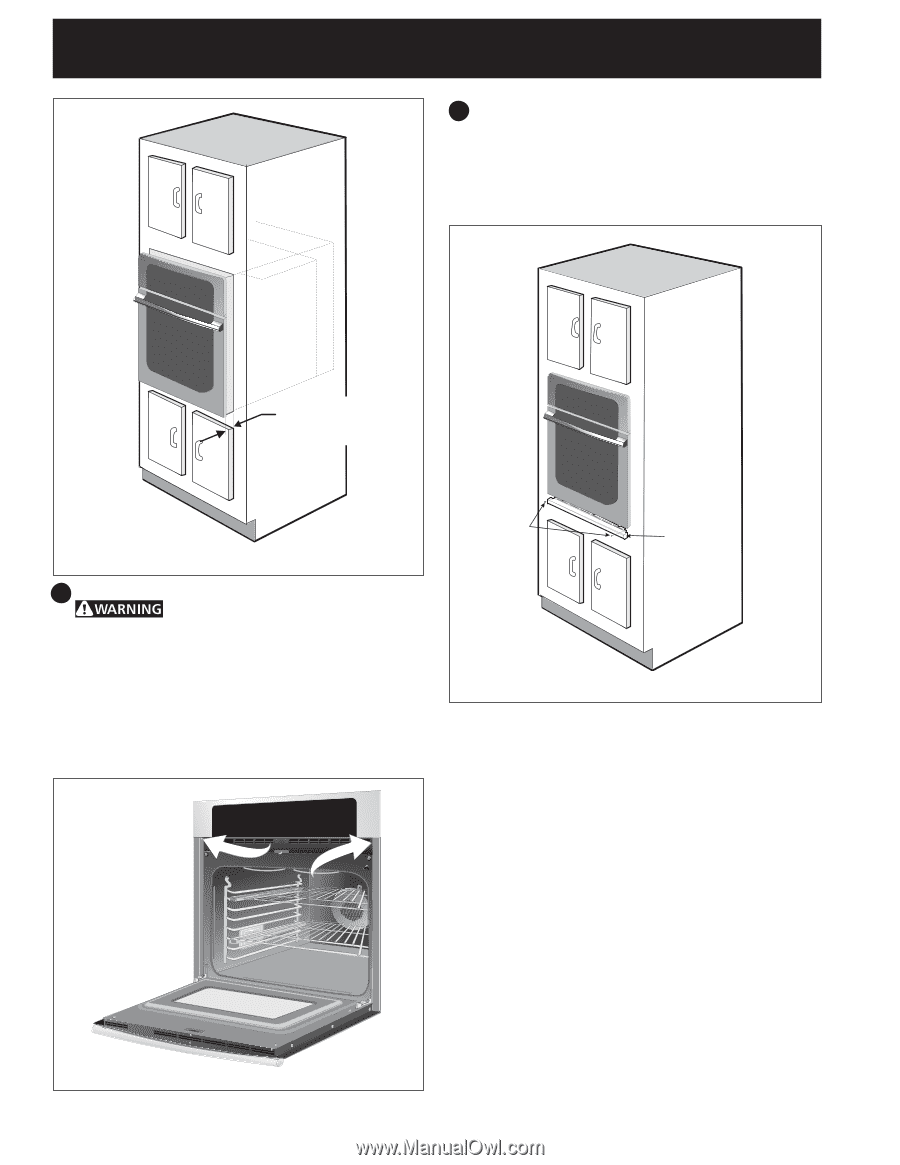
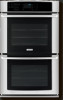
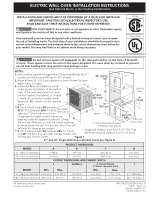
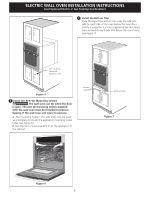
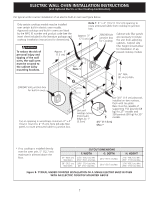
ELECTRIC WALL OVEN INSTALLATION INSTRUCTIONS (and Optional Electric or Gas Cooktop Combination) 7 Install the Bottom Trim Place the top of the bottom trim over the side trim tabs on each side of the oven below the oven door and fix it using the 2 screws supplied in the mounting holes located on each side trim below the oven frame (see Figure 7). 1½" (3.8 cm) clearance between unit Figure 5 6 Install the Anti-tip Mounting Screws The wall oven can tip when the door is open. The anti-tip mounting screws supplied with the wall oven must be installed to prevent tipping of the wall oven and injury to persons. A. The mounting holes in the side trims may be used as a template to locate the appliance mounting screw holes (see figure 6). B. Use the two screws supplied to fix the appliance to the cabinet. Screws supplied Bottom Trim Figure 7 Figure 6 6
-
 1
1 -
 2
2 -
 3
3 -
 4
4 -
 5
5 -
 6
6 -
 7
7 -
 8
8 -
 9
9 -
 10
10 -
 11
11 -
 12
12 -
13
-
14
-
15
-
16
-
17
-
18
-
19
-
20
-
21
-
22
-
23
-
24
 |
 |