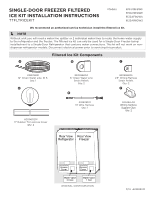
Electrolux EI33AR80WS Ice Kit Installation Instructions English - Page 6
Water Line Final Connections - installation manual
 |
View all Electrolux EI33AR80WS manuals
Add to My Manuals
Save this manual to your list of manuals |
Page 6 highlights
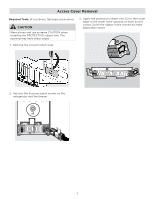
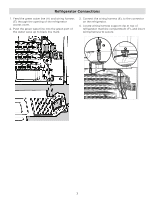
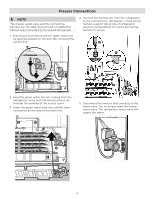
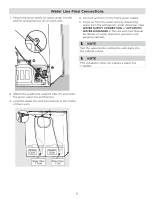
Water Line Final Connections 1. Fasten the strain reliefs for green water line (B) and for wiring harness (C) on each unit. 4. Connect and turn on the home water supply. 5. Purge air from the water lines by dispensing water from the refrigerator water dispenser. (See WATER SUPPLY CONNECTION or AUTOMATIC WATER DISPENSER in the Use and Care Manual for details on water dispenser operation and purging method). NOTE Test the water before sliding the units back into the cabinet cutout. B C NOTE This installation does not require a water line Y splitter. 2. Attach the 2 adhesive support clips (F) and insert the green water line and harness. 3. Loop the water line and wire harness in the center of the 2 units. F FPO Access Cover Access Cover Water Valve 3 Coils Water Valve 1 Coil 6
-
 1
1 -
 2
2 -
 3
3 -
 4
4 -
 5
5 -
 6
6
 |
 |
