Electrolux EW23CS65GW Use and Care Guide - Page 7
No-, g
 |
UPC - 012505694752
View all Electrolux EW23CS65GW manuals
Add to My Manuals
Save this manual to your list of manuals |
Page 7 highlights
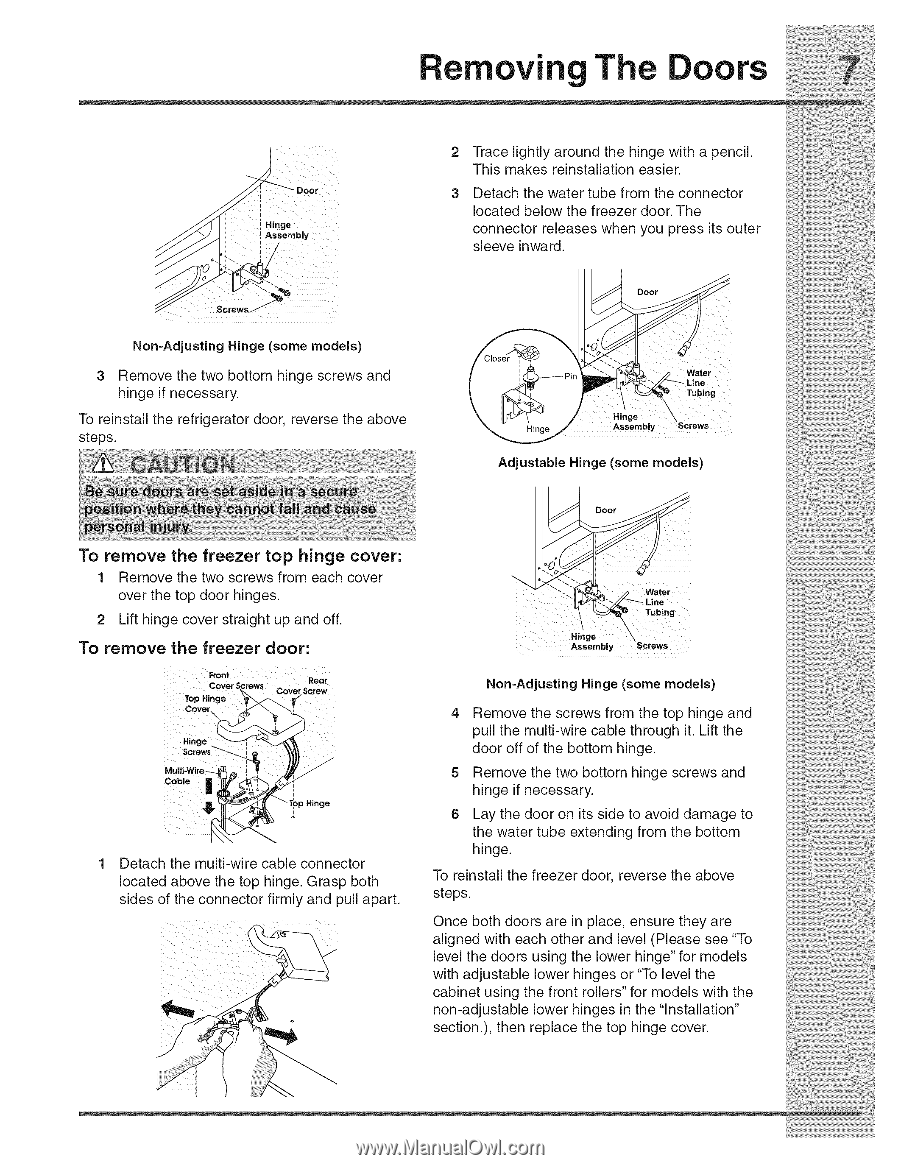
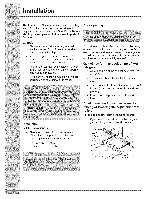
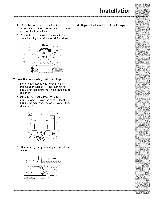
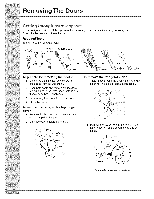
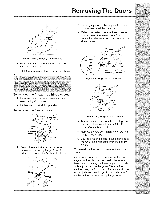
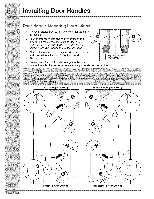
i ii_:_ii_:_ii:¸_I,;I!iI!:!Ii_i! Removing The Doors | __ _1_ J_--_ I ,,,o_ _2__: i _sem!,! 2 Trace lightly around the hinge with a pencil. This makes reinstallation easier. 3 Detach the water tube from the connector located below the freezer door. The connector re eases when you press ts outer sleeve inward. :: :: No-, g g ( ) 3 Remove the two bottom hinge screws and hinge if necessary. TO reinstall the refrigerator door, reverse the above steps. _w_ttr :: Tubt,,g H=ngo Assembly Screws Adjustable Hinge (some models) Door To remove the freezer top hinge cover: 1 Remove the two screws from each cover over the top door hinges. 2 Lift hinge cover straight up and off. To remove the freezer door: Cever ScreWs cO'_ _r Screw Cover.._,/_/ Hinge Screws i i 1 Detach the multi-wire cable connector located above the top hinge. Grasp both sides of the connector firmly and pull apart. Hinge Assembly Wat_ Tubing Non-Adjusting Hinge (some models) 4 Remove the screws from the top hinge and pull the multi-wire cable through it. Lift the door off of the bottom hinge. 5 Remove the two bottom hinge screws and hinge if necessary. 6 Lay the door on its side to avoid damage to the water tube extending from the bottom hinge. To reinstall the freezer door, reverse the above steps. Once both doors are in place, ensure they are aligned with each other and level (Please see "To level the doors using the lower hinge" for models with adjustable lower hinges or "To level the cabinet using the front rollers" for models with the non-adjustable lower hinges in the 'Installation" section.), then replace the top hinge cover.
-
 1
1 -
 2
2 -
 3
3 -
 4
4 -
 5
5 -
 6
6 -
 7
7 -
 8
8 -
 9
9 -
 10
10 -
 11
11 -
 12
12 -
13
-
14
-
15
-
16
-
17
-
18
-
19
-
20
-
21
-
22
-
23
-
24
-
25
-
26
-
27
-
28
-
29
-
30
-
31
-
32
-
33
-
34
 |
 |