Electrolux EW30DS80RS Installation Instructions English Spanish French - Page 3
Dual Fuel Slide-in Range Installation Instructions
 |
View all Electrolux EW30DS80RS manuals
Add to My Manuals
Save this manual to your list of manuals |
Page 3 highlights
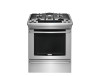
30" DUAL FUEL SLIDE-IN RANGE INSTALLATION INSTRUCTIONS (Models with an Electric Oven and a Gas Cooktop) • Do not use the oven as a storage space. This creates a potentially hazardous situation. • Never use your range for warming or heating the room. Prolonged use of the range without adequate ventilation can be dangerous. • Do not store or use gasoline or other flammable vapors and liquids near this or any other appliance. Explosions or fires could result. • In the event of an electrical power outage, the surface burners can be lit manually. To light a surface burner, hold a lit match to the burner head and slowly turn the Surface Control knob to LITE. Use caution when lighting surface burners manually. • Reset all controls to the "off" position after using a programmable timing operation. FOR MODELS WITH SELF-CLEAN FEATURE: • Remove broiler pan, food and other utensils before self-cleaning the oven. Wipe up excess spillage. Follow the precleaning instructions in the Use and Care Guide. Cabinet dimensions WALL 30" Min. (76,2 cm Min.) These surfaces should be flat & leveled (hatched area). Shave Raised Edge to Clear Space for a 31½" (80 cm) Wide Cooktop. 1 ½" Max. (3,8 cm Max.) 1/2" min. 5" Min. (12,7 cm Min.) From Wall Both Sides 30" Min. (76,2 cm) Min. (see Note 3) E 18" Min. (45,7 cm) Min. 3/8" min. 31 1/2" (80 cm) Exact 1/2" min. G Approx. 1 7/8" (4,8 cm) 13" (33 cm) F Locate Cabinet Doors 1" (2,5 cm) Min. from Cutout Opening. E IMPORTANT: Cabinet and countertop width should match the E cutout width. 24" Min. (61 cm Min.) Grounded Junction Box or Wall Outlet Should Be Located 8" to 17" (20,3 cm to 43,2 cm) From Right Cabinet and 2" to 4" (5,1 cm to 10,2 cm) From Floor. A. HEIGHT B. WIDTH C. COOKTOP WIDTH 35 5/8" (90,5 cm) - 30" 36 5/8" (93 cm) (76,2 cm) 31½" (80 cm) D. DEPTH TO FRONT OF RANGE 28 5/16" (71,9 cm) E. CUTOUT WIDTH* (Countertop and Cabinet) 30±1/16" (76,2±0,15 cm) F. CUTOUT DEPTH 21 3/4" (55,2 cm) Min. 22 1/8" (56,2 cm) Max 24" (61 cm) Min. with backguard G. HEIGHT OF COUNTERTOP 36 5/8" (93 cm) Max. 35 7/8" (91,1 cm) Min. 3
-
 1
1 -
 2
2 -
 3
3 -
 4
4 -
 5
5 -
 6
6 -
 7
7 -
 8
8 -
 9
9 -
10
-
11
-
12
-
13
-
14
-
15
-
16
-
17
-
18
-
19
-
20
-
21
-
22
-
23
-
24
-
25
-
26
-
27
-
28
-
29
-
30
-
31
-
32
-
33
-
34
-
35
-
36
-
37
-
38
-
39
-
40
-
41
-
42
-
43
-
44
-
45
-
46
-
47
-
48
 |
 |
