Epson 1420Wi Operation Guide - EasyMP Network Projection - Page 19
Wireless LAN
 |
View all Epson 1420Wi manuals
Add to My Manuals
Save this manual to your list of manuals |
Page 19 highlights
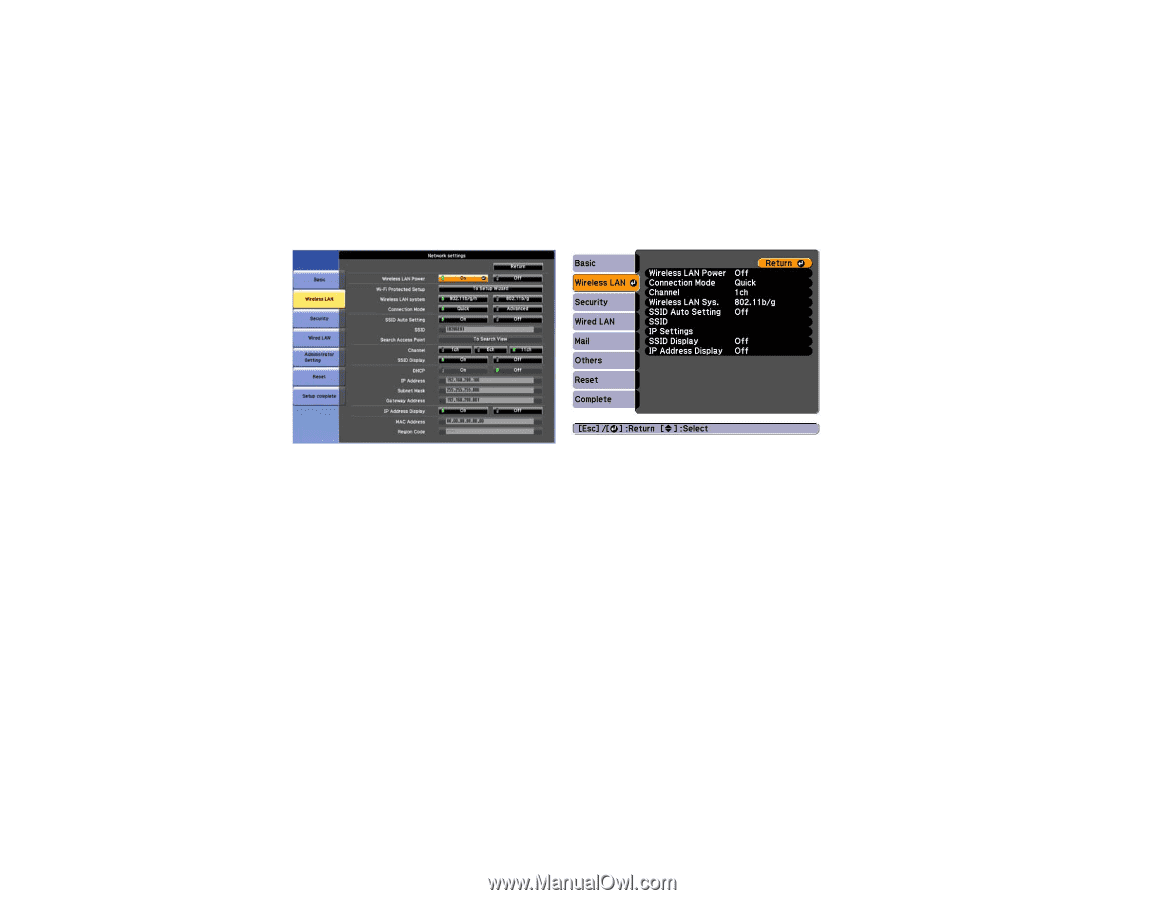
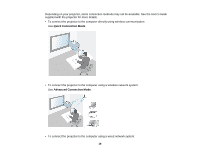
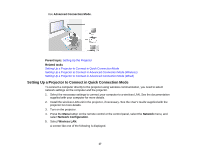
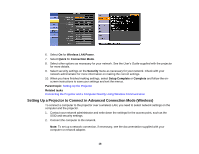
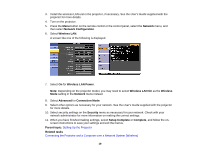
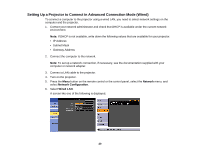
3. Install the wireless LAN unit in the projector, if necessary. See the User's Guide supplied with the projector for more details. 4. Turn on the projector. 5. Press the Menu button on the remote control or the control panel, select the Network menu, and then select Network Configuration. 6. Select Wireless LAN. A screen like one of the following is displayed. 7. Select On for Wireless LAN Power. Note: Depending on the projector model, you may need to select Wireless LAN On as the Wireless Mode setting in the Network menu instead. 8. Select Advanced for Connection Mode. 9. Select other options as necessary for your network. See the User's Guide supplied with the projector for more details. 10. Select security settings on the Security menu as necessary for your network. Check with your network administrator for more information on making the correct settings. 11. When you have finished making settings, select Setup Complete or Complete, and follow the on- screen instructions to save your settings and exit the menus. Parent topic: Setting Up the Projector Related tasks Connecting the Projector and a Computer over a Network System (Wireless) 19
-
 1
1 -
2
-
3
-
4
-
5
-
6
-
7
-
8
-
9
-
10
-
11
-
12
-
13
-
 14
14 -
 15
15 -
 16
16 -
 17
17 -
 18
18 -
 19
19 -
 20
20 -
 21
21 -
 22
22 -
 23
23 -
 24
24 -
25
-
26
-
27
-
28
-
29
-
30
-
31
-
32
-
33
-
34
-
35
-
36
-
37
-
38
-
39
-
40
-
41
-
42
-
43
-
44
-
45
-
46
-
47
-
48
-
49
-
50
-
51
-
52
-
53
-
54
-
55
-
56
-
57
-
58
-
59
-
60
-
61
-
62
-
63
-
64
-
65
-
66
-
67
-
68
-
69
-
70
-
71
-
72
-
73
-
74
-
75
-
76
-
77
-
78
-
79
-
80
-
81
-
82
-
83
-
84
-
85
-
86
-
87
-
88
-
89
-
90
-
91
-
92
-
93
-
94
-
95
-
96
-
97
-
98
-
99
-
100
-
101
-
102
-
103
-
104
-
105
-
106
-
107
-
108
-
109
 |
 |