Epson 1640SU Scanner Basics - Page 60
Installing the Auto Document Feeder
 |
UPC - 010343832022
View all Epson 1640SU manuals
Add to My Manuals
Save this manual to your list of manuals |
Page 60 highlights
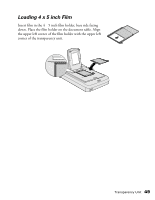
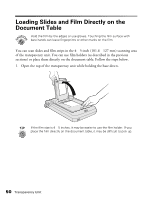
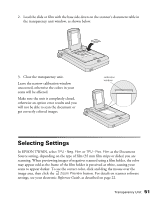
Installing the Auto Document Feeder 1. Make sure your scanner is turned off. 2. If your scanner has a document cover, remove it from the scanner by opening it to an upright position, and lifting it straight up. 3. Make sure the document table is clean and dust free. 4. Insert the hinges on the ADF into the outer square holes at the back of the scanner and close the ADF. 5. Attach the ADF's connector (arrow faces up) to the scanner's option interface. 6. Attach the paper support to the ADF. 7. Turn on the scanner. For information on loading paper in the ADF and selecting driver settings, see "Selecting Settings" on page 56. 54 Auto Document Feeder
-
 1
1 -
2
-
3
-
4
-
5
-
6
-
7
-
8
-
9
-
10
-
11
-
12
-
13
-
14
-
15
-
16
-
17
-
18
-
19
-
20
-
21
-
22
-
23
-
24
-
25
-
26
-
27
-
28
-
29
-
30
-
31
-
32
-
33
-
34
-
35
-
36
-
37
-
38
-
39
-
40
-
41
-
42
-
43
-
44
-
45
-
46
-
47
-
48
-
49
-
50
-
51
-
52
-
53
-
54
-
 55
55 -
 56
56 -
 57
57 -
 58
58 -
 59
59 -
 60
60 -
 61
61 -
 62
62 -
 63
63 -
 64
64 -
 65
65 -
66
-
67
-
68
-
69
-
70
-
71
-
72
-
73
-
74
-
75
-
76
-
77
-
78
-
79
-
80
-
81
-
82
-
83
-
84
-
85
-
86
-
87
-
88
-
89
-
90
-
91
-
92
 |
 |
54
Auto Document Feeder
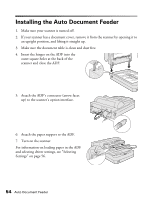
Installing the Auto Document Feeder
1.
Make sure your scanner is turned off.
2.
If your scanner has a document cover, remove it from the scanner by opening it to
an upright position, and lifting it straight up.
3.
Make sure the document table is clean and dust free.
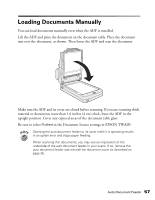
4.
Insert the hinges on the ADF into the
outer square holes at the back of the
scanner and close the ADF.
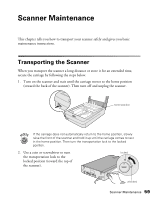
5.
Attach the ADF’s connector (arrow faces
up) to the scanner’s option interface.
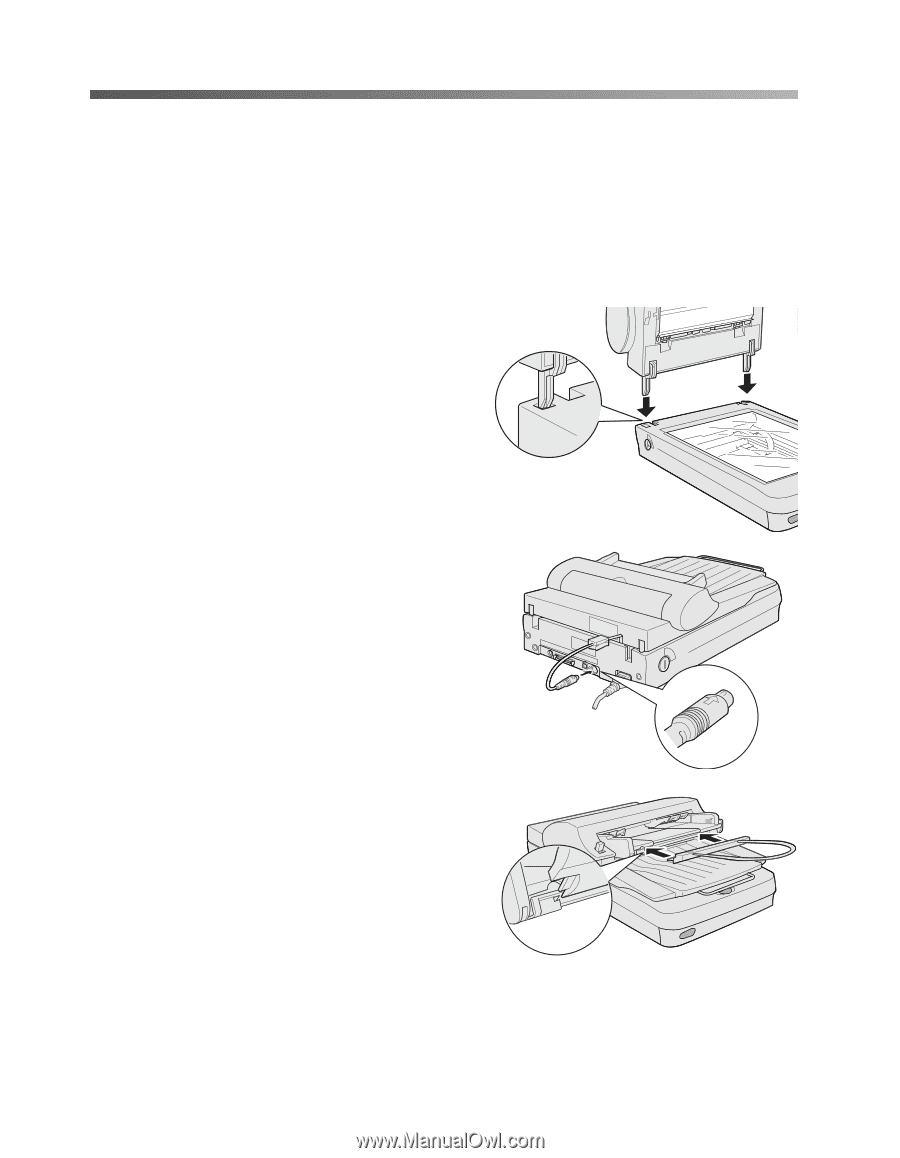
6.
Attach the paper support to the ADF.
7.
Turn on the scanner.
For information on loading paper in the ADF
and selecting driver settings, see “Selecting
Settings” on page 56.