Epson 4180 Product Information Guide - Page 6
Epson Perfection 4180 PHOTO, The Image Adjustments window opens. - photo scanner
 |
UPC - 010343850880
View all Epson 4180 manuals
Add to My Manuals
Save this manual to your list of manuals |
Page 6 highlights
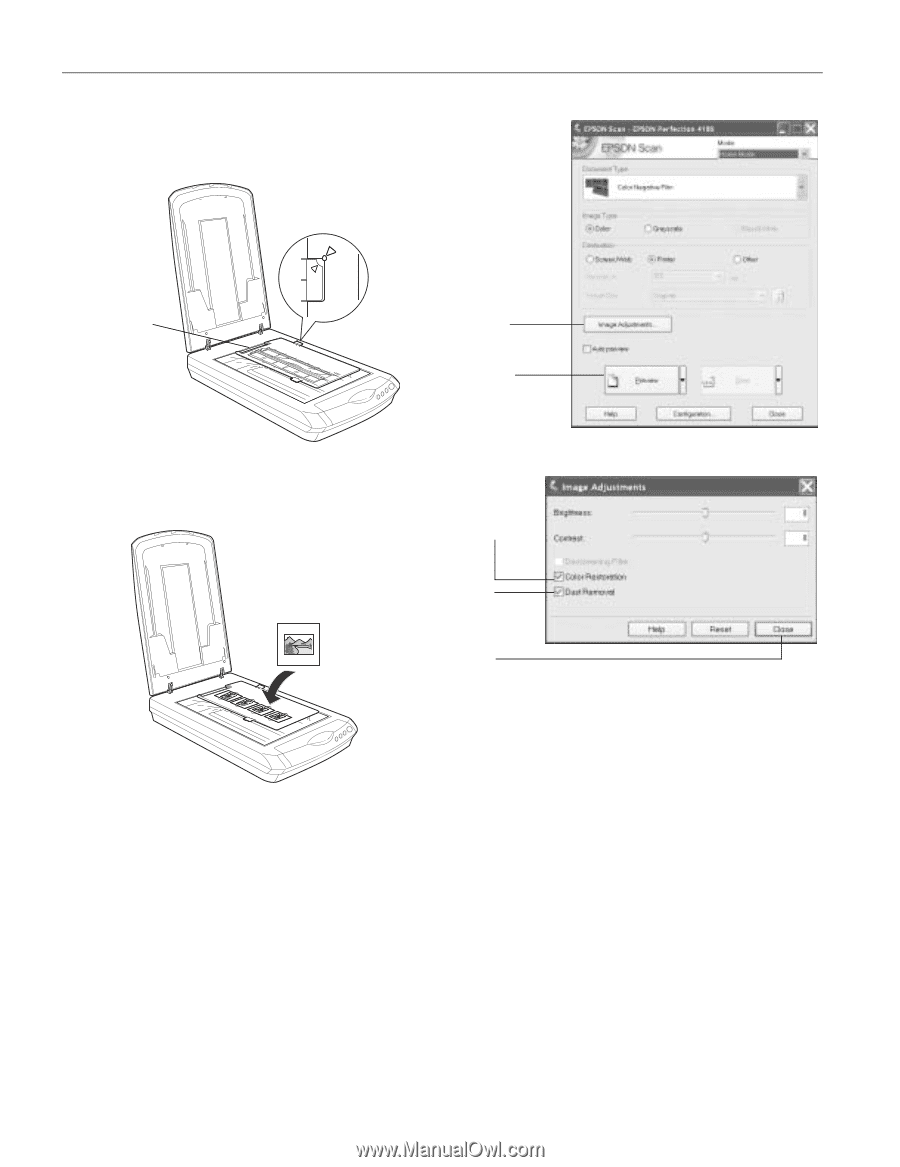
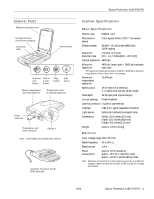
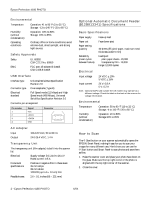
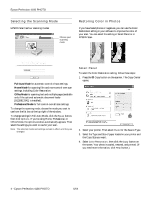
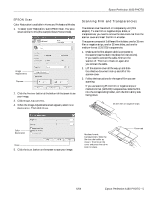
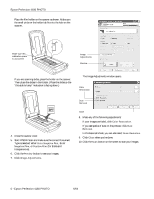
Epson Perfection 4180 PHOTO Place the film holder on the scanner as shown. Make sure the small circle on the holder tab fits into the hole on the scanner. Make sure this calibration space is uncovered Image Adjustments Preview If you are scanning slides, place the holder on the scanner. Then place the slides in the holder. (Place the slides so the "this side to lamp" indication is facing down.) The Image Adjustments window opens. Color Restoration 4. Close the scanner cover. 5. Start EPSON Scan and make sure the correct Document Type is selected: either Color Negative Film, B&W Negative Film, or Positive Film (for slides and transparencies). 6. Click the Preview button to see your images. 7. Click Image Adjustments. Dust Removal Close 8. Make any of the following adjustments: If your images are faded, click Color Restoration. If you see specks of dust on the preview, click Dust Removal. In Professional Mode, you can also select Grain Reduction. 9. Click Close when you're done. 10. Click the Scan button on the screen to scan your images. 6 - Epson Perfection 4180 PHOTO 6/04
-
 1
1 -
 2
2 -
 3
3 -
 4
4 -
 5
5 -
 6
6 -
 7
7
 |
 |