Epson 4900 Network Guide - Page 24
Printer Name or IP Address text box. Then click, Finish
 |
View all Epson 4900 manuals
Add to My Manuals
Save this manual to your list of manuals |
Page 24 highlights
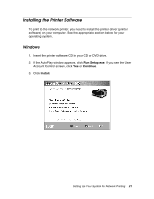
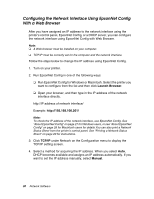
6. Enter the printer's IP address, shown on the network status sheet, in the Printer Name or IP Address text box. Then click Next. Note: If you get the IP address from the printer's control panel, be sure to omit any leading zeros when entering it in the screen above. Example: 192.168.010.193 should be entered 192.168.10.193. 7. On the next screen, click Finish. Note: If the finish screen does not appear, the IP address may be incorrect or there may not be a good Ethernet connection. Check the IP address and the status light on the printer. You can now use the printer on your network. Setting Up Your System for Network Printing 25
-
 1
1 -
2
-
3
-
4
-
5
-
6
-
7
-
8
-
9
-
10
-
11
-
12
-
13
-
14
-
15
-
16
-
17
-
18
-
 19
19 -
 20
20 -
 21
21 -
 22
22 -
 23
23 -
 24
24 -
 25
25 -
 26
26 -
 27
27 -
 28
28 -
 29
29 -
30
-
31
-
32
-
33
-
34
-
35
-
36
-
37
-
38
-
39
 |
 |

Setting Up Your System for Network Printing
25
6.
Enter the printer’s IP address, shown on the network status sheet, in the
Printer Name or IP Address text box. Then click
Next
.
Note:
If you get the IP address from the printer’s control panel, be sure to omit any
leading zeros when entering it in the screen above. Example: 192.168.010.193
should be entered 192.168.10.193.
7.
On the next screen, click
Finish
.
Note:
If the finish screen does not appear, the IP address may be incorrect or there may
not be a good Ethernet connection. Check the IP address and the status light on
the printer.
You can now use the printer on your network.