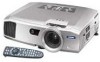
Epson 7800p Product Information Guide - Page 17
Using EMP NetworkManager - manual
 |
View all Epson 7800p manuals
Add to My Manuals
Save this manual to your list of manuals |
Page 17 highlights
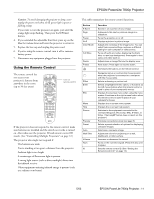
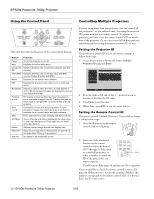
EPSON PowerLite 7800p Projector Configuring the Monitoring Interval If you need to have the most current status information about your projectors, click the Refresh button in the EMP Monitor screen. You can also select how often EMP Monitor checks the projector status: 1. From the Tool menu, select Configuration. You see this screen. 2. If you'd like to register a projector manually and you know its IP address, double-click the Proj(ector) address selection icon. You see this screen: Note: If you want EMP Monitor to run whenever you start your computer, click Add to Startup. 2. Select the desired update interval and click OK. 3. Enter the projector's IP address and click Add. The projector's icon is added to the EMP NetworkManager screen. Setting a Password You can set a password to restrict access to each projector from EMP NetworkManager: 1. Right-click the icon of the projector whose password you want to set, then select Change Password. Using EMP NetworkManager You can use EMP NetworkManager to configure the projector to send out messages by e-mail, notifying you when a problem occurs with the projector. Before running EMP NetworkManager, make sure you've installed the software as described in the User's Guide. Then follow the steps below to create e-mail settings for each projector you want to monitor. Selecting the Projectors to Monitor 1. To start EMP NetworkManager, click Start > Programs or All Programs > EPSON Projector > EMP NetworkManager. You see the EMP NetworkManager screen. The projectors you've registered through EMP Monitor appear as icons. 2. Enter a password up to 14 characters in length. Creating the E-Mail Settings 1. If EMP NetworkManager is not already running, open it from the Start menu. You see your registered projectors: 2. Double-click the icon for the projector whose e-mail settings you want to create. Enter your password, if you created one. 16 - EPSON PowerLite 7800p Projector 5/03
-
 1
1 -
2
-
3
-
4
-
5
-
6
-
7
-
8
-
9
-
10
-
11
-
 12
12 -
 13
13 -
 14
14 -
 15
15 -
 16
16 -
 17
17 -
 18
18 -
 19
19 -
 20
20 -
 21
21 -
 22
22
 |
 |
