Epson 821p Quick Start - Page 1
Epson 821p - PowerLite XGA LCD Projector Manual
 |
UPC - 010343852020
View all Epson 821p manuals
Add to My Manuals
Save this manual to your list of manuals |
Page 1 highlights
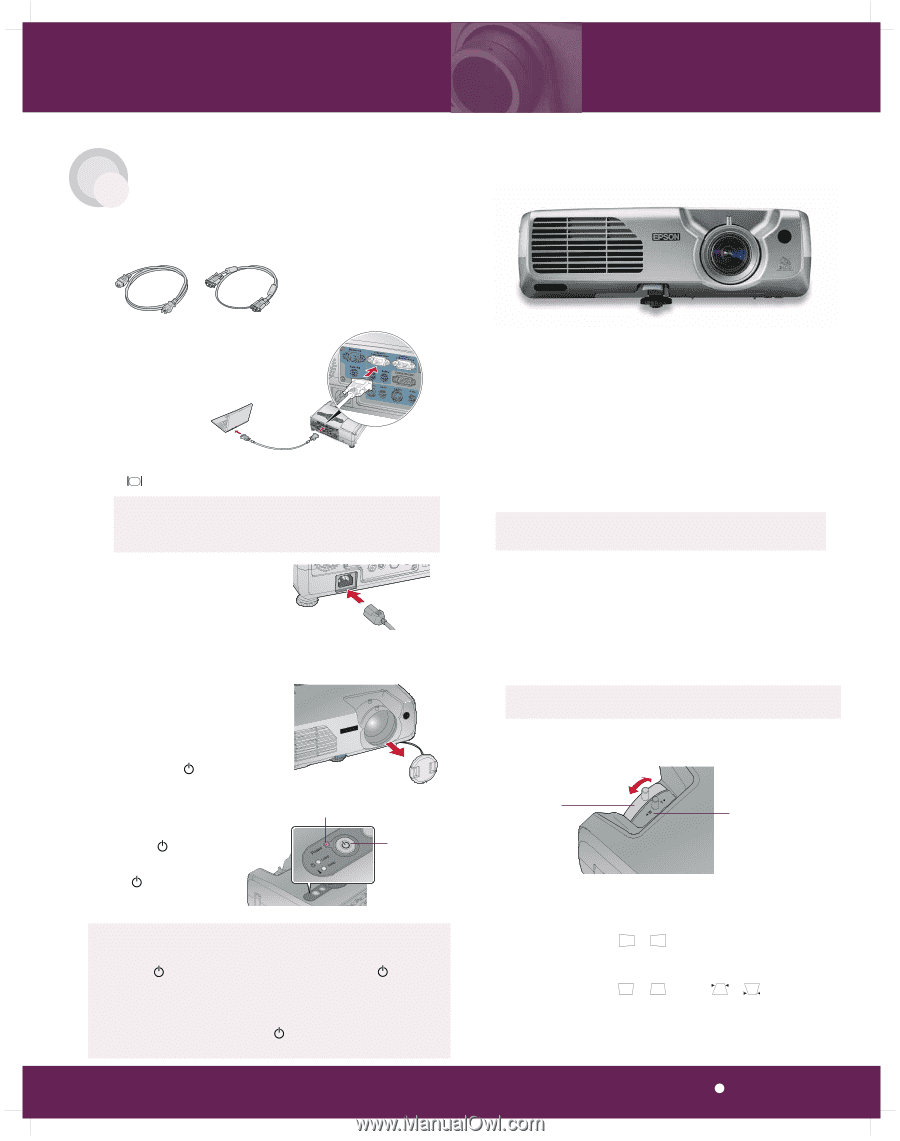
TART S HERE Connect the projector to your notebook 1 Locate the required cables: Power cord Computer cable 2 Connect the computer cable to the Computer 1/Component Video 1 port on the projector. Epson® PowerLite® 821p Quick Setup 3 Connect the other end to your notebook's video-out or monitor port. NOTE: If your notebook has a DVI connector, you need to either connect a DVI-to-VGA adapter to the included computer cable (see your computer's documentation), or purchase an optional DVI to VGA cable (for a higher-quality image). See your User's Guide. 4 Connect the power cord to the projector, then plug the other end into a grounded electrical outlet. Turn on your equipment 1 Turn on your notebook. 2 Remove the projector's lens cap. 3 Make sure the Power light is orange and not flashing. Power light is orange and not flashing 4 Press the Power button to turn on the projector. The projector beeps and the Power light flashes as the projector warms up. Power button CAUTION: Before unplugging the projector... Shut down the projector properly: 1. Press the Power button twice. The lamp turns off, the Power light flashes orange (about 20 seconds), and the projector beeps twice to signal power is off. 2. Once the projector beeps, it's safe to unplug it. Never unplug the projector when the Power light is green or flashing orange. Follow these instructions to connect the projector to your notebook. For other setup options, see your User's Guide. Adjust the image 1 If you've turned on your notebook and you don't see an image, press the Source Search button on the projector repeatedly until you see your image. NOTE: If you still see a blank screen or have other display problems, see the troubleshooting tips on the back of this sheet. 2 Rotate the focus ring to sharpen the image. Focus ring to sharpen the image Zoom ring to adjust the image size 3 Rotate the zoom ring to reduce or enlarge the image. (You can also move the projector closer to or farther from the screen.) 4 If your image looks like or , you've placed the projector off to one side of the screen at an angle. Place it directly in front of the center of the screen, facing the screen squarely. 5 If your image looks like or , use the or square up the image. buttons to
-
 1
1 -
 2
2
 |
 |