Epson AP-60 Installation Guide - Page 14
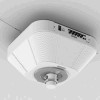
Install the AP-60, cable channel as shown below. - audio panel
 |
UPC - 010343874695
View all Epson AP-60 manuals
Add to My Manuals
Save this manual to your list of manuals |
Page 14 highlights
Install the AP-60 Locate the following parts: • AP-60 • Lower bracket • M47.5 jam nut • M10 bolt and nut 1 Locate the lower bracket and M47.5 jam nut and have them close by. 2 Before attaching the AP-60 to the mounting pipe, feed the projector's power and video cables through the cable channel as shown below. 3 Slide the AP-60 and the lower bracket onto the mounting pipe with the audio control panel facing the front of the room. The lower bracket's cutout should line up with the cable channel on the bottom of the AP-60. 4 Secure the lower bracket with the M47.5 jam nut as shown below. Do not attach the M10 bolt and nut at this time. Lower bracket cutout Lower bracket M47.5 jam nut 14
-
 1
1 -
2
-
3
-
4
-
5
-
6
-
7
-
8
-
 9
9 -
 10
10 -
 11
11 -
 12
12 -
 13
13 -
 14
14 -
 15
15 -
 16
16 -
 17
17 -
 18
18 -
 19
19 -
20
-
21
-
22
-
23
-
24
-
25
-
26
-
27
-
28
 |
 |

14
Install the AP-60
Locate the following parts:
•
AP-60
•
Lower bracket
•
M47.5 jam nut
•
M10 bolt and nut
1
Locate the lower bracket and M47.5 jam nut and have them close by.
2
Before attaching the AP-60 to the mounting pipe, feed the projector’s power and video cables through the
cable channel as shown below.
3
Slide the AP-60 and the lower bracket onto the mounting pipe with the audio control panel facing the front
of the room. The lower bracket’s cutout should line up with the cable channel on the bottom of the AP-60.
4
Secure the lower bracket with the M47.5 jam nut as shown below. Do not attach the M10 bolt and nut at
this time.
Lower bracket
Lower bracket
cutout
M47.5 jam nut