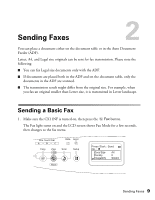
Epson AcuLaser CX11NF Fax Guide - Page 11
Image Quality, Polling Reception, and Overseas transmission mode settings. For, button while
 |
View all Epson AcuLaser CX11NF manuals
Add to My Manuals
Save this manual to your list of manuals |
Page 11 highlights
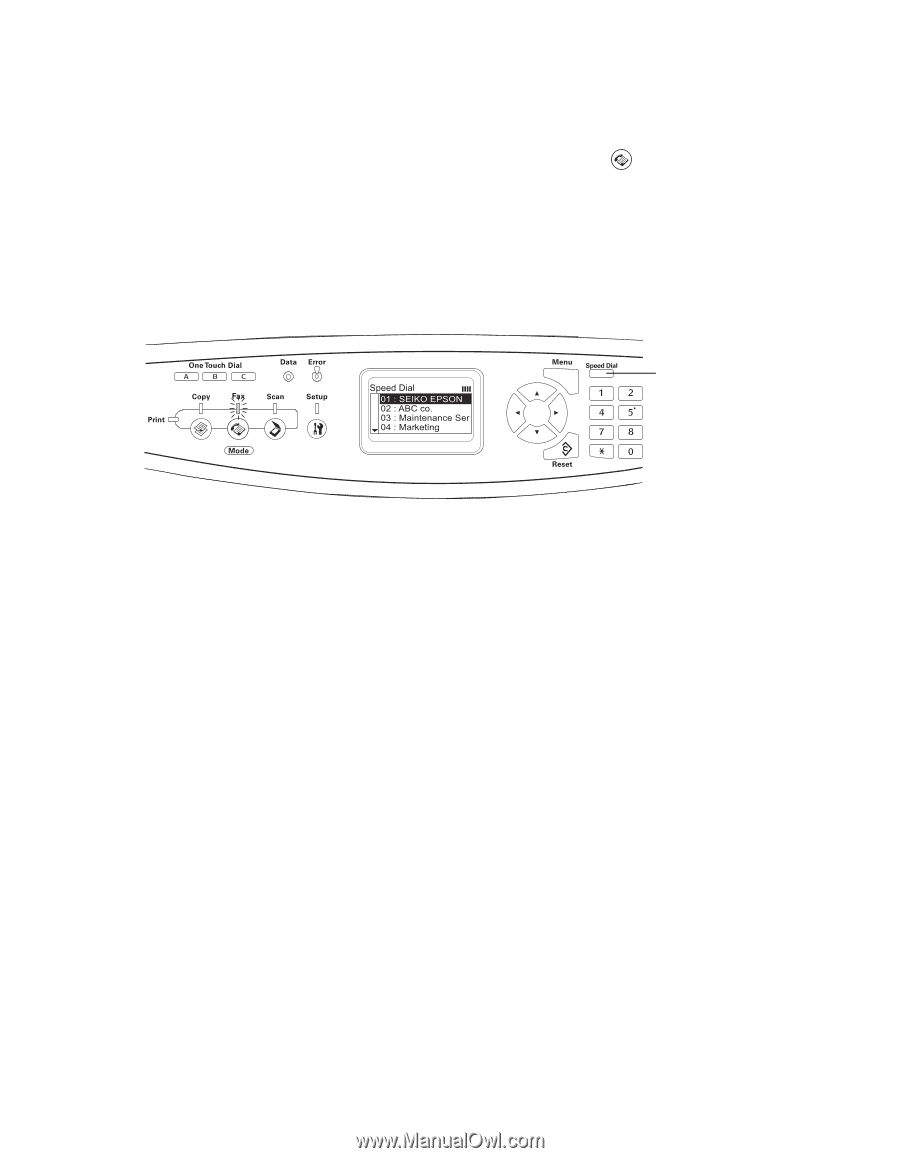
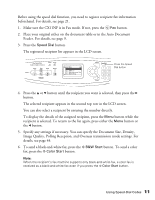
Before using the speed dial function, you need to register recipient fax information beforehand. For details, see page 21. 1. Make sure the CX11NF is in Fax mode. If not, press the Fax button. 2. Place your original either on the document table or in the Auto Document Feeder. For details, see page 9. 3. Press the Speed Dial button. The registered recipient list appears in the LCD screen. Press the Speed Dial button 4. Press the u or d button until the recipient you want is selected, then press the r button. The selected recipient appears in the second top row in the LCD screen. You can also select a recipient by entering the number directly. To display the details of the assigned recipient, press the Menu button while the recipient is selected. To return to the list again, press either the Menu button or the l button. 5. Specify any settings if necessary. You can specify the Document Size, Density, Image Quality, Polling Reception, and Overseas transmission mode settings. For details, see page 44. 6. To send a black-and-white fax, press the x B&W Start button. To send a color fax, press the x Color Start button. Note: When the recipient's fax machine supports only black-and-white fax, a color fax is received as a black-and-white fax even if you press the x Color Start button. Using Speed-Dial Codes 11
-
 1
1 -
2
-
3
-
4
-
5
-
 6
6 -
 7
7 -
 8
8 -
 9
9 -
 10
10 -
 11
11 -
 12
12 -
 13
13 -
 14
14 -
 15
15 -
 16
16 -
17
-
18
-
19
-
20
-
21
-
22
-
23
-
24
-
25
-
26
-
27
-
28
-
29
-
30
-
31
-
32
-
33
-
34
-
35
-
36
-
37
-
38
-
39
-
40
-
41
-
42
-
43
-
44
-
45
-
46
-
47
-
48
-
49
-
50
-
51
-
52
-
53
-
54
-
55
-
56
-
57
-
58
-
59
-
60
-
61
-
62
-
63
-
64
 |
 |