Epson B-510DN Network Guide - Page 3
Installing the Printer on Your Network, Windows Network Connection
 |
View all Epson B-510DN manuals
Add to My Manuals
Save this manual to your list of manuals |
Page 3 highlights
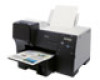
English Installing the Printer on Your Network Follow these instructions to install the software and connect the printer to your network. First, make sure you install the ink cartridges and load paper as described on the Start Here sheet that came with the printer. Then follow the steps below for Windows® or on page 7 for Macintosh®. Windows Network Connection The software works with Windows 2000, Windows Server 2003, Windows Server 2008, Windows XP, Windows XP Professional x64 Edition, Windows Vista®, and Windows 7. Before you begin, make sure you have a standard RJ-45 network cable (not included). Note: The steps show installation screens for the B-510DN, but the installation instructions are the same for the B-310N. 1. Turn off the printer. 2. Connect one end of the cable to the printer's 10/100 Ethernet port. Then connect the other end to your network switch or hub. 3. Turn on the printer. 4. Insert your printer CD. With Windows 7 and Windows Vista, if you see the AutoPlay window, click Run Setup.exe. When you see the User Account Control screen, click Yes or Continue. 3
-
 1
1 -
 2
2 -
 3
3 -
 4
4 -
 5
5 -
 6
6 -
 7
7 -
 8
8 -
 9
9 -
10
-
11
-
12
-
13
-
14
-
15
-
16
-
17
-
18
-
19
-
20
 |
 |
