Epson B-510DN Start Here - Page 2
Load paper in the cassette, Load paper in the rearsheet feeder, Choose your connection - printer
 |
View all Epson B-510DN manuals
Add to My Manuals
Save this manual to your list of manuals |
Page 2 highlights
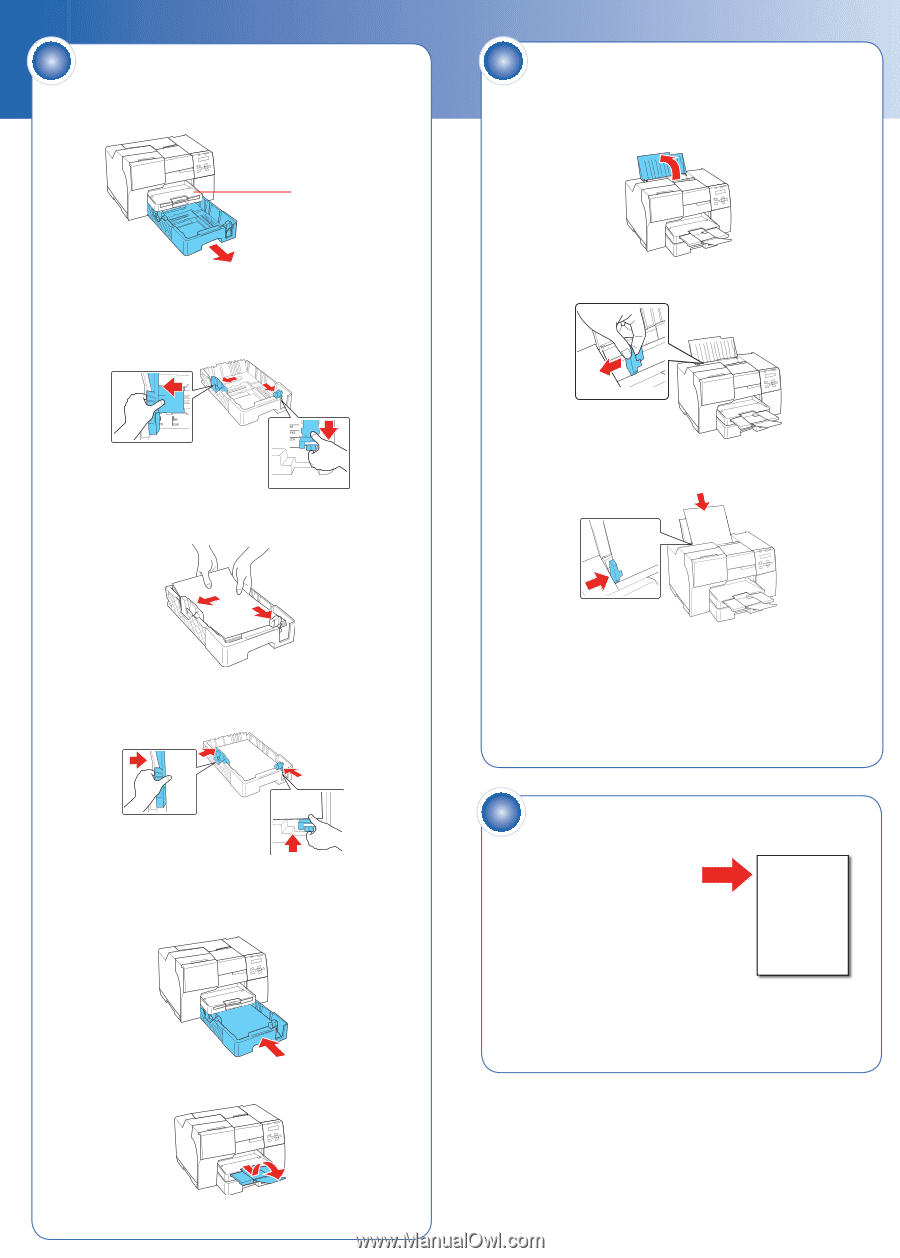
4 Load paper in the cassette 1 Pull out the front paper cassette. Make sure you don't pull out the cassette cover. Cassette cover 5 Load paper in the rear sheet feeder 1 Open the paper support. Note: If you are using the legal-size paper cassette (optional with the B-310N), flip open the front of the paper tray. 2 Squeeze the edge guides and slide them out. 2 Slide the edge guide to the left. 3 Load paper with the printable side down (up to 500 sheets of plain paper). 3 Insert paper with the printable side up, against the right side of the feeder. Then slide the edge guide against the paper. 4 Squeeze the edge guides and slide them against the paper. Make sure the paper is stacked against the front edge guide. Note: Close the front cover of the legal-sized paper cassette. 5 Reinsert the cassette into the printer. 6 Slide out the output tray and flip up the extension. Note: You can load up to 150 sheets of plain, letter-size paper in the rear sheet feeder. Do not load paper above the arrow on the edge guide. Using the optional legal-size paper support, you can load up to 60 sheets of plain, legal-size paper. See the back of this sheet for information on ordering the optional legal-size paper support. 6 Choose your connection Network Connection See the Network Installation Guide for instructions. B-310N/B-510DN Network Installation Guide Guide d'installation réseau USB Connection Make sure you have a USB cable (not included). Then follow the steps on the back of this sheet for Windows® or Macintosh®.
-
 1
1 -
 2
2 -
 3
3 -
 4
4
 |
 |