Epson BrightLink 475Wi Installation Worksheet
Epson BrightLink 475Wi Manual
 |
View all Epson BrightLink 475Wi manuals
Add to My Manuals
Save this manual to your list of manuals |
Epson BrightLink 475Wi manual content summary:
- Epson BrightLink 475Wi | Installation Worksheet - Page 1
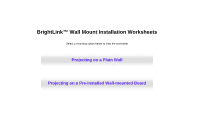
BrightLink™ Wall Mount Installation Worksheets Select a mounting option below to view the worksheet Projecting on a Plain Wall Projecting on a Pre-installed Wall-mounted Board - Epson BrightLink 475Wi | Installation Worksheet - Page 2
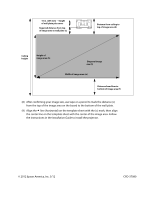
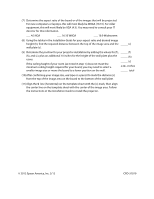
mount for a BrightLink® installation for projecting on a plain wall. (1) Measure the ceiling height (distance from the floor to the ceiling). _____ (2) Determine the desired aspect ratio of the image. For new computers or laptops, this will most likely be WXGA in the Installation Guide to - Epson BrightLink 475Wi | Installation Worksheet - Page 3
) on the template sheet with the (c) mark, then align the center line on the template sheet with the center of the image area. Follow the instructions in the Installation Guide to install the projector. © 2012 Epson America, Inc. 3/12 CPD-37080 - Epson BrightLink 475Wi | Installation Worksheet - Page 4
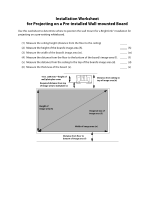
Use this worksheet to determine where to position the wall mount for a BrightLink® installation for projecting on a pre-existing whiteboard. (1) Measure the ceiling height (distance from the floor to the ceiling) _____ (2) Measure the height of the board's image - Epson BrightLink 475Wi | Installation Worksheet - Page 5
for this information. ___ 4:3 XGA ___ 16:10 WXGA ___ 16:9 Widescreen (8) Using the tables in the Installation Guide for your aspect ratio and desired image height (h), area. Follow the instructions in the Installation Guide to install the projector. © 2012 Epson America, Inc. 3/12 CPD-37079
-
 1
1 -
 2
2 -
 3
3 -
 4
4 -
 5
5
 |
 |

BrightLink™ Wall Mount Installation Worksheets
Select a mounting option below to view the worksheet
Projecting on a Plain Wall
Projecting on a Pre-installed Wall-mounted Board