Epson C11C617001 Product Information Guide - Page 9
to close the Print Head Alignment Utility
 |
UPC - 010343855571
View all Epson C11C617001 manuals
Add to My Manuals
Save this manual to your list of manuals |
Page 9 highlights
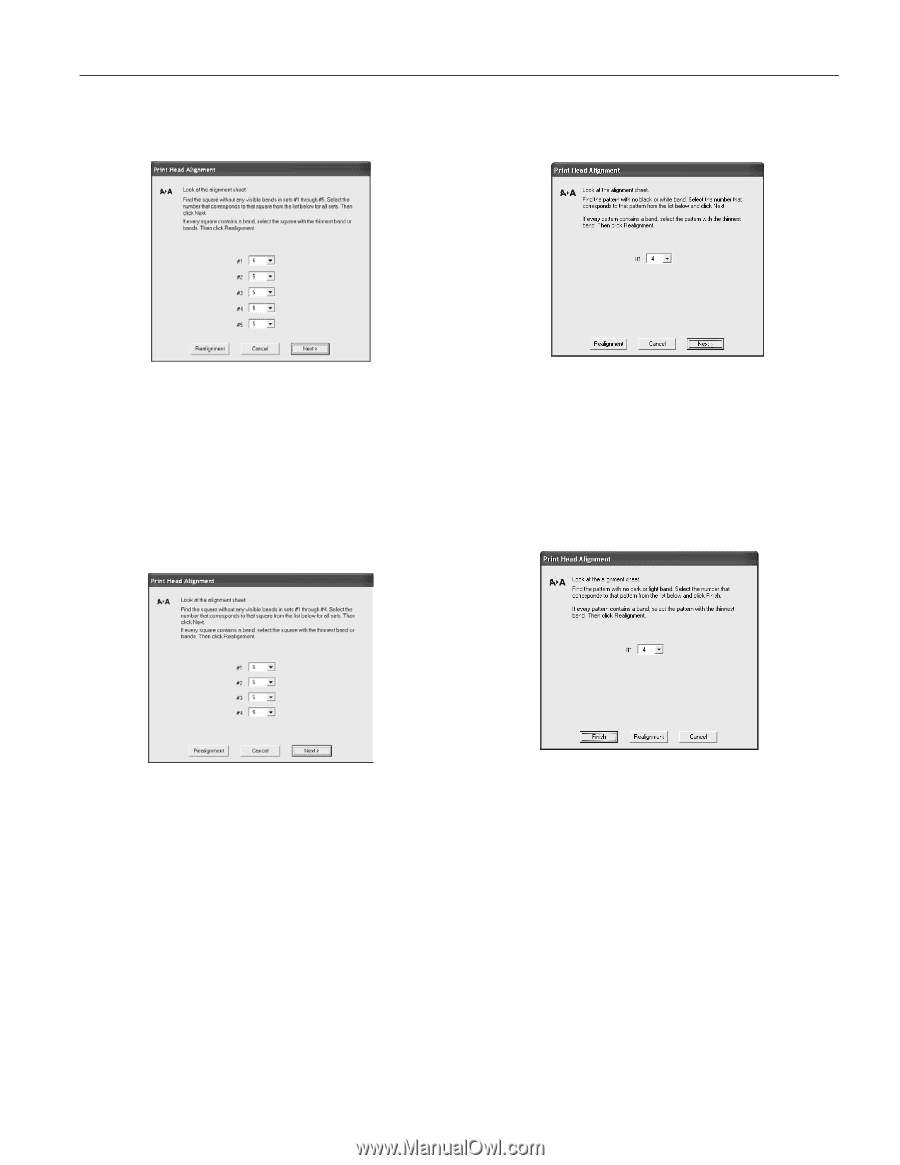
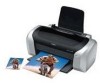
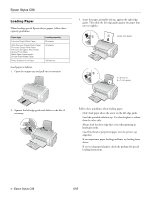
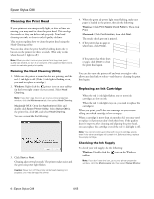
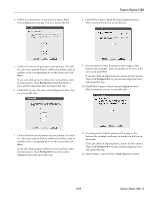
4. Follow the instructions on the screen to print a black vertical alignment test page. You see a screen like this: Epson Stylus C88 8. Click Print to print a black horizontal alignment sheet. After it's printed you see a screen like this: 5. Look at the five sets of patterns in your printout. For each set, if you see a pattern with no visible vertical lines, enter its number in the corresponding box on the screen and click Next. If you can't find a pattern without any vertical lines, select the best pattern. Click Realignment and then Print to print another alignment sheet and repeat this step. 6. Click Print to print the color vertical alignment sheet. You see a screen like this: 9. In your printout, select the pattern with no gap or line between the rectangles. Enter its number in the box on the screen and click Next. If you can't find an aligned pattern, choose the best pattern. Then click Realignment to print another alignment sheet and repeat this step. 10. Click Print to print a color horizontal alignment sheet. After it's printed, you see a screen like this: 7. Look at the four sets of patterns in your printout. For each set, if you see a pattern with no visible vertical lines, enter its number in the corresponding box on the screen and click Next. If you can't find a pattern without any vertical lines, select the best pattern. Click Realignment to print another alignment sheet and repeat this step. 11. In your printout, find the pattern with no gap or line between the rectangles and enter its number in the box on the screen. If you can't find an aligned pattern, choose the best pattern. Then click Realignment to print another alignment sheet and repeat this step. 12. Click Finish to close the Print Head Alignment Utility. 6/05 Epson Stylus C88 - 9
-
 1
1 -
2
-
3
-
 4
4 -
 5
5 -
 6
6 -
 7
7 -
 8
8 -
 9
9 -
 10
10
 |
 |