Epson C31C412144 Information Guide - Page 3
Electrical Characteristics, Environmental Conditions, Safety, Buffer Sizes, Control Panel
 |
View all Epson C31C412144 manuals
Add to My Manuals
Save this manual to your list of manuals |
Page 3 highlights
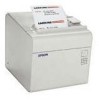
EPSON TM-L90 Electrical Characteristics Supply voltage +24 V ± 7% (using the PS-170 or PS-180) Current consumption (approximate, at room temperature) Normal Mean: 1.7 A Peak: 7.7 A Low-power Mean: 1 A Standby Mean: 0.1 A Loading Paper Use only paper rolls and labels that meet specifications. When using the printer horizontally, peel the backing sheet off the paper exit guide and attach it as shown to prevent paper cut by the autocutter from falling into the printer. Environmental Conditions Temperature: Humidity Operating: 41~ 113°F (5 ~ 45°C) Storage: 14 ~ 122°F (-10 ~ 50°C) Operating: 10 ~ 90% RH Storage: 10 ~ 90% RH (except paper) Safety EMI FCC/ICES-003 Class A Safety standards UL 1950 CSA C22.2 No. 950 TÜV (EN 60950) (Tested using the EPSON PS-170 and PS-180.) If you use roll paper smaller than the specifications, but with an inside core diameter of at least 1" and an outside core diameter of at least 1.25", do not attach the paper exit guide. Otherwise, a paper jam may occur. 1. Open the paper roll cover using the cover open lever. 2. Insert a paper roll and pull out a small amount of paper, aligning it with the guide, as shown below. Buffer Sizes Receive User Macro 4KB or 45 bytes, selectable via memory switch 12KB 2KB NV (non-volatile) bit image 0 through 384KB NV user 1KB through 192KB Page mode area 106KB Control Panel 3. Close the cover and tear off the extra paper by pulling it toward the front of the printer. Installing the Paper Roll Spacer To use paper rolls that are 38 or 70 mm {1.5 or 2.76"} wide, install the paper roll spacer, as described below. Button and LEDs FEED BUTTON Feeds roll paper or starts execution of a self-test or a macro. POWER LED On when the power is on. Flashes during an operation. ERROR LED Off when the printer is online, lights when the printer is offline or feeding paper, and flashes when an error occurs. PAPER OUT LED On when the printer is out, or nearly out, of roll paper. Flashes during standby for printing a self-test or running a macro (when the macro execution command is used). 1. For rolls from 61 to 70 mm {2.4 to 2.76"}, break tabs off the spacer. (For 38 to 61 mm paper, you can leave tabs on.) 2 - EPSON TM-L90 1/02
-
 1
1 -
 2
2 -
 3
3 -
 4
4 -
 5
5
 |
 |
