Epson ELPDC20 User Manual - Page 12
Interface, Composite, Power, Computer In, Display Out, USB-A, Mic - power supply
 |
View all Epson ELPDC20 manuals
Add to My Manuals
Save this manual to your list of manuals |
Page 12 highlights
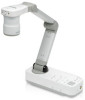
Document Camera Parts 12 D[ [ Name Function button When the menu screen is displayed, pressing these buttons selects menu items and setting values. ] [ ] button Adjusts the image Brightness. [Enter] button E [Esc] button F [Zoom] button [z] [x] G [Focus] button H [ ] button I [ ] button When the menu is displayed, pressing this button confirms the current item. Stops the current function. When the menu is displayed, pressing this button moves to the previous menu level. Enlarges or reduces the image without changing the projection size. s p.26 Press the [Focus] button to automatically focus the image. The unit cannot focus on objects that are approximately 10 cm (4 inches) or less from the surface of the camera lens. If you press and release the button, the image is frozen. If you press and hold the button, the still image is saved. s p.38 Starts and stops video recording. Interface Name A Composite port B Power (AC adapter) port C Computer In port D Display Out port E HDMI port F USB-A (TypeA) port G USB-B (TypeB) port H Mic In port Function Outputs composite video signals to a projector or external monitor. Connects the supplied power cord and adapter. Inputs image signals from a computer. Outputs image signals to a projector. Outputs image signals to a video device or computer that is compatible with HDMI signal. Lets you annotate live images by connecting a commercially available USB mouse. s p.32 Lets you save and display images on a USB drive. Connects the document camera to a computer via the supplied USB cable when using the included software. Connects a commercially available microphone when recording audio and video.
-
 1
1 -
2
-
3
-
4
-
5
-
6
-
 7
7 -
 8
8 -
 9
9 -
 10
10 -
 11
11 -
 12
12 -
 13
13 -
 14
14 -
 15
15 -
 16
16 -
 17
17 -
18
-
19
-
20
-
21
-
22
-
23
-
24
-
25
-
26
-
27
-
28
-
29
-
30
-
31
-
32
-
33
-
34
-
35
-
36
-
37
-
38
-
39
-
40
-
41
-
42
-
43
-
44
-
45
-
46
-
47
-
48
-
49
-
50
-
51
-
52
-
53
-
54
-
55
-
56
-
57
-
58
-
59
-
60
-
61
-
62
-
63
-
64
-
65
-
66
-
67
-
68
-
69
-
70
-
71
-
72
-
73
-
74
-
75
-
76
-
77
-
78
-
79
-
80
-
81
-
82
-
83
 |
 |
