Epson P3000 Product Support Bulletin(s) - Page 7
Setting The Projector For A Serial Connection - change drive
 |
UPC - 010343860476
View all Epson P3000 manuals
Add to My Manuals
Save this manual to your list of manuals |
Page 7 highlights
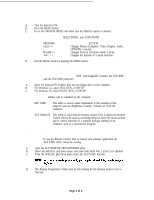
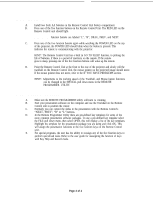
SETTING THE PROJECTOR FOR A SERIAL CONNECTION A Turn the projector ON. B. Press the MENU button. C. Go to the OPTIONS MENU and make sure the SERIAL option is checked HINT!: Changing MENUS, SELECTIONS, and FUNCTIONS PRESSING sync-/+ Bright-/+ Vol. - / + ACTION Changes Menus (Computer, Video, Display, Audio, OPTIONS, Custom). Changes between selections within a menu. Changes the function of a menu selection. D. Exit the MENU mode by pressing the MENU button. INSTALLING TEE PC UTILITIES SOFTWARE HINT!: The ELP UTILITIES software is NOT interchangeable between the ELP-3000 and the ELP-3300 projectors A. Insert the projector PC Utilities disk into the floppy drive on the computer. B. For Windows 3.x, select FILE, RUN, A:\SETUP. C. For Windows 95, select START, RUN, A:\SETUP HINT!: Two utilities will be installed on the computer: ELP LINK This utility is used to make adjustments to the operation of the projector such as: Brightness, Contrast, Volume etc, from the computer. ELP REMOTE This utility is used with the Remote Control Unit. It allows the Remote Control Unit to be used as a pointing device to move the mouse pointer and to control functions of a software package running on the computer, such as a presentation program. RUNNING TEE ELP REMOTE PROGRAMME R UTILITY HINT!: To use the Remote Control Unit to control your software application the ELP LINK utility cannot be running. A. Open the ELP REMOTE PROGRAMMER utility. B. Select the SPECIAL pull down menu, and make sure Serial Port 1 (Com 1) is checked. C. From the SPECIAL pull down menu select the ACTIVATE function. D. The Remote Programmer Utility must be left running for the Remote Control Unit to function. Page 2 of 4
-
 1
1 -
 2
2 -
 3
3 -
 4
4 -
 5
5 -
 6
6 -
 7
7 -
 8
8 -
 9
9
 |
 |