Epson PPC650 User Manual - Page 21
Formatting the USB CompactFlash Card, PLAYBACK, SELECT, Reformat
 |
UPC - 010343821101
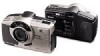
View all Epson PPC650 manuals
Add to My Manuals
Save this manual to your list of manuals |
Page 21 highlights
Formatting the USB CompactFlash Card Before you use your camera for the first time, you need to format your USB CompactFlash card so it can store your pictures. After that, you only need to format the card if a message appears on the LCD monitor instructing you to do so or if you want to quickly erase all the pictures it contains. Make sure you installed the USB CompactFlash card in the camera (as described on page 1-2), and set the camera's date and time (as described on page 1-5), then follow these steps: 4 Press the or button until Reformat is highlighted, then press the SELECT button. A warning message appears. 5 Press the SELECT button again to format the card and return to the Photo Control menu. 6 Press BACK until you return to normal playback mode. NOTE Your USB CompactFlash card works with any ATA-compatible digital camera, such as EPSON's PhotoPC 600, 700, or 750Z cameras. 1 On the back of the camera, set the monitor switch to PLAYBACK (as shown to the left). 2 Press the SELECT button to display the LCD monitor menus. If you have problems formatting or using your CompactFlash card, contact Lexar Media, as described on page 9-10. 3 Press the or button until you see the Photo Control menu. Then press the SELECT button to display the menu options, as shown below: A Photo Control Erase Lock B Reformat Getting Started 1-7
-
 1
1 -
2
-
3
-
4
-
5
-
6
-
7
-
8
-
9
-
10
-
11
-
12
-
13
-
14
-
15
-
 16
16 -
 17
17 -
 18
18 -
 19
19 -
 20
20 -
 21
21 -
 22
22 -
 23
23 -
 24
24 -
 25
25 -
 26
26 -
27
-
28
-
29
-
30
-
31
-
32
-
33
-
34
-
35
-
36
-
37
-
38
-
39
-
40
-
41
-
42
-
43
-
44
-
45
-
46
-
47
-
48
-
49
-
50
-
51
-
52
-
53
-
54
-
55
-
56
-
57
-
58
-
59
-
60
-
61
-
62
-
63
-
64
-
65
-
66
-
67
-
68
-
69
-
70
-
71
-
72
-
73
-
74
-
75
-
76
-
77
-
78
-
79
-
80
-
81
-
82
-
83
-
84
-
85
-
86
-
87
-
88
-
89
-
90
-
91
-
92
-
93
-
94
-
95
-
96
-
97
-
98
-
99
-
100
-
101
-
102
-
103
-
104
-
105
-
106
-
107
-
108
-
109
-
110
-
111
-
112
-
113
-
114
-
115
-
116
-
117
-
118
-
119
-
120
-
121
-
122
-
123
-
124
-
125
-
126
-
127
-
128
-
129
-
130
-
131
-
132
-
133
-
134
-
135
-
136
-
137
-
138
-
139
-
140
-
141
-
142
-
143
-
144
-
145
-
146
-
147
-
148
-
149
-
150
-
151
-
152
-
153
-
154
-
155
-
156
-
157
-
158
 |
 |
