Epson Perfection 1270 Start Here - Page 1
Epson Perfection 1270 Manual
 |
View all Epson Perfection 1270 manuals
Add to My Manuals
Save this manual to your list of manuals |
Page 1 highlights
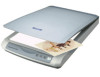
Start Here Epson® Perfection® 1270 Please read these instructions before using the product. Unpack Your Scanner 1 Make sure you have everything for your Epson scanner: 2 Remove the yellow sticker. Remove 3 Connect the power cord and AC adapter, as shown. Then connect the AC adapter to the scanner and plug the other end of the power cord into a grounded electrical outlet. Perfection 1270 Power cord and AC adapter Software USB cable 2 Remove all packing tape, but leave the large sticker in place. IMPORTANT! Leave the sticker in place until you are instructed to remove it Install the Software Wait! Install your software before connecting the scanner to your computer. 1 Insert the scanner software CD-ROM in the CD-ROM or DVD drive. If the installer does not start automatically, do the following: • Windows XP: Start > My Computer > Epson. • Windows 98, Me or 2000: My Computer > Epson > Epson. 2 Follow the on-screen instructions to install the scanner software and Reference Guide. Note that EPSON Smart Panel™ installs in several steps. Note: If you're using Windows 98 and you see a message asking if you'd like to restart your system, select No, I will restart my system later. 3 At the end of the installation, click Exit. 4 When you see the Product Registration screen, register your scanner on-line as instructed. Connect the Scanner 1 Remove the sticker covering the transportation lock on the bottom of the scanner. Then slide the lock to the unlock position, as shown below. Caution: Do not turn the scanner over; this may damage the scanner. Caution: • It is not possible to change the AC adapter's input or output voltage. If the label on the AC adapter does not show the correct voltage, contact your dealer. Do not plug in the power cord. • Whenever you unplug the scanner, wait at least 10 seconds before plugging it back in to avoid damaging it. The scanner turns on and the ] Start button light flashes green. It stops flashing and turns green when the scanner is ready. 4 Plug the USB cable to the scanner, then to your computer as shown below. Note: Your scanner may not work correctly if you use a USB cable other than the one supplied by Epson or if you connect your scanner to a hub system. 5 Restart your system, then remove the CD-ROM. Scanner Basics Your First Scan The ] Start button on your scanner opens Smart Panel. Here's how you can use this button and Smart Panel to scan photos and save them as files. 1 Raise the scanner cover and place your photo face down on the glass. Place the document against the front edge of the scanner glass and center it on the arrow, as shown. Then close the cover. 2 Press the ] Start button on your scanner. Note: If you see a message the first time you press the ] Start button, select EPSON Smart Panel for Scanner, click Always use this program for this action, then click OK.
-
 1
1 -
 2
2
 |
 |
