Epson Perfection V750 Pro Using Your Epson Fluid Mount Accessory - Page 2
area. Use the grid to align your - accessories
 |
View all Epson Perfection V750 Pro manuals
Add to My Manuals
Save this manual to your list of manuals |
Page 2 highlights
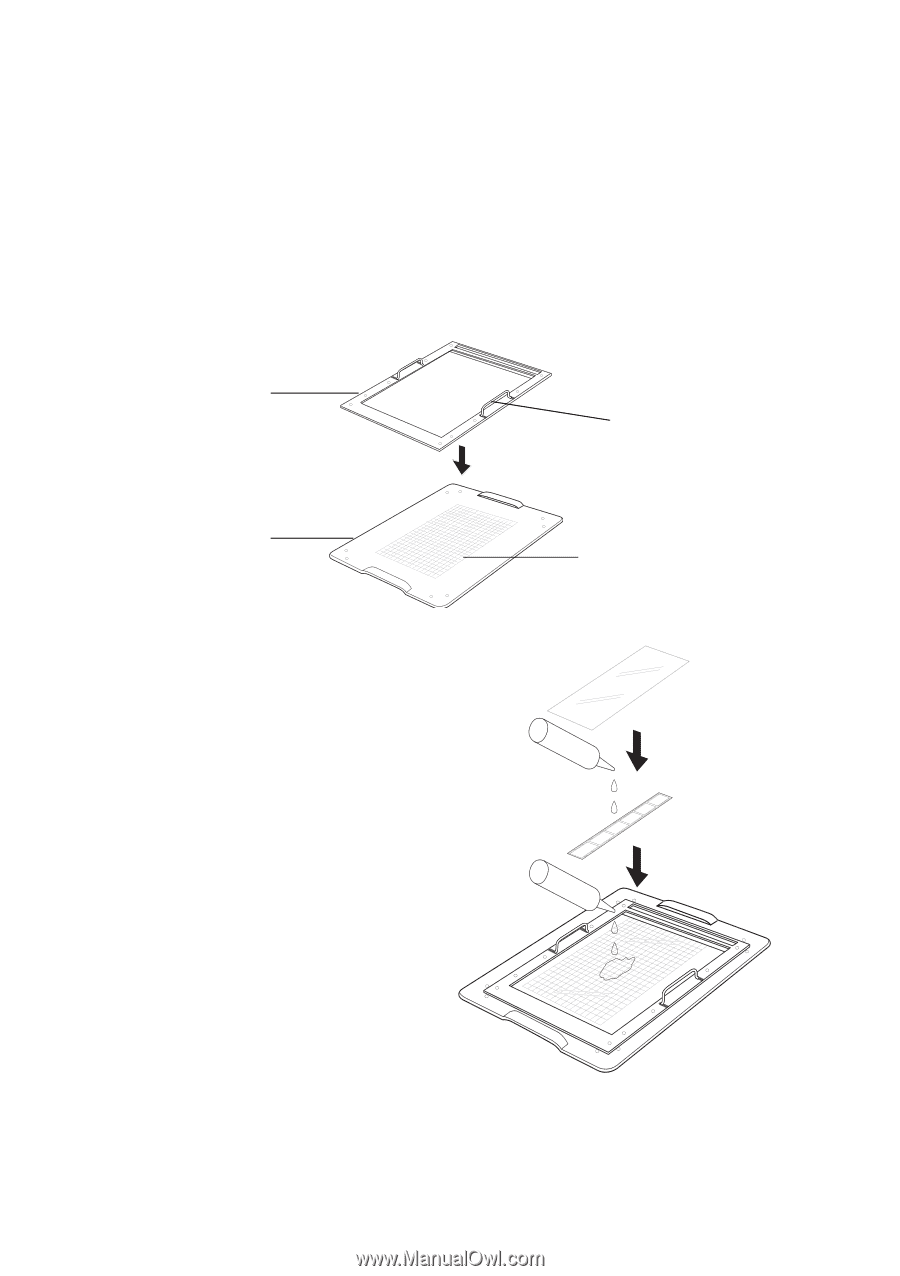
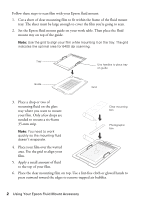
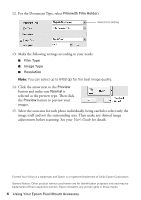
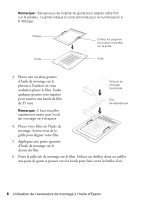
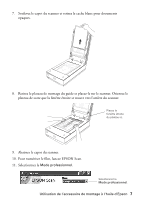
Follow these steps to scan film with your Epson fluid mount: 1. Cut a sheet of clear mounting film to fit within the frame of the fluid mount tray. The sheet must be large enough to cover the film you're going to scan. 2. Set the Epson fluid mount guide on your work table. Then place the fluid mount tray on top of the guide. Note: Use the grid to align your film while mounting it on the tray. The grid indicates the optimal area for 6400 dpi scanning. Tray Use handles to place tray on guide Guide Grid 3. Place a drop or two of mounting fluid on the glass tray where you want to mount your film. Only a few drops are needed to mount a six-frame 35-mm strip. Note: You need to work quickly so the mounting fluid doesn't evaporate. Clear mounting film Photographic film 4. Place your film over the wetted area. Use the grid to align your film. 5. Apply a small amount of fluid to the top of your film. 6. Place the clear mounting film on top. Use a lint-free cloth or gloved hands to press outward toward the edges to remove trapped air bubbles. 2 Using Your Epson Fluid Mount Accessory
-
 1
1 -
 2
2 -
 3
3 -
 4
4 -
 5
5 -
 6
6 -
 7
7 -
 8
8
 |
 |