Epson PictureMate Deluxe Viewer Edition Product Information Guide - Page 4
Choosing Photos to Print, PictureMate Deluxe Viewer Edition - review
 |
View all Epson PictureMate Deluxe Viewer Edition manuals
Add to My Manuals
Save this manual to your list of manuals |
Page 4 highlights
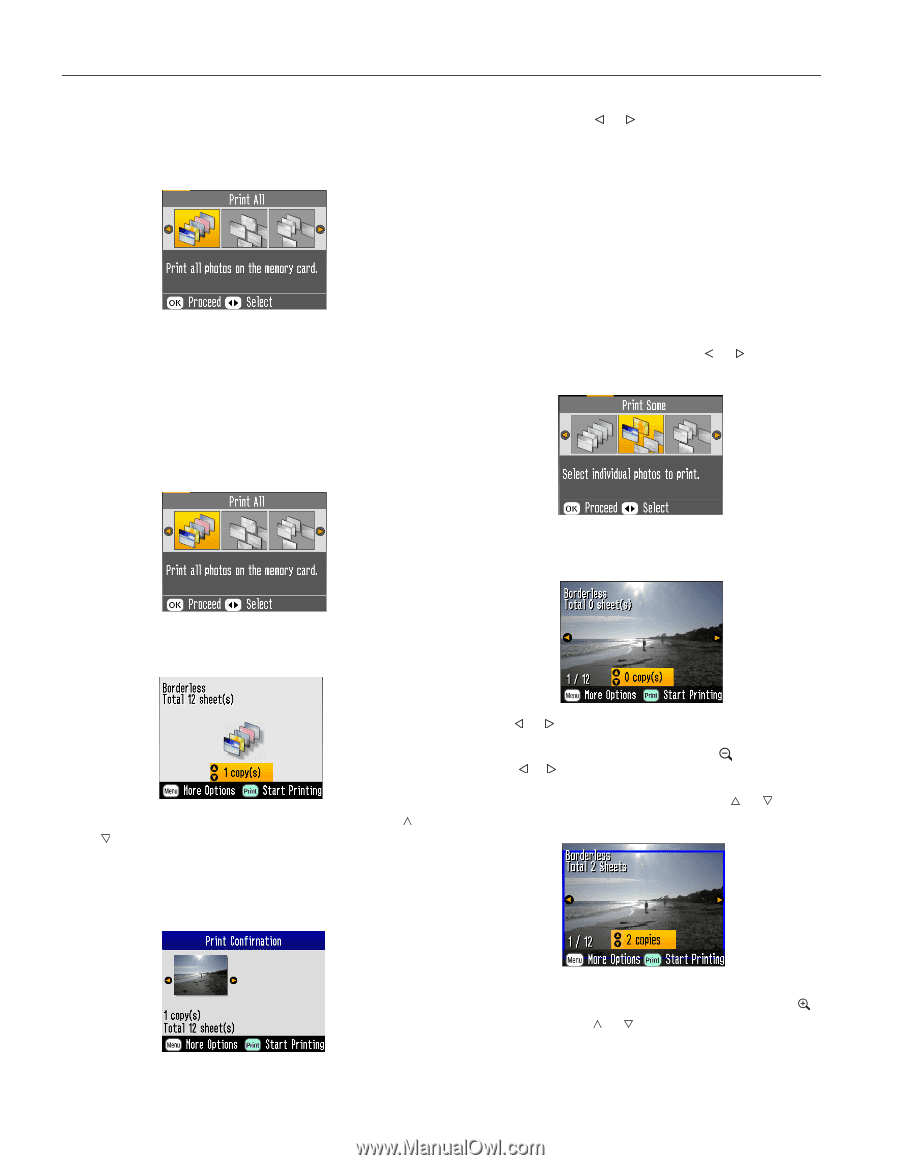
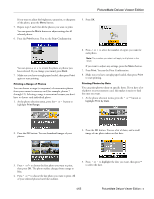
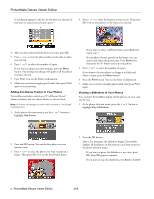
PictureMate Deluxe Viewer Edition Choosing Photos to Print PictureMate's photo viewer screen makes it easy to select the photos you want to print. Note: When you press the Print button, PictureMate shows you a screen confirming the number of copies and layout. If you don't want to see the confirmation screen each time you print, you can turn it off. See Using PictureMate Without a Computer for instructions. Printing All Photos When you turn on PictureMate, you see the photo selection menu on the screen. The red or orange bar at the top of the screen indicates the currently selected option. You can press press or to review your photos. If you change your mind, press the Back button. 4. Make sure you have enough paper loaded, then press Print again to start printing. Note: If your card has more than 20 photos, you will need to reload paper while printing. Load a maximum of 20 sheets at a time. When you see a message that paper is out, load more paper and press OK to continue printing. If you need to cancel printing, press Cancel. Printing Individual Photos You can easily view the photos on your memory card and select just the ones you want to print. 1. At the photo selection menu, press the or button to highlight Print Some. 2. Press the OK button. You see the first photo on your memory card: 1. Make sure Print All is highlighted, then press the OK button. 2. If you want more than 1 copy of each picture, press the or button to select the number of copies. You can also press the Menu button to adjust settings if necessary. 3. Press the Print button. You see the Print Confirmation: 3. Press or to view the photos you want to print. Note: To view 9 photos at a time, press the button. Then press or to select the photos you want. 4. When you see a photo that you want, press or to choose the number of copies to print. 4 - PictureMate Deluxe Viewer Edition You see a blue box around your photo, indicating the area that will print. If you want to adjust this area, press the button. Then press or to move the box. Press OK, then press OK again. 4/05
-
 1
1 -
 2
2 -
 3
3 -
 4
4 -
 5
5 -
 6
6 -
 7
7 -
 8
8 -
 9
9 -
 10
10
 |
 |