Epson PictureMate Deluxe Using PictureMate Without a Computer - Page 22
Adding the Date and/or Time, Black & White, Sepia, Print, Stamp
 |
View all Epson PictureMate Deluxe manuals
Add to My Manuals
Save this manual to your list of manuals |
Page 22 highlights
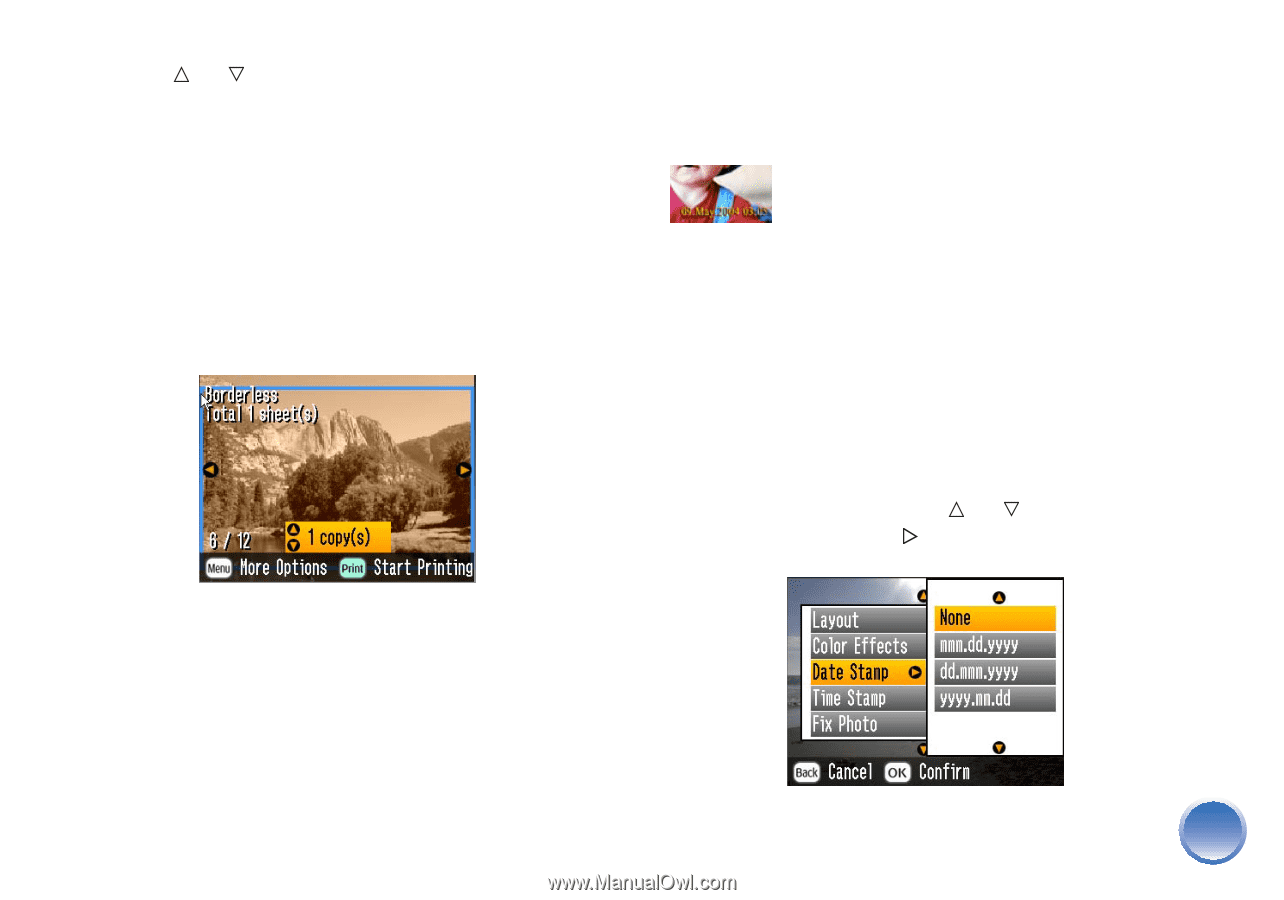
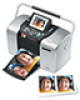
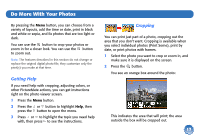
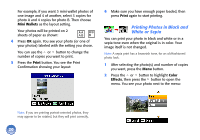
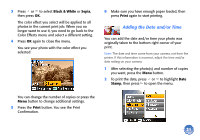
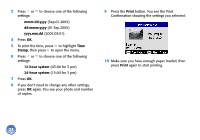
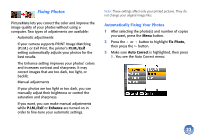
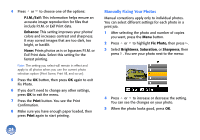
3 Press or to select Black & White or Sepia, then press OK. The color effect you select will be applied to all photos in the current print job. When you no longer want to use it, you need to go back to the Color Effects menu and select a different setting. 4 Press OK again to close the menu. You see your photo with the color effect you selected: 6 Make sure you have enough paper loaded, then press Print again to start printing. Adding the Date and/or Time You can add the date and/or time your photo was originally taken to the bottom right corner of your print. Note: The date and time come from your camera, not from the printer. If this information is incorrect, adjust the time and/or date setting on your camera. 1 After selecting the photo(s) and number of copies you want, press the Menu button. 2 To print the date, press or to highlight Date Stamp, then press to open the menu. You can change the number of copies or press the Menu button to change additional settings. 5 Press the Print button. You see the Print Confirmation. 21
-
 1
1 -
2
-
3
-
4
-
5
-
6
-
7
-
8
-
9
-
10
-
11
-
12
-
13
-
14
-
15
-
16
-
 17
17 -
 18
18 -
 19
19 -
 20
20 -
 21
21 -
 22
22 -
 23
23 -
 24
24 -
 25
25 -
 26
26 -
 27
27 -
28
-
29
-
30
-
31
-
32
-
33
-
34
-
35
-
36
-
37
-
38
-
39
-
40
-
41
-
42
-
43
-
44
-
45
-
46
-
47
-
48
-
49
-
50
-
51
-
52
-
53
-
54
-
55
-
56
-
57
-
58
-
59
-
60
-
61
-
62
-
63
-
64
-
65
-
66
-
67
-
68
-
69
-
70
-
71
-
72
-
73
-
74
-
75
-
76
-
77
-
78
-
79
 |
 |