Epson PowerLite 1760W Operation Guide - EasyMP Network Projection - Page 28
For Mac OS, Applications folder to start EasyMP Network Projection.
 |
View all Epson PowerLite 1760W manuals
Add to My Manuals
Save this manual to your list of manuals |
Page 28 highlights
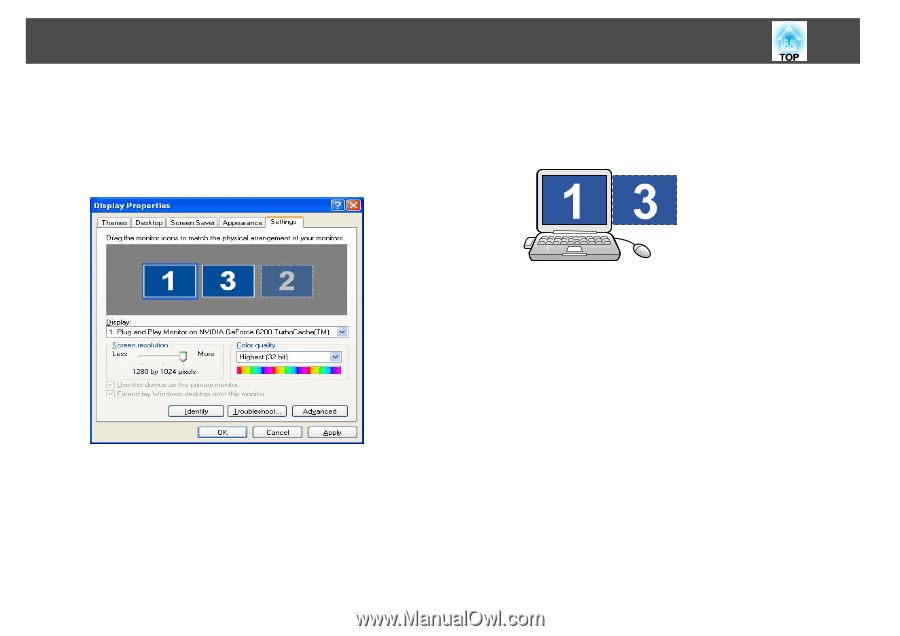
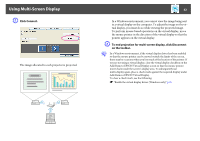
Using Multi-Screen Display F Drag the displayed monitor icon and place it where desired. Here, the actual monitor (1) is placed on the left, while the virtual monitor (3) is placed on the right. When the PC has multiple display output terminals, the numbers assigned to the virtual terminals will be sequential to those of the physical terminals. 28 • For the Screen Resolution settings, see the following. s "Supported Resolutions" p.38 When the monitor icon is arranged, a virtual display is connected as the image like below. q • When an external monitor is connected as a secondary monitor, the image for that screen cannot be projected. • Depending on the hardware, the number of the secondary monitor may be other than "2". When placing the monitor icons, click the icon to check that the display monitor type is not the secondary monitor. G Click OK to close the Display Properties screen. Allocate the projecting images next. s "Allocating the Image to be Projected" p.30 For Mac OS A Double-click EasyMP Network Projection from the Applications folder to start EasyMP Network Projection. B Select Quick Connection Mode or Advanced Connection Mode, and then click OK.
-
 1
1 -
2
-
3
-
4
-
5
-
6
-
7
-
8
-
9
-
10
-
11
-
12
-
13
-
14
-
15
-
16
-
17
-
18
-
19
-
20
-
21
-
22
-
 23
23 -
 24
24 -
 25
25 -
 26
26 -
 27
27 -
 28
28 -
 29
29 -
 30
30 -
 31
31 -
 32
32 -
 33
33 -
34
-
35
-
36
-
37
-
38
-
39
-
40
-
41
-
42
-
43
-
44
-
45
-
46
-
47
-
48
-
49
-
50
 |
 |