Epson PowerLite 1770W User's Guide - Page 36
Connecting to a Computer for Sound, Connecting to Video Sources, Related references, TypeB, Audio
 |
View all Epson PowerLite 1770W manuals
Add to My Manuals
Save this manual to your list of manuals |
Page 36 highlights
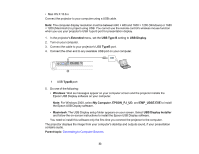
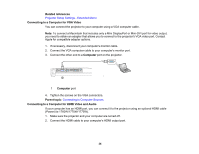
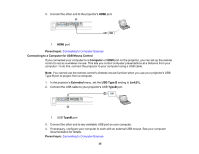
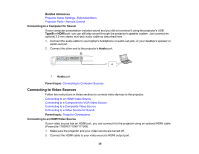
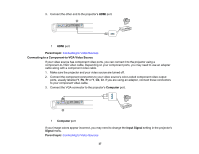
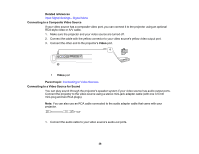
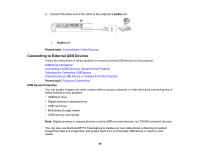
Related references Projector Setup Settings - Extended Menu Projector Parts - Remote Control Connecting to a Computer for Sound If your computer presentation includes sound and you did not connect it using the projector's USB TypeB or HDMI port, you can still play sound through the projector's speaker system. Just connect an optional 3.5 mm stereo mini-jack audio cable as described here. 1. Connect the audio cable to your laptop's headphone or audio-out jack, or your desktop's speaker or audio-out port. 2. Connect the other end to the projector's Audio port. 1 Audio port Parent topic: Connecting to Computer Sources Connecting to Video Sources Follow the instructions in these sections to connect video devices to the projector. Connecting to an HDMI Video Source Connecting to a Component-to-VGA Video Source Connecting to a Composite Video Source Connecting to a Video Source for Sound Parent topic: Projector Connections Connecting to an HDMI Video Source If your video source has an HDMI port, you can connect it to the projector using an optional HDMI cable (PowerLite 1760W/1770W/1775W). 1. Make sure the projector and your video source are turned off. 2. Connect the HDMI cable to your video source's HDMI output port. 36
-
 1
1 -
2
-
3
-
4
-
5
-
6
-
7
-
8
-
9
-
10
-
11
-
12
-
13
-
14
-
15
-
16
-
17
-
18
-
19
-
20
-
21
-
22
-
23
-
24
-
25
-
26
-
27
-
28
-
29
-
30
-
 31
31 -
 32
32 -
 33
33 -
 34
34 -
 35
35 -
 36
36 -
 37
37 -
 38
38 -
 39
39 -
 40
40 -
 41
41 -
42
-
43
-
44
-
45
-
46
-
47
-
48
-
49
-
50
-
51
-
52
-
53
-
54
-
55
-
56
-
57
-
58
-
59
-
60
-
61
-
62
-
63
-
64
-
65
-
66
-
67
-
68
-
69
-
70
-
71
-
72
-
73
-
74
-
75
-
76
-
77
-
78
-
79
-
80
-
81
-
82
-
83
-
84
-
85
-
86
-
87
-
88
-
89
-
90
-
91
-
92
-
93
-
94
-
95
-
96
-
97
-
98
-
99
-
100
-
101
-
102
-
103
-
104
-
105
-
106
-
107
-
108
-
109
-
110
-
111
-
112
-
113
-
114
-
115
-
116
-
117
-
118
-
119
-
120
-
121
-
122
-
123
-
124
-
125
-
126
-
127
-
128
-
129
-
130
-
131
-
132
-
133
-
134
-
135
-
136
-
137
-
138
-
139
-
140
-
141
-
142
-
143
-
144
-
145
-
146
-
147
-
148
-
149
-
150
-
151
-
152
-
153
-
154
-
155
-
156
-
157
-
158
-
159
-
160
-
161
-
162
-
163
-
164
-
165
-
166
-
167
-
168
-
169
-
170
-
171
-
172
-
173
-
174
-
175
-
176
-
177
-
178
-
179
-
180
-
181
-
182
-
183
-
184
-
185
-
186
-
187
-
188
-
189
-
190
-
191
-
192
-
193
 |
 |
