Epson PowerLite 480 EasyMP Network Projection - Operations Guide - Page 25
Procedure Before Using the Multi-screen Display Function, Setting the Virtual Display, Function
 |
View all Epson PowerLite 480 manuals
Add to My Manuals
Save this manual to your list of manuals |
Page 25 highlights
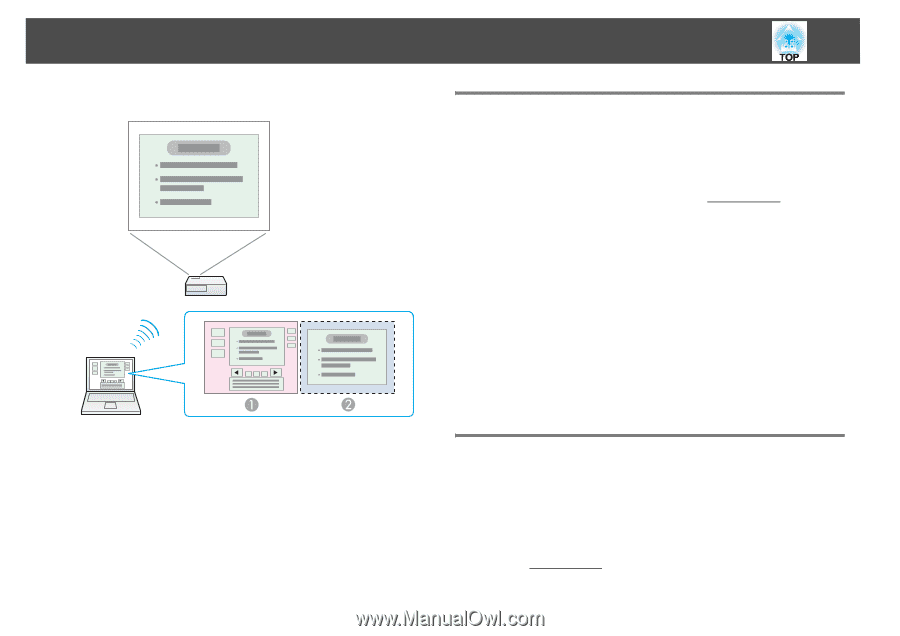
Using Multi-Screen Display 25 Arrangement example 2 Procedure Before Using the Multi-screen Display Function A Set the virtual display. s "Setting the Virtual Display" p.25 In a Windows environment, enable the virtual displayg driver as necessary. Also, for both Windows and Mac OS, set up the virtual display arrangement. B Allocate the image to be projected. s "Allocating the Image to be Projected" p.30 Open the file to be projected, and then move the screen to the virtual display according to the actual projection arrangement. C Project the allocated images. s "Projecting the Allocated Images" p.31 Allocate a virtual display number to a projector, and then start projection. A Actual monitor image PowerPoint file presenter tools B Image of virtual display Slide Show using a PowerPoint file Setting the Virtual Display This section explains the virtual display for arrangement example 1. s "Example of Adjusting the Virtual Display" p.24 Enable the virtual display driver (Windows only) Enable the virtual displayg driver. If you have already enabled the virtual display while installing EasyMP Network Projection, this operation is not necessary. Go to the following section.
-
 1
1 -
2
-
3
-
4
-
5
-
6
-
7
-
8
-
9
-
10
-
11
-
12
-
13
-
14
-
15
-
16
-
17
-
18
-
19
-
 20
20 -
 21
21 -
 22
22 -
 23
23 -
 24
24 -
 25
25 -
 26
26 -
 27
27 -
 28
28 -
 29
29 -
 30
30 -
31
-
32
-
33
-
34
-
35
-
36
-
37
-
38
-
39
-
40
-
41
-
42
-
43
-
44
-
45
-
46
-
47
-
48
-
49
-
50
 |
 |