Epson PowerLite 735c Start Here Card - Page 2
Install the software, Start EasyMP, Con the projector, Con the computer, Run NS - wireless projector
 |
View all Epson PowerLite 735c manuals
Add to My Manuals
Save this manual to your list of manuals |
Page 2 highlights
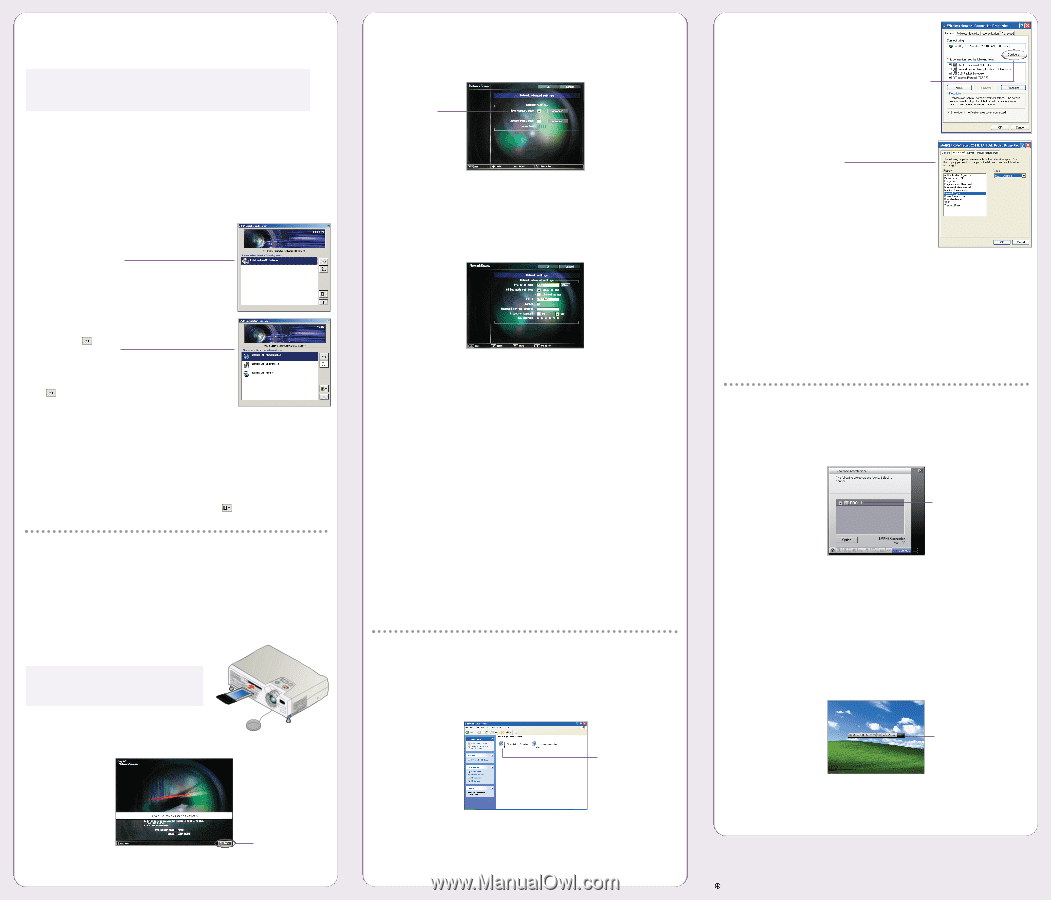
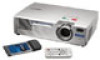
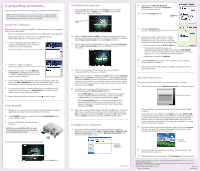
If projecting wirelessly... Follow the steps in this section to project over an 802.11b wireless network. NOTE: These instructions tell you how to connect a single computer to the projector using Ad Hoc mode. To connect multiple computers using Infrastructure mode, see your User's Guide. Install the software Before installing the projector's EasyMPTM software, make sure your computer meets these requirements: • Must be running Windows 98, 2000, Me, or XP (Macintosh not supported) • Must have an 802.11b network card or transmitter already installed (to project over a wireless network) 1 Insert the EasyMP software CD-ROM in your computer's CD-ROM drive and wait a few seconds for it to be recognized. You see this screen: 2 Click the button to advance to the next screen. 3 Make sure the option to install EMP NS Connection is highlighted, then click the button. Follow the instructions on the screen to finish installing it. 4 If you want to use your projector's memory card feature, select the option for EMP SlideMaker2 and install it the same way. For more information on using a memory card, see your User's Guide. 5 If you want to be able to monitor the projector remotely from this computer, select the option for EMP Monitor to install it on your system. See your User's Guide for details. 6 When done installing the software, click the button to exit. Start EasyMP 1 Make sure you've turned on the projector and adjusted the image as described in sections 1 and 2 on the front of this sheet. 2 Select EasyMP as the source by pressing the Comp/EasyMP button on the remote control. 3 Insert the EPSON 802.11b card face-up as shown. NOTE: Use only the EPSON 802.11b card. Other brands may not be compatible and are not guaranteed to work. Once the card is inserted, you see a screen like this: Config button Configure the projector 1 On the EasyMP Network Screen, the Config button is already highlighted. To select Config, press the Enter button on the remote control. You see this screen: Easy connect mode 2 Make sure Easy connect mode is selected, as shown above. If not, use the arrow buttons on the remote control to highlight the checkbox next to Easy connect mode, then press Enter to select it. 3 Use the arrow buttons on the remote control to highlight Advanced (next to Easy connect mode), then press Enter to select it. You see this screen: 4 Make sure the projector has a unique name, such as PROJ 1, so you can identify it from your computer. If you need to rename it, highlight the Clear button next to Projector name, then press Enter to clear the text box. Then highlight the text box and press Enter. Use the up and down arrows to select individual characters (if you want to insert a blank space, it comes before capital 'A'); use the right arrow to move to the next character position. When done typing, press Enter. 5 To enable your computer to find the projector on the network, select the appropriate Ad hoc mode settings: • Select ESSID ad hoc if your computer's network card supports an SSID or ESSID identifier. Then enter a name (for example, "CONF ROOM") in the ESSID text box and press Enter. • Select Channel ad hoc if your network card supports using channels instead of ESSID names to identify devices on the network. Then select a channel number in the Channel text box and press Enter. 6 When done making these settings, highlight the OK button at the top of the screen (use the arrow buttons on the remote control or press ESC to highlight it), then press Enter. Highlight the OK button again and press Enter to return to the main EasyMP Network Screen. Configure the computer 1 Access your wireless network Properties window. For example, in Windows XP you would click Start > Control Panel > Network and Internet Connections. Then click the Network Connections icon. You see a screen similar to this: Right-click and select Properties continued 2 Right-click the Wireless Network Connection icon and select Properties. You see a screen like this. 3 Click the Configure button. Configure button 4 Click the Advanced tab. You see a screen like this: 5 Check your network card's device settings. (Depending on the type of card or wireless transmitter you're using, some of the setting names may be different from those listed here.) • Set the network type to 802.11 Ad Hoc. • Set the SSID to match the name you assigned to the projector's ESSID-for example, CONF ROOM. (If your network card uses channel mode instead, set the correct channel, 1 to 11, so it matches that of the projector.) • Make sure encryption is Disabled. 6 Click the General tab to make sure the network card or wireless network device is enabled. 7 When done making these settings, click OK as needed to close any open dialog boxes. Run NS Connection Now you're ready to launch NS Connection and project wirelessly. 1 From the Start menu, select EMP NS Connection. You see this screen: Select your projector If the connection is working properly, you see your projector listed as shown. If you don't see your projector, click Option, then click Switch LAN. Verify that the correct wireless network device is selected. Sometimes another network device, such as an Ethernet card, may be selected instead. If you don't see your wireless device listed, but you're sure you've enabled it as described in "Configure the computer," you may need to restart your computer. 2 Once the name of your projector appears, select it and click Connect. You see your computer's image transmitted to the projector, and a floating control bar appears on the screen: Click here to minimize 3 If necessary, drag the control bar out of the way, or minimize it by clicking it as shown above. 4 When done with your presentation, click Disconnect on the control bar. EPSON is a registered trademark and EasyMP is a trademark of SEIKO EPSON CORPORATION. PowerLite is a registered trademark of Epson America, Inc. General Notice: Other product names are for identification purposes only and may be trademarks of their respective owners. EPSON disclaims any and all rights in those marks. Copyright © 2003 by Epson America, Inc. 1/03 CPD-15676 Printed on recycled paper. Printed in USA
-
 1
1 -
 2
2
 |
 |