Epson PowerLite 82c User's Guide - Page 40
Adjusting the Brightness, Correcting Computer Images, doesn't fit properly on the screen, press
 |
View all Epson PowerLite 82c manuals
Add to My Manuals
Save this manual to your list of manuals |
Page 40 highlights
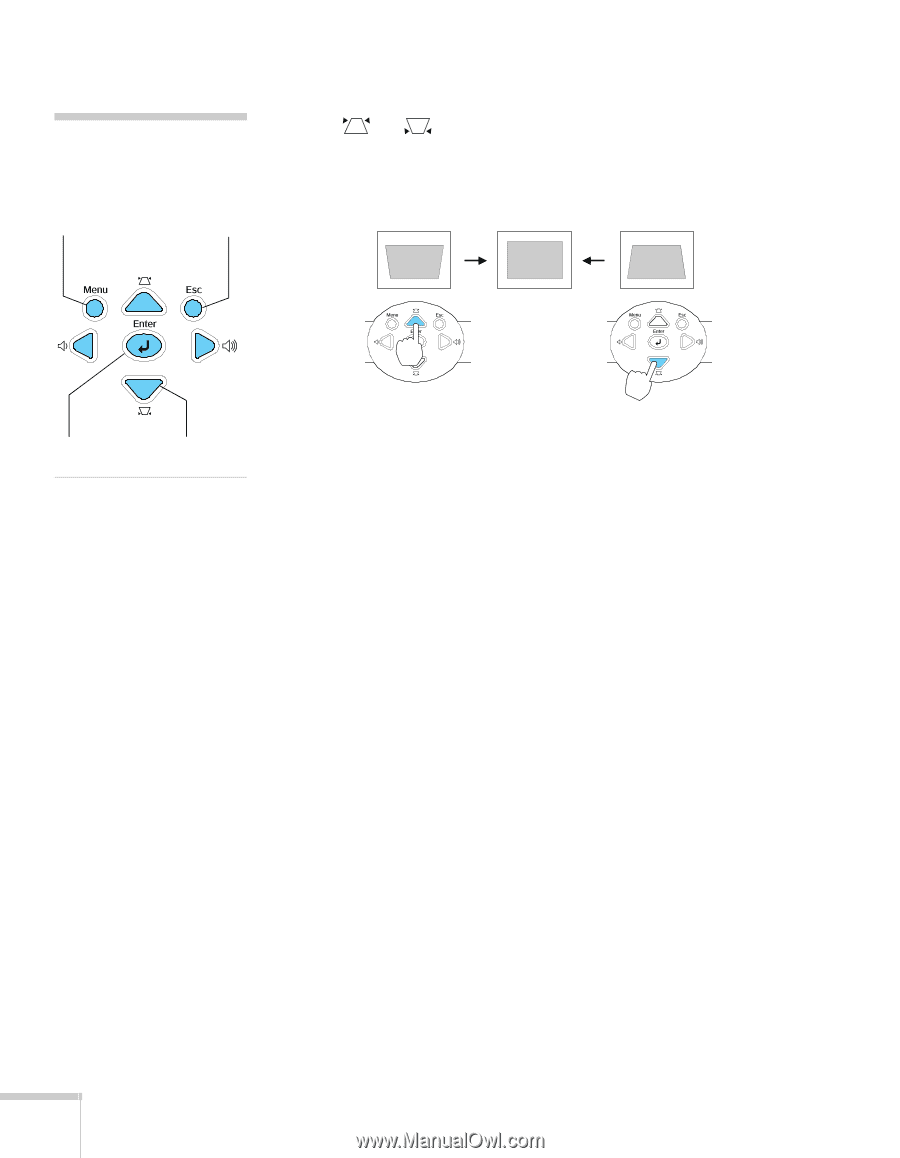
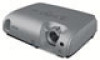
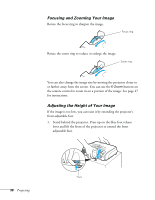
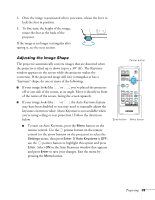
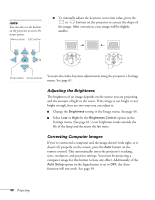
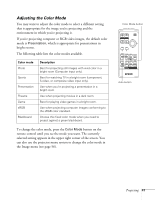
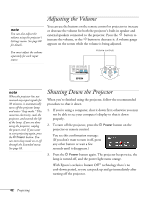
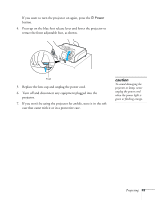
note You can also use the buttons on the projector to access the menu system: Menu button ESC button ■ To manually adjust the keystone correction value, press the or buttons on the projector to correct the shape of the image. After correction, your image will be slightly smaller. Enter button Arrow buttons You can also make keystone adjustments using the projector's Settings menu. See page 61. Adjusting the Brightness The brightness of an image depends on the source you are projecting and the amount of light in the room. If the image is too bright or not bright enough, here are two ways you can adjust it: ■ Change the Brightness setting in the Image menu. See page 56. ■ Select Low or High for the Brightness Control option in the Settings menu. (See page 61.) Low brightness mode extends the life of the lamp and decreases the fan noise. Correcting Computer Images If you've connected a computer and the image doesn't look right, or it doesn't fit properly on the screen, press the Auto button on the remote control. This automatically resets the projector's tracking, sync, resolution, and position settings. You must be projecting a computer image for this button to have any effect. Additionally, if the Auto Setup option in the Signal menu is set to OFF, the Auto function will not work. See page 59. 40 Projecting
-
 1
1 -
2
-
3
-
4
-
5
-
6
-
7
-
8
-
9
-
10
-
11
-
12
-
13
-
14
-
15
-
16
-
17
-
18
-
19
-
20
-
21
-
22
-
23
-
24
-
25
-
26
-
27
-
28
-
29
-
30
-
31
-
32
-
33
-
34
-
 35
35 -
 36
36 -
 37
37 -
 38
38 -
 39
39 -
 40
40 -
 41
41 -
 42
42 -
 43
43 -
 44
44 -
 45
45 -
46
-
47
-
48
-
49
-
50
-
51
-
52
-
53
-
54
-
55
-
56
-
57
-
58
-
59
-
60
-
61
-
62
-
63
-
64
-
65
-
66
-
67
-
68
-
69
-
70
-
71
-
72
-
73
-
74
-
75
-
76
-
77
-
78
-
79
-
80
-
81
-
82
-
83
-
84
-
85
-
86
-
87
-
88
-
89
-
90
-
91
-
92
-
93
-
94
-
95
-
96
-
97
-
98
-
99
-
100
-
101
-
102
-
103
-
104
-
105
-
106
-
107
-
108
-
109
-
110
-
111
-
112
-
113
 |
 |