Epson PowerLite Home Cinema 2045 User Manual - Page 34
Selecting the Connected USB Source, Disconnecting a USB Device or Camera From the Projector
 |
View all Epson PowerLite Home Cinema 2045 manuals
Add to My Manuals
Save this manual to your list of manuals |
Page 34 highlights
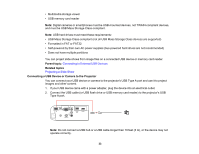
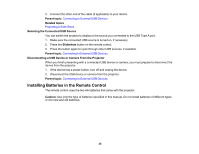
3. Connect the other end of the cable (if applicable) to your device. Parent topic: Connecting to External USB Devices Related topics Projecting a Slide Show Selecting the Connected USB Source You can switch the projector's display to the source you connected to the USB Type A port. 1. Make sure the connected USB source is turned on, if necessary. 2. Press the Slideshow button on the remote control. 3. Press the button again to cycle through other USB sources, if available. Parent topic: Connecting to External USB Devices Disconnecting a USB Device or Camera From the Projector When you finish presenting with a connected USB device or camera, you must prepare to disconnect the device from the projector. 1. If the device has a power button, turn off and unplug the device. 2. Disconnect the USB device or camera from the projector. Parent topic: Connecting to External USB Devices Installing Batteries in the Remote Control The remote control uses the two AA batteries that came with the projector. Caution: Use only the type of batteries specified in this manual. Do not install batteries of different types, or mix new and old batteries. 34
-
 1
1 -
2
-
3
-
4
-
5
-
6
-
7
-
8
-
9
-
10
-
11
-
12
-
13
-
14
-
15
-
16
-
17
-
18
-
19
-
20
-
21
-
22
-
23
-
24
-
25
-
26
-
27
-
28
-
 29
29 -
 30
30 -
 31
31 -
 32
32 -
 33
33 -
 34
34 -
 35
35 -
 36
36 -
 37
37 -
 38
38 -
 39
39 -
40
-
41
-
42
-
43
-
44
-
45
-
46
-
47
-
48
-
49
-
50
-
51
-
52
-
53
-
54
-
55
-
56
-
57
-
58
-
59
-
60
-
61
-
62
-
63
-
64
-
65
-
66
-
67
-
68
-
69
-
70
-
71
-
72
-
73
-
74
-
75
-
76
-
77
-
78
-
79
-
80
-
81
-
82
-
83
-
84
-
85
-
86
-
87
-
88
-
89
-
90
-
91
-
92
-
93
-
94
-
95
-
96
-
97
-
98
-
99
-
100
-
101
-
102
-
103
-
104
-
105
-
106
-
107
-
108
-
109
-
110
-
111
-
112
-
113
-
114
-
115
-
116
-
117
-
118
-
119
-
120
-
121
-
122
-
123
-
124
-
125
-
126
-
127
-
128
-
129
-
130
-
131
-
132
-
133
-
134
-
135
-
136
-
137
-
138
-
139
-
140
-
141
-
142
-
143
-
144
-
145
-
146
-
147
-
148
-
149
-
150
-
151
-
152
-
153
-
154
-
155
-
156
-
157
-
158
-
159
-
160
-
161
-
162
-
163
-
164
-
165
-
166
-
167
-
168
-
169
-
170
-
171
-
172
-
173
-
174
-
175
-
176
-
177
-
178
-
179
-
180
-
181
-
182
-
183
-
184
-
185
-
186
-
187
-
188
-
189
-
190
-
191
-
192
-
193
-
194
-
195
-
196
-
197
-
198
-
199
-
200
-
201
-
202
-
203
-
204
-
205
-
206
-
207
 |
 |
