Epson PowerLite Home Cinema 600 User Manual - Page 33
Connecting to External USB Devices, USB Device Projection, Audio, Parent topic
 |
View all Epson PowerLite Home Cinema 600 manuals
Add to My Manuals
Save this manual to your list of manuals |
Page 33 highlights
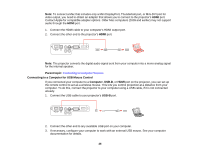
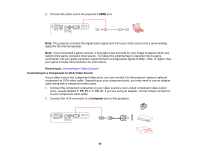
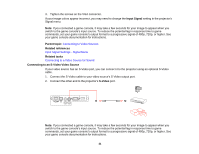
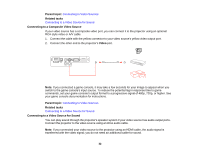
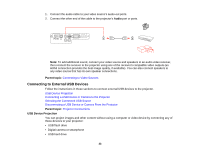
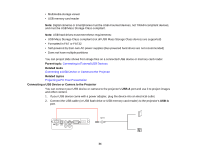
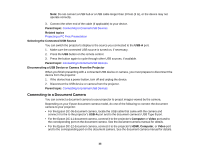
1. Connect the audio cable to your video source's audio-out ports. 2. Connect the other end of the cable to the projector's Audio port or ports. Note: To add additional sound, connect your video source and speakers to an audio video receiver, then connect the receiver to the projector using one of the receiver's compatible video outputs (an HDMI connection provides the best image quality, if available). You can also connect speakers to any video source that has its own speaker connections. Parent topic: Connecting to Video Sources Connecting to External USB Devices Follow the instructions in these sections to connect external USB devices to the projector. USB Device Projection Connecting a USB Device or Camera to the Projector Selecting the Connected USB Source Disconnecting a USB Device or Camera From the Projector Parent topic: Projector Connections USB Device Projection You can project images and other content without using a computer or video device by connecting any of these devices to your projector: • USB flash drive • Digital camera or smartphone • USB hard drive 33
-
 1
1 -
2
-
3
-
4
-
5
-
6
-
7
-
8
-
9
-
10
-
11
-
12
-
13
-
14
-
15
-
16
-
17
-
18
-
19
-
20
-
21
-
22
-
23
-
24
-
25
-
26
-
27
-
 28
28 -
 29
29 -
 30
30 -
 31
31 -
 32
32 -
 33
33 -
 34
34 -
 35
35 -
 36
36 -
 37
37 -
 38
38 -
39
-
40
-
41
-
42
-
43
-
44
-
45
-
46
-
47
-
48
-
49
-
50
-
51
-
52
-
53
-
54
-
55
-
56
-
57
-
58
-
59
-
60
-
61
-
62
-
63
-
64
-
65
-
66
-
67
-
68
-
69
-
70
-
71
-
72
-
73
-
74
-
75
-
76
-
77
-
78
-
79
-
80
-
81
-
82
-
83
-
84
-
85
-
86
-
87
-
88
-
89
-
90
-
91
-
92
-
93
-
94
-
95
-
96
-
97
-
98
-
99
-
100
-
101
-
102
-
103
-
104
-
105
-
106
-
107
-
108
-
109
-
110
-
111
-
112
-
113
-
114
-
115
-
116
-
117
-
118
-
119
-
120
-
121
-
122
-
123
-
124
-
125
-
126
-
127
-
128
-
129
-
130
-
131
-
132
-
133
-
134
-
135
-
136
-
137
-
138
-
139
-
140
-
141
-
142
-
143
-
144
-
145
-
146
-
147
-
148
-
149
-
150
-
151
-
152
-
153
-
154
-
155
-
156
-
157
-
158
-
159
-
160
-
161
-
162
-
163
-
164
-
165
-
166
-
167
-
168
-
169
-
170
-
171
-
172
-
173
-
174
-
175
-
176
-
177
-
178
-
179
-
180
-
181
-
182
-
183
-
184
-
185
-
186
-
187
-
188
-
189
-
190
-
191
-
192
-
193
-
194
-
195
-
196
-
197
-
198
-
199
-
200
-
201
-
202
-
203
-
204
 |
 |
