Epson PowerLite Pro G6570WU User Manual
Epson PowerLite Pro G6570WU Manual
 |
View all Epson PowerLite Pro G6570WU manuals
Add to My Manuals
Save this manual to your list of manuals |
Epson PowerLite Pro G6570WU manual content summary:
- Epson PowerLite Pro G6570WU | User Manual - Page 1
PowerLite® Pro G6070W/G6170/G6270W/G6470WU/ G6570WU/G6770WU/G6870/G6970WU User's Guide - Epson PowerLite Pro G6570WU | User Manual - Page 2
- Epson PowerLite Pro G6570WU | User Manual - Page 3
Contents PowerLite Pro G6070W/G6170/G6270W/G6470WU/G6570WU/G6770WU/ G6870/G6970WU User's Guide ...11 Introduction to Your Projector ...12 Projector Features...12 Product Box Contents...13 Additional Components ...15 Optional Equipment and Replacement Parts 15 Warranty and Registration - Epson PowerLite Pro G6570WU | User Manual - Page 4
Network Projection ...60 Installing the Wireless LAN Module 61 Using Quick Wireless Connection (Windows Only 63 Selecting Wireless Network Settings Manually 65 Wireless LAN Menu Settings ...68 Selecting Wireless Network Settings in Windows 69 Selecting Wireless Network Settings in OS X 70 - Epson PowerLite Pro G6570WU | User Manual - Page 5
SNMP 80 Selecting Other Network Settings...81 Controlling a Networked Projector Using a Web Browser 83 Crestron RoomView Support...85 Setting Up Crestron RoomView Support 85 Controlling a Networked Projector Using Crestron RoomView 87 Using Basic Projector Features ...89 Turning On the Projector - Epson PowerLite Pro G6570WU | User Manual - Page 6
Image Aspect Ratio ...129 Changing the Image Aspect Ratio 130 Available Image Aspect Ratios ...130 Color Mode...131 Changing the Color Mode...132 Available Color Modes...132 Turning On Auto Iris...133 Controlling the Volume with the Volume Buttons 134 Setting the Date and Time...134 Adjusting - Epson PowerLite Pro G6570WU | User Manual - Page 7
Viewing 3D Images ...162 Saving Settings to Memory and Using Saved Settings 162 Saving a Scheduled Event ...163 Viewing Scheduled Events ...164 Editing a Scheduled Event...165 Copying Menu Settings Between Projectors 166 Saving Settings to a USB Flash Drive 167 Transferring Settings From a USB - Epson PowerLite Pro G6570WU | User Manual - Page 8
Help Displays ...217 Solving Image or Sound Problems 218 Solutions When No Image Appears 218 Solutions When "No Signal" Message Appears 219 Displaying From a PC Laptop 219 Displaying From a Mac Laptop 220 Solutions When "Not Supported" Message Appears 220 Solutions When Only a Partial - Epson PowerLite Pro G6570WU | User Manual - Page 9
Supported Video Display Formats...238 Notices ...242 Recycling...242 Important Safety Information ...242 Important Safety Instructions...243 Restriction of Use ...246 FCC Compliance Statement...246 Trademarks ...247 Open Source Software License...247 Copyright Notice...294 A Note Concerning - Epson PowerLite Pro G6570WU | User Manual - Page 10
- Epson PowerLite Pro G6570WU | User Manual - Page 11
PowerLite Pro G6070W/G6170/G6270W/G6470WU/G6570WU/G6770WU/ G6870/G6970WU User's Guide Welcome to the PowerLite Pro G6070W/G6170/G6270W/G6470WU/G6570WU/G6770WU/G6870/G6970WU User's Guide. 11 - Epson PowerLite Pro G6570WU | User Manual - Page 12
of 1280 × 800 pixels (WXGA) PowerLite Pro G6170/G6870: Native resolution of 1024 × 768 pixels (XGA) PowerLite Pro G6470WU/G6570WU/G6770WU/G6970WU: Native resolution of 1920 × 1200 pixels (WUXGA) Flexible connectivity • Wired and wireless network support for projection, monitoring, and control via - Epson PowerLite Pro G6570WU | User Manual - Page 13
shut down • Support for Crestron RoomView network monitoring systems • Network message broadcast system to project timely messages to all networked projectors (Windows only) Note: The PowerLite Pro G6970WU projector with the standard lens is shown in most illustrations in this manual, unless noted - Epson PowerLite Pro G6570WU | User Manual - Page 14
3 Cable clip2 4 Remote control 5 Remote control batteries (two AA alkaline) 6 Power cord 7 VGA computer cable 8 Lens unit screw1 9 Projector documentation CD 10 Projector software CD (PowerLite Pro G6070W/G6170/G6270W/G6470WU/G6570WU/G6770WU) 14 - Epson PowerLite Pro G6570WU | User Manual - Page 15
Epson reseller. Note: Older Mac computers (2009 and earlier) may not support audio through the HDMI port. • To receive a DisplayPort signal, you need a compatible DisplayPort cable. • To receive an HDBaseT signal, you need a compatible 100Base-TX LAN cable. • To receive an SDI signal (PowerLite Pro - Epson PowerLite Pro G6570WU | User Manual - Page 16
projector: Option or part Genuine Epson replacement lamp (ELPLP76) Air filter (ELPAF43) Quick Wireless Connection USB key (ELPAP09; PowerLite Pro G6070W/G6170/G6270W/G6470WU/G6570WU/G6770WU) Wireless LAN module (ELPAP07; PowerLite Pro G6070W/G6170/G6270W/G6470WU/G6570WU/G6770WU) HDBaseT Transmitter - Epson PowerLite Pro G6570WU | User Manual - Page 17
comes with a basic warranty that lets you project with confidence. For details, see the warranty that came with your projector. In addition, Epson offers free Extra Care Road Service. In the unlikely event of an equipment failure, you won't have to wait for your unit to be repaired. Instead - Epson PowerLite Pro G6570WU | User Manual - Page 18
meetings in a network environment (PowerLite Pro G6070W/G6170/G6270W/G6470WU/G6570WU/G6770WU), see the EasyMP Multi PC Projection Operation Guide. • If you still need help after checking this manual and the sources listed above, you can use the Epson PrivateLine Support service to get help fast. For - Epson PowerLite Pro G6570WU | User Manual - Page 19
Note: The PowerLite G6970WU projector is shown in most illustrations in this manual, unless noted otherwise. Projector Parts - Front/Top Projector Parts - Rear Projector Parts - Interface Ports Projector Parts - Base Projector Parts - Control Panel Projector Parts - Remote Control - Epson PowerLite Pro G6570WU | User Manual - Page 20
release button 6 Remote receiver 7 Projector status lights 8 Wireless LAN indicator light (PowerLite Pro G6070W/G6170/G6270W/G6470WU/G6570WU/G6770WU) 9 Air filter/intake vent 10 Speaker (PowerLite Pro G6070W/G6170/G6270W/G6470WU/G6570WU/G6770WU) 11 Air filter cover latch 12 Cable cover 13 Vertical - Epson PowerLite Pro G6570WU | User Manual - Page 21
3 AC input port 4 Control panel 5 Cable clip slot Parent topic: Projector Part Locations Projector Parts - Interface Ports 1 Audio1 port 2 Computer port 3 BNC ports 4 Audio2 port 5 RS-232C port 6 Remote port 7 Audio L-R ports 8 Video port 9 S-Video port 10 Audio Out port 11 Monitor Out port 12 - Epson PowerLite Pro G6570WU | User Manual - Page 22
13 HDMI port 14 Audio3 port 15 HDBaseT port 16 Network LAN port 17 SDI port (PowerLite Pro G6970WU) 18 Service port Parent topic: Projector Part Locations Projector Parts - Base 22 - Epson PowerLite Pro G6570WU | User Manual - Page 23
1 Front adjustable foot 2 Rear feet 3 Screw holes for cable cover 4 Security cable attachment point 5 Mounting bracket holes 6 Screw hole for lens unit release button Parent topic: Projector Part Locations Projector Parts - Control Panel 1 Power button 2 Source Search button (searches for connected - Epson PowerLite Pro G6570WU | User Manual - Page 24
8 Esc button (cancels/exits functions) 9 Up arrow button and displays screen adjustment options 10 Menu button (accesses projector menu system) Parent topic: Projector Part Locations Related references Projector Light Status 24 - Epson PowerLite Pro G6570WU | User Manual - Page 25
Projector Parts - Remote Control 25 - Epson PowerLite Pro G6570WU | User Manual - Page 26
1 On button (turns power on) 2 Standby button (turns power off) 3 Source buttons (changes input source; some buttons may not function depending on the model) 4 Auto button (automatically adjusts position, tracking, and sync settings when projecting analog RGB signals from the Computer or BNC ports) - Epson PowerLite Pro G6570WU | User Manual - Page 27
27 Light button (lights up the buttons temporarily) 28 Indicator light (lights up when the remote control is in use) 29 Remote control signal emitter (emits remote control signals) Parent topic: Projector Part Locations 27 - Epson PowerLite Pro G6570WU | User Manual - Page 28
Setting Up the Projector Follow the instructions in these sections to set up your projector for use. Projector Placement Projector Connections Attaching and Removing a Lens Attaching and Removing the Cable Cover Attaching - Epson PowerLite Pro G6570WU | User Manual - Page 29
Front Rear Front ceiling 29 - Epson PowerLite Pro G6570WU | User Manual - Page 30
Rear ceiling Note: Be sure to leave at least 20 inches (50 cm) of space in front of the air exhaust and intake vents and, when setting up multiple projectors, 20 inches (50 cm) of space between the projectors. 30 - Epson PowerLite Pro G6570WU | User Manual - Page 31
If you mount the projector to the ceiling, install it within the following angles: • Vertically: Any angle in a complete 360 degree circle. • Horizontally: Within the adjustment range of the rear adjustable feet. If you project from the ceiling or from the rear, select the correct Projection setting - Epson PowerLite Pro G6570WU | User Manual - Page 32
the size of the projected image. (Conversion figures may have been rounded up or down.) You can also use the projector Throw Distance Calculator at epson.com/support (U.S.) or epson.ca/support (Canada). 32 - Epson PowerLite Pro G6570WU | User Manual - Page 33
distance 2 Distance from the center of the lens to the base of the image (varies depending on vertical lens shift) 3 Center of lens PowerLite Pro G6170/G6870 4:3 Aspect Ratio Image or Screen with Standard Zoom Lens Screen or image size Projection distance (1) Wide to Tele (Minimum to Maximum - Epson PowerLite Pro G6570WU | User Manual - Page 34
cm) Vertical lens shift (2) Top to Bottom -11.4 to 161.4 inches (-29 to 410 cm) -13.7 to 193.7 inches (-35 to 492 cm) PowerLite Pro G6070W/G6270W/G6470WU/G6570WU/G6770WU/G6970WU 16:10 Aspect Ratio Image or Screen with Standard Zoom Lens Screen or image size Projection distance (1) Wide to Tele - Epson PowerLite Pro G6570WU | User Manual - Page 35
16:10 Aspect Ratio Image or Screen with Standard Zoom Lens Screen or image size Projection distance (1) Wide to Tele (Minimum to Maximum) 250 inches 211.8 × 132.7 inches (538 × 337 cm) 274 to 492 inches (695 to 1251 cm) 300 inches 254.3 × 159.1 inches (646 × 404 cm) 329 to 591 inches (835 - Epson PowerLite Pro G6570WU | User Manual - Page 36
Product Box Contents Connecting to Computer Sources Follow the instructions in these sections to connect a computer to the projector. Connecting to a Computer for VGA Video Connecting to a Computer for HDMI Video and Audio Connecting to a - Epson PowerLite Pro G6570WU | User Manual - Page 37
compatible adapter options. Older Mac computers (2009 and earlier) may not support audio through the HDMI port. 1. Connect the HDMI cable to your signal if you are connecting to external speakers. Note: If you have problems hearing audio through the HDMI connection, you can use the Audio3 port - Epson PowerLite Pro G6570WU | User Manual - Page 38
2. Connect the other end to the projector's DisplayPort connector. Note: If you have problems hearing audio through the DisplayPort connection, you can use the Audio3 port instead to play sound. Connect one end of an optional 3.5 mm stereo mini- - Epson PowerLite Pro G6570WU | User Manual - Page 39
still play sound through the projector's speaker system (PowerLite Pro G6070W/G6170/G6270W/G6470WU/G6570WU/G6770WU). Just connect an optional 3.5 mm stereo Connecting to External Speakers Connecting to Video Sources Follow the instructions in these sections to connect video devices to the projector - Epson PowerLite Pro G6570WU | User Manual - Page 40
source into a mono analog signal for the internal speaker or a stereo analog signal if you are connecting to external speakers. Note: If you have problems hearing audio through the HDMI connection, you can use the Audio3 port instead to play sound. Connect one end of an optional 3.5 mm stereo mini - Epson PowerLite Pro G6570WU | User Manual - Page 41
2. Connect the BNC connectors to the projector's R/Cr/Pr, G/Y, B/Cb/Pb ports. Parent topic: Connecting to Video Sources Related tasks Connecting to a Video Source for Sound Connecting to a Component-to-VGA Video Source If your video source has component video ports, you can connect it to the - Epson PowerLite Pro G6570WU | User Manual - Page 42
Related tasks Connecting to a Video Source for Sound Connecting to an S-Video Video Source If your video source has an S-Video port, you can connect it to the projector using an optional S-Video cable. 1. Connect the S-Video cable to your video source's S-Video output port. 2. Connect the other end - Epson PowerLite Pro G6570WU | User Manual - Page 43
ports (PowerLite Pro G6070W/G6170/G6270W/G6470WU/G6570WU/G6770WU). Note: If your projector does not have an internal speaker system (PowerLite Pro G6870/ to the projector's SDI port (PowerLite Pro G6900WU), audio output is not supported. 1. Connect the audio cable to your video source's audio-out - Epson PowerLite Pro G6570WU | User Manual - Page 44
2. Do one of the following: • Connect the other end of the cable to the projector's Audio port that corresponds to the Computer or BNC port you are using for video. • Connect the red and white plugs on the other end of the cable to the projector's Audio L-R ports. Parent topic: Connecting to Video - Epson PowerLite Pro G6570WU | User Manual - Page 45
See the documentation that came with the HDBaseT transmitter for instructions on connecting it to your video device or computer. 4. Turn on the projector and HDBaseT transmitter. Note: To enable communication from the Ethernet and serial - Epson PowerLite Pro G6570WU | User Manual - Page 46
setting and Always On for the A/V Output setting in the projector's Extended menu. Note: The projector's built-in speaker system (PowerLite Pro G6070W/G6170/G6270W/G6470WU/G6570WU/G6770WU) is disabled when you connect external speakers. 1. Make sure your computer or video source is connected to the - Epson PowerLite Pro G6570WU | User Manual - Page 47
Attaching and Removing a Lens Follow the instructions in these sections to attach or remove a compatible lens. Attaching the Lens Unit Removing the Lens Unit Parent topic: Setting Up the Projector Attaching the - Epson PowerLite Pro G6570WU | User Manual - Page 48
1 Tighten 2 Loosen 2. Hold the lens unit with the white dot facing up. Insert the lens unit straight into the projector's lens socket and turn it clockwise until you hear it click into place. 48 - Epson PowerLite Pro G6570WU | User Manual - Page 49
3. Insert the screw that came with the projector or the lens unit, and tighten it. This secures the lens unit release button and prevents the lens from accidentally being removed. 4. Set the Lens Type setting to the correct option in the projector's Extended menu. Parent topic: Attaching and - Epson PowerLite Pro G6570WU | User Manual - Page 50
2. Remove the screw securing the lens unit release button. 3. Press and hold the lens unit release button as you turn the lens unit counterclockwise until you hear it click. 4. Gently pull the lens unit straight out of the projector. 50 - Epson PowerLite Pro G6570WU | User Manual - Page 51
the attached cables from view. 1. Bundle the cables together using a band or other fastener (not provided). 2. Place the cable cover on the projector as shown, guiding the cables through the notch on the base of the cable cover. 51 - Epson PowerLite Pro G6570WU | User Manual - Page 52
Removing the Cable Clips You can install the cable clips that came with your projector to provide additional support to the power and HDMI cables. Note: The PowerLite Pro G6070W/G6170/G6270W/G6470WU/G6570WU/G6770WU come with one cable clip. 1. Connect the power and HDMI cables to the projector. 52 - Epson PowerLite Pro G6570WU | User Manual - Page 53
2. Insert the end of the cable clip anchors into the cable clip slots near the power inlet and HDMI port. 1 Cable clip slot 2 Cable clip anchor 3 Cable clip 3. Place the open cable clips around the power and HDMI cables, but don't lock them into place. 4. Slide each cable clip onto the anchors and - Epson PowerLite Pro G6570WU | User Manual - Page 54
Caution: Use only the type of batteries specified in this manual. Do not install batteries of different types, or mix new and old batteries. 1. Remove the battery cover. 2. Insert the batteries with the + and - ends facing as shown. 54 - Epson PowerLite Pro G6570WU | User Manual - Page 55
3. Replace the battery cover and press it down until it clicks into place. Warning: Dispose of used batteries according to local regulations. Do not expose batteries to heat or flame. Keep batteries out of the reach of children; they are choking hazards and are very dangerous if swallowed. Parent - Epson PowerLite Pro G6570WU | User Manual - Page 56
projection: • EasyMP Network Projection software sets up your computer for network projection (PowerLite Pro G6070W/G6170/G6270W/G6470WU/G6570WU/G6770WU). See the EasyMP Network Projection Operation Guide for instructions. • EasyMP Monitor software (Windows only) lets you monitor and control your - Epson PowerLite Pro G6570WU | User Manual - Page 57
access point, you can connect to the projector wirelessly through the access point using the EasyMP Network Projection software (PowerLite Pro G6070W/G6170/G6270W/G6470WU/G6570WU/G6770WU). Connecting to a Wired Network Selecting Wired Network Settings Parent topic: Using the Projector on a Network - Epson PowerLite Pro G6570WU | User Manual - Page 58
3. Select the Network menu and press Enter. 4. Select Network Configuration and press Enter. 5. Select the Basic menu and press Enter. 58 - Epson PowerLite Pro G6570WU | User Manual - Page 59
characters long for accessing the projector over the web. (Default user name is EPSONWEB; default password is admin.) • Projector Keyword (PowerLite Pro G6070W/G6170/G6270W/G6470WU/G6570WU/G6770WU) lets you turn on a security password to prevent access to the projector by anyone not in the room with - Epson PowerLite Pro G6570WU | User Manual - Page 60
instructions to save your settings and exit the menus. Parent topic: Wired Network Projection Wireless Network Projection You can send images to your projector through a wireless network (PowerLite Pro G6070W/G6170/G6270W/G6470WU/G6570WU/G6770WU). To do this, you must install the optional Epson - Epson PowerLite Pro G6570WU | User Manual - Page 61
Network Settings Manually Selecting Wireless Network Settings in Windows Selecting Wireless Network Settings in OS X Enabling WPA or EAP Security Parent topic: Using the Projector on a Network Installing the Wireless LAN Module To use the projector over a wireless network, install the Epson 802.11b - Epson PowerLite Pro G6570WU | User Manual - Page 62
3. Remove the screw securing the wireless LAN module stopper, then remove the stopper. 4. Insert the wireless LAN module into the port. 62 - Epson PowerLite Pro G6570WU | User Manual - Page 63
Connection (Windows Only) You can use the Quick Wireless Connection USB key to quickly connect your computer to the projector wirelessly (PowerLite Pro G6070W/G6170/G6270W/G6470WU/G6570WU/G6770WU). Then you can project your presentation and remove the key when you are done. Note: The Quick Wireless - Epson PowerLite Pro G6570WU | User Manual - Page 64
You see a screen like this: 3. Verify that an SSID and IP address are displayed, then remove the wireless LAN module from the projector. 4. Insert the Quick Wireless Connection USB key into the same port used for the wireless LAN module. You see a projected message that the network information - Epson PowerLite Pro G6570WU | User Manual - Page 65
.exe, then select Allow on the next screen. 8. Follow the on-screen instructions to install the Quick Wireless Connection driver. Note: If you see a Windows Optional Equipment and Replacement Parts Selecting Wireless Network Settings Manually Before you can project from your wireless network, you - Epson PowerLite Pro G6570WU | User Manual - Page 66
3. Select the Network menu and press Enter. 4. Select Network Configuration and press Enter. 5. Select the Basic menu and press Enter. 66 - Epson PowerLite Pro G6570WU | User Manual - Page 67
on the Wireless LAN menu as necessary for your network. 9. When you finish selecting settings, select Setup complete and follow the on-screen instructions to save your settings and exit the menus. After you complete the wireless settings for your projector, you need to select the wireless network - Epson PowerLite Pro G6570WU | User Manual - Page 68
Off To Setup Wizard Wireless LAN System Connection Mode 802.11b/g 802.11b/g/n Quick Advanced SSID Auto Setting On Off 68 Description Turns wireless LAN support on and off Select To Setup Wizard to start the WPS Connection Setup utility Sets the type of wireless LAN system the projector is - Epson PowerLite Pro G6570WU | User Manual - Page 69
the Off SSID on the network standby screen On Turns on DHCP if your network Off assigns addresses automatically; set to Off to manually enter the network's IP Address, Subnet Mask, and Gateway Address - View or change the projector's IP address - View or change the projector's Subnet - Epson PowerLite Pro G6570WU | User Manual - Page 70
2. Do one of the following: • If your projector is set up on an existing network (Advanced mode), select the network name (SSID). • If your projector is configured for Quick mode, select the projector's SSID. 3. Click Connect. Parent topic: Wireless Network Projection Selecting Wireless Network - Epson PowerLite Pro G6570WU | User Manual - Page 71
3. Select the Network menu and press Enter. 4. Select Network Configuration and press Enter. 5. Select the Security menu and press Enter. 6. Select a WPA or EAP setting from the drop-down menu. 71 - Epson PowerLite Pro G6570WU | User Manual - Page 72
you finish selecting settings, select Setup complete and follow the on-screen instructions to save your settings and exit the menus. Wireless Security Menu Settings hidden. Change the passphrase to connect using Epson iProjection. For WPA/WPA2-EAP security, selects the protocol for authentication 72 - Epson PowerLite Pro G6570WU | User Manual - Page 73
Setting User name Password Client Certificate Verify Server Certificate CA certificate Options Various user names up to 64 characters Various passwords up to 64 characters - On Off - Description For WPA/WPA2-EAP security, selects the user name; automatically detected when using the PEAP-TLS or - Epson PowerLite Pro G6570WU | User Manual - Page 74
Registering a Digital Certificate on the Projector Follow the instructions here if you need to install a digital certificate on the projector to provide security for your presentation files (PowerLite Pro G6070W/G6170/G6270W/G6470WU/G6570WU/G6770WU). Note: You can register a digital certificate - Epson PowerLite Pro G6570WU | User Manual - Page 75
Registering Digital Certificates from a Web Browser You can register the digital certificates on the projector for wireless LAN authentication. 1. Make sure your digital certificate file is compatible with projector registration. 2. Make sure the projector is turned on. 3. Start your web browser on - Epson PowerLite Pro G6570WU | User Manual - Page 76
7. Click the Browse button, select the certificate file, and click Open. 8. Enter a password in the Password box. 9. Click Set to adjust the certificate validity period. 10. When you finish registering the certificate, click Apply to finalize your changes and complete the registration. Digital - Epson PowerLite Pro G6570WU | User Manual - Page 77
Setting Up Projector Network E-Mail Alerts You can set up the projector to send you an e-mail alert over the network if there is a problem with the projector. 1. Press the Menu button. 2. Select the Network menu and press Enter. 3. Select Network Configuration and press Enter. 4. Do one of the - Epson PowerLite Pro G6570WU | User Manual - Page 78
PowerLite Pro G6870/G6970WU • Select the Administrator Settings menu and press Enter, then select Mail Notification and press Enter. Turn on Mail Notification. PowerLite Pro G6070W/G6170/G6270W/G6470WU/G6570WU/G6770WU 78 - Epson PowerLite Pro G6570WU | User Manual - Page 79
on-screen instructions to save your settings and exit the menus. Note: If a critical problem causes a Epson Projector on the subject line • The name of the projector experiencing a problem • The IP address of the affected projector • Detailed information about the problem Note: If a critical problem - Epson PowerLite Pro G6570WU | User Manual - Page 80
. 2. Select the Network menu and press Enter. 3. Select Network Configuration and press Enter. 4. Do one of the following: • Select the Others menu and press Enter. PowerLite Pro G6870/G6970WU • Select the Administrator Setting menu and press Enter, then select the SNMP menu and press Enter. 80 - Epson PowerLite Pro G6570WU | User Manual - Page 81
PowerLite Pro G6070W/G6170/G6270W/G6470WU/G6570WU/G6770WU 5. Enter up to two IP addresses to receive G6470WU/G6570WU/G6770WU). You can enter up to 32 single-byte alphanumeric characters. 7. When you finish selecting settings, select Complete or Setup complete and follow the on-screen instructions - Epson PowerLite Pro G6570WU | User Manual - Page 82
4. Do one of the following: • Select the Others menu and press Enter. PowerLite Pro G6870/G6970WU • Select the Administrator Setting menu and press Enter. PowerLite Pro G6070W/G6170/G6270W/G6470WU/G6570WU/G6770WU 82 - Epson PowerLite Pro G6570WU | User Manual - Page 83
Note: Enabling Crestron RoomView disables the Epson Message Broadcast feature in the EasyMP Monitor or Setup complete and follow the on-screen instructions to save your settings and exit the menus. Note: The web setup and control features support Microsoft Internet Explorer 8.0 or later, and Safari - Epson PowerLite Pro G6570WU | User Manual - Page 84
, or select config to display the Web Control page. 4. To select projector menu settings, select the name of the menu and follow the on-screen instructions. 5. To control projection remotely, select the Web Remote option. You see a screen like this: 84 - Epson PowerLite Pro G6570WU | User Manual - Page 85
Network Related references Projector Setup Settings - Extended Menu Crestron RoomView Support If you are using the Crestron RoomView network monitoring and control your projector using a web browser. Note: You cannot use the Epson Web Control feature or the Message Broadcasting plug-in for EasyMP - Epson PowerLite Pro G6570WU | User Manual - Page 86
button. 2. Select the Network menu and press Enter. 3. Select Network Configuration and press Enter. 4. Select the Others menu (PowerLite Pro G6870/G6970WU) or the Administrator Setting menu (PowerLite Pro G6070W/G6170/G6270W/G6470WU/G6570WU/G6770WU) and press Enter. PowerLite Pro G6870/G6970WU 86 - Epson PowerLite Pro G6570WU | User Manual - Page 87
PowerLite Pro G6070W/G6170/G6270W/G6470WU/G6570WU/G6770WU 5. Set the Crestron RoomView setting to On to allow the projector to be detected. Note: Enabling Crestron RoomView disables the Epson Message Broadcasting feature in the EasyMP Monitor software. 6. When you finish selecting settings, select - Epson PowerLite Pro G6570WU | User Manual - Page 88
tab, select settings on the displayed screen, and click Send. 7. When you finish selecting settings, click Exit to exit the program. Parent topic: Crestron RoomView Support 88 - Epson PowerLite Pro G6570WU | User Manual - Page 89
Using Basic Projector Features Follow the instructions in these sections to use your projector's basic features. Turning On the Projector Turning Off the Projector Selecting the Language for the Projector Menus Resizing - Epson PowerLite Pro G6570WU | User Manual - Page 90
1. Connect the power cord to the projector's power inlet. 2. Plug the power cord into an electrical outlet. The projector's power light turns orange. This indicates that the projector is receiving power, but is not yet turned on (it is in standby mode). Note: With Direct Power On turned on, the - Epson PowerLite Pro G6570WU | User Manual - Page 91
. (To leave the projector on, press any other button.) The projector beeps twice, the lamp turns off, and the power light turns orange. Note: With Epson's Instant Off technology, there is no cool-down period so you can pack up the projector for transport right away (if necessary). 3. To transport or - Epson PowerLite Pro G6570WU | User Manual - Page 92
Selecting the Language for the Projector Menus If you want to view the projector's menus and messages in another language, you can change the Language setting. 1. Turn on the projector. 2. Press the Menu button. 3. Select the Extended menu and press Enter. 4. Select the Language setting and press - Epson PowerLite Pro G6570WU | User Manual - Page 93
Note: You can also display a pattern to aid in adjusting the projected image using the Test Pattern button on the remote control. 2. To enlarge or reduce the image size, rotate the projector's zoom ring. Parent topic: Using Basic Projector Features Related references Projector Setup Settings - - Epson PowerLite Pro G6570WU | User Manual - Page 94
2. To sharpen the image focus, rotate the projector's focus ring. Focusing the Image with the Optional Short Throw Lens Parent topic: Using Basic Projector Features Related references Projector Setup Settings - Extended Menu Related tasks Displaying a Test Pattern Focusing the Image with the - Epson PowerLite Pro G6570WU | User Manual - Page 95
all the way counter-clockwise. Note: Be careful not to shift the short throw lens when adjusting it to prevent the projected image from shifting. 3. Support the front of the lens with one hand and use the other to carefully rotate the focus ring until the center of the image is - Epson PowerLite Pro G6570WU | User Manual - Page 96
4. Rotate the distortion ring until the edges of the image are also focused. 5. Rotate the focus ring again to focus the entire screen image. 6. If the center of the image out of focus, rotate the distortion ring again to bring the area into focus. Parent topic: Focusing the Image Using the Focus - Epson PowerLite Pro G6570WU | User Manual - Page 97
You see this screen: 6. Select your model number and press Enter. 7. Press the Menu button to accept the changes. Parent topic: Using Basic Projector Features Setting the Screen Type You can use the Screen Type setting to match the aspect ratio of the displayed image to the screen you are using. 1. - Epson PowerLite Pro G6570WU | User Manual - Page 98
7. Adjust the aspect ratio for the projected image, if necessary. Parent topic: Using Basic Projector Features Related concepts Image Aspect Ratio Adjusting the Image Position Using Screen Position You can adjust the image position if there are margins between the edge of the image and the projected - Epson PowerLite Pro G6570WU | User Manual - Page 99
Setting the Screen Type Adjusting the Image Position Using Lens Shift If you cannot install the projector directly in front of the screen, you can adjust the position of the projected image using the lens shift feature. Follow these guidelines when using lens shift to adjust your images: • When - Epson PowerLite Pro G6570WU | User Manual - Page 100
necessary. Note: You can move the image within the ranges shown below. You cannot move the image to both the horizontal and vertical maximum values. PowerLite Pro G6070W/G6270W/G6470WU/G6570WU/G6770WU/G6970WU 100 - Epson PowerLite Pro G6570WU | User Manual - Page 101
range: V × 67% (PowerLite Pro G6070W/G6270W/G6470WU/G6570WU/G6770WU/G6970WU) V× 57% (PowerLite Pro G6170/G6870) 4 Maximum vertical adjustment range with maximum horizontal adjustment: V × 27% (PowerLite Pro G6070W/G6270W/G6470WU/G6570WU/G6770WU/G6970WU) V× 19% (PowerLite Pro G6170/G6870) 101 - Epson PowerLite Pro G6570WU | User Manual - Page 102
4. When you are finished, slide the lens shift dial lock as shown to lock the dials. Parent topic: Using Basic Projector Features Displaying a Test Pattern You can display a test pattern to adjust the projected image without connecting a computer or video device. Note: The test pattern's shape is - Epson PowerLite Pro G6570WU | User Manual - Page 103
3. Press the left or right arrow buttons on the remote control or press Enter on the control panel to cycle through the available test patterns. 4. Adjust the image as necessary. 5. Press the Esc to exit the test pattern. Available Test Pattern Image Adjustments Parent topic: Using Basic Projector - Epson PowerLite Pro G6570WU | User Manual - Page 104
Settings Multi-Projection • Brightness Level • Edge Blending2 • Multi-screen 1 Except for custom Gamma settings 2 Except for the Black Level setting (PowerLite Pro G6870/G6970WU) Parent topic: Displaying a Test Pattern Adjusting the Image Height If you are projecting from a table or other flat - Epson PowerLite Pro G6570WU | User Manual - Page 105
cannot combine multiple image adjustment methods, except adjusting the Point Correction setting after adjusting the Curved Surface or Corner Wall (PowerLite Pro G6870/G6970WU) settings. Correcting Image Shape with H/V Keystone Correcting Image Shape with Quick Corner Correcting Image Shape with Arc - Epson PowerLite Pro G6570WU | User Manual - Page 106
Correcting Image Shape with H/V Keystone You can use the projector's H/V Keystone setting to correct the shape of an image that is unevenly rectangular on the sides. Note: For the best results, make sure the Lens Type setting in the projector's Extended menu is set correctly before making any - Epson PowerLite Pro G6570WU | User Manual - Page 107
3. Select the Settings menu and press Enter. 4. Select the Geometric Correction setting and press Enter. 5. Select the H/V-Keystone setting and press Enter. Then press Enter again. You see the H/V-Keystone adjustment screen: 107 - Epson PowerLite Pro G6570WU | User Manual - Page 108
6. Use the arrow buttons on the projector or the remote control to select between vertical and horizontal keystone correction and to adjust the image shape as necessary. V-Keystone H-Keystone 7. When you are finished, press Esc. After correction, your image is slightly smaller. Parent topic: Image - Epson PowerLite Pro G6570WU | User Manual - Page 109
Correcting Image Shape with Quick Corner You can use the projector's Quick Corner setting to correct the shape and size of an image that is unevenly rectangular on all sides. 1. Turn on the projector and display an image. Note: You can display a pattern to aid in adjusting the projected image using - Epson PowerLite Pro G6570WU | User Manual - Page 110
Image Shape with Arc Correction You can use the projector's Arc Correction setting to adjust the curve or arc of the sides of your image (PowerLite Pro G6070W/G6170/G6270W/G6470WU/G6570WU/G6770WU). 110 - Epson PowerLite Pro G6570WU | User Manual - Page 111
1. Turn on the projector and display an image. Note: You can display a pattern to aid in adjusting the projected image using the Settings menu. Note: You can also display a pattern to aid in adjusting the projected image using the Test Pattern button on the remote control. 2. Press the Menu button. - Epson PowerLite Pro G6570WU | User Manual - Page 112
You see the Arc Correction adjustment screen. Note: To reset your adjustments, press the Esc button for at least 2 seconds to display a reset screen, and select Yes. 6. Use the arrow buttons on the projector or the remote control to select the corner or side of the image you want to adjust. Then - Epson PowerLite Pro G6570WU | User Manual - Page 113
Image Shape with Curved Surface You can use the projector's Curved Surface setting to adjust the shape of an image projected on a curved surface (PowerLite Pro G6870/G6970WU). Note: For the best results, project from the front of the screen onto a surface with a uniform arc radius and with the lens - Epson PowerLite Pro G6570WU | User Manual - Page 114
3. Select the Settings menu and press Enter. 4. Select the Geometric Correction setting and press Enter. 5. Select the Curved Surface setting and press Enter. Note: If you see a confirmation message, press Enter. You see this screen: 6. Select the Correct Shape setting and press Enter. 114 - Epson PowerLite Pro G6570WU | User Manual - Page 115
7. Use the arrow buttons on the projector or the remote control to select the area you want to adjust. Then press Enter. Note: To reset your adjustments, press the Esc button for at least 2 seconds to display a reset screen, and select Yes. 8. Use the arrow buttons on the projector to adjust the - Epson PowerLite Pro G6570WU | User Manual - Page 116
9. Press the Esc button to return to the Curved Surface menu screen. 10. Repeat the previous three steps as necessary to adjust other image areas. If the image expands or contracts, continue with the next step to adjust the linearity. 11. Select one of the following from the Curved Surface menu - Epson PowerLite Pro G6570WU | User Manual - Page 117
Related references Projector Setup Settings - Extended Menu Related tasks Displaying a Test Pattern Correcting Image Shape with Point Correction Correcting Image Shape with Point Correction You can use the projector's Point Correction feature to fine-tune the image shape using points on a grid. This - Epson PowerLite Pro G6570WU | User Manual - Page 118
You see this screen: 6. Select the Point Correction setting and press Enter. 7. Select the number of grid lines to display and press Enter. Note: If you need to change the color of the grid lines, select the Pattern Color setting and select a suitable color. 8. Use the arrow buttons on the projector - Epson PowerLite Pro G6570WU | User Manual - Page 119
setting to adjust the shape of an image projected on a surface with right angles, such as a rectangular pillar or the corner of a room (PowerLite Pro G6870/G6970WU). Note: For the best results, project from the front of the screen onto a right-angled surface with the lens centered horizontally using - Epson PowerLite Pro G6570WU | User Manual - Page 120
1. Turn on the projector and display an image. Note: You can display a pattern to aid in adjusting the projected image using the Settings menu. Note: You can also display a pattern to aid in adjusting the projected image using the Test Pattern button on the remote control. 2. Press the Menu button. - Epson PowerLite Pro G6570WU | User Manual - Page 121
You see this screen: 6. Select the Corner Type setting and press Enter. 7. Select one of the following: • Horizontal Corner when the surfaces line up horizontally • Vertical Corner when the surfaces line up vertically 8. Press the Esc button to return to the Corner Wall menu screen. 9. Select the - Epson PowerLite Pro G6570WU | User Manual - Page 122
10. Adjust the projector's position and use the lens shift option to center the image over the point where the two surfaces meet. (The rest of these steps show Horizontal Corner as the selected Corner Type but the steps are the same for Vertical Corner.) Note: You can press Enter to show or hide the - Epson PowerLite Pro G6570WU | User Manual - Page 123
11. Use the arrow buttons on the projector or the remote control to select the area you want to adjust. Then press Enter. • For horizontal corners, adjust the top area using the lowest point (indicated by the blue arrow) as your reference. Adjust the lower area using the highest point (indicated by - Epson PowerLite Pro G6570WU | User Manual - Page 124
Note: To reset your adjustments, press the Esc button for at least 2 seconds to display a reset screen, and select Yes. 12. Press and hold the arrow buttons on the projector or remote control to adjust the image shape. 13. Repeat the previous two steps as necessary to adjust other image areas. If - Epson PowerLite Pro G6570WU | User Manual - Page 125
Related references Projector Setup Settings - Extended Menu Related tasks Displaying a Test Pattern Correcting Image Shape with Point Correction Remote Control Operation The remote control lets you control the projector from almost anywhere in the room, up to 49 feet (15 m) away. You can point it at - Epson PowerLite Pro G6570WU | User Manual - Page 126
4 ±30° 5 +10° to +50° Note: Avoid using the remote control in conditions with bright fluorescent lights or in direct sunlight, or the projector may not respond to commands. If you will not use the remote control for a long time, remove the batteries. Parent topic: Using Basic Projector Features - Epson PowerLite Pro G6570WU | User Manual - Page 127
source 3 Video port source (composite video) 4 S-Video port source 5 Network source 6 DisplayPort source 7 HDMI port source 8 SDI port source (PowerLite Pro G6970WU) 9 HDBaseT port source Parent topic: Using Basic Projector Features Projection Modes Depending on how you positioned the projector, you - Epson PowerLite Pro G6570WU | User Manual - Page 128
Changing the Projection Mode Using the Remote Control Changing the Projection Mode Using the Menus Parent topic: Using Basic Projector Features Changing the Projection Mode Using the Remote Control You can change the projection mode to flip the image over top-to-bottom. 1. Turn on the projector and - Epson PowerLite Pro G6570WU | User Manual - Page 129
3. Select the Extended menu and press Enter. 4. Select the Projection setting and press Enter. 5. Select a projection mode and press Enter. 6. Press Menu or Esc to exit the menus. Parent topic: Projection Modes Image Aspect Ratio The projector can display images in different width-to-height ratios - Epson PowerLite Pro G6570WU | User Manual - Page 130
Changing the Image Aspect Ratio You can change the aspect ratio of the displayed image to resize it. Note: Set the Screen Type setting in the projector's Extended menu before changing the aspect ratio. 1. Turn on the projector and switch to the image source you want to use. 2. Press the Aspect - Epson PowerLite Pro G6570WU | User Manual - Page 131
Screen Type setting 16:10 Available aspect ratios Auto or Normal, 16:9, Full, Zoom, Native *Available only when projecting computer images, or from sources connected to the HDMI or HDBaseT port Aspect ratio setting Auto Normal 4:3 16:9 Full Zoom Native Description Automatically sets the aspect - Epson PowerLite Pro G6570WU | User Manual - Page 132
Parent topic: Using Basic Projector Features Related references Image Quality Settings - Image Menu Changing the Color Mode You can change the projector's Color Mode using the remote control to optimize the image for your viewing environment. 1. Turn on the projector and switch to the image source - Epson PowerLite Pro G6570WU | User Manual - Page 133
Color Mode DICOM SIM1 Multi-Projection Description Best for projecting X-ray photographs and other medical images Best for projecting from multiple projectors (reduces the color tone difference between images) 1 Available only when inputting RGB signals Note: The DICOM SIM Color Mode is for - Epson PowerLite Pro G6570WU | User Manual - Page 134
performance. You can turn Auto Iris on or off for each Color Mode that supports the feature. You cannot change the Auto Iris setting when you are using a buttons control the projector's internal speaker system (PowerLite Pro G6070W/G6170/G6270W/G6470WU/G6570WU/G6770WU) or any external speakers you - Epson PowerLite Pro G6570WU | User Manual - Page 135
1. Press the Menu button. 2. Select the Extended menu and press Enter. 3. Select the Operation setting and press Enter. 4. Select the Date & Time setting and press Enter. You see a screen like this: 5. Select the Date & Time setting and press Enter. 6. Use the displayed keyboard to enter the date - Epson PowerLite Pro G6570WU | User Manual - Page 136
Adjusting Projector Features Follow the instructions in these sections to use your projector's feature adjustments. Shutting Off the Picture and Sound Temporarily Stopping Video Action Temporarily Zooming Into and Out of - Epson PowerLite Pro G6570WU | User Manual - Page 137
Parent topic: Adjusting Projector Features Related references Projector Setup Settings - Extended Menu Stopping Video Action Temporarily You can temporarily stop the action in a video or computer presentation and keep the current image on the screen. Any sound or video action continues to run, - Epson PowerLite Pro G6570WU | User Manual - Page 138
2. Use the following buttons on the remote control to adjust the zoomed image: • Use the arrow buttons to position the crosshair in the image area you want to zoom into. • Press the E-Zoom + button repeatedly to zoom into the image area, enlarging it as necessary. Press and hold the E-Zoom + button - Epson PowerLite Pro G6570WU | User Manual - Page 139
• Time/Schedule Protection password prevents anyone from changing the projector's time or schedule settings. Setting a Password Selecting Password Security Types Entering a Password to Use the Projector Saving a User's Logo Image to Display Parent topic: Projector Security Features Setting a - Epson PowerLite Pro G6570WU | User Manual - Page 140
4. Press and hold down the Num button on the remote control and use the numeric buttons to set a four-digit password. The password displays as **** as you enter it. Then you see the confirmation prompt. 5. Enter the password again. You see the message "Password accepted." 6. Press Esc to return to - Epson PowerLite Pro G6570WU | User Manual - Page 141
1. To prevent unauthorized use of the projector, select Power On Protection, press Enter, select On, press Enter again, and press Esc. 2. To prevent changes to the User's Logo screen or related display settings, select User's Logo Protection, press Enter, select On, press Enter again, and press Esc. - Epson PowerLite Pro G6570WU | User Manual - Page 142
password several times in succession, the projector displays a request code and a message to contact Epson Support. Do not attempt to enter the password again. When you contact Epson Support, provide the displayed request code and proof of ownership for assistance in unlocking the projector. Parent - Epson PowerLite Pro G6570WU | User Manual - Page 143
2. Press the Menu button, select the Extended menu, and press Enter. 3. Select the User's Logo setting and press Enter. You see a prompt asking if you want to use the displayed image as a user's logo. 4. Select Yes and press Enter. You see a selection box overlaying your image. 5. Use the arrow - Epson PowerLite Pro G6570WU | User Manual - Page 144
You see the User's Logo zoom factor menu. 7. Select a zoom percentage and press Enter. You see a prompt asking if you want to save the image as the User's Logo. 8. Select Yes and press Enter. You see a completion message. 9. Press Esc to exit the message screen. 10. Select the Extended menu and - Epson PowerLite Pro G6570WU | User Manual - Page 145
2. Select the Settings menu and press Enter. 3. Select the Control Panel Lock setting and press Enter. 4. Select one of these lock types and press Enter: • To lock all of the projector's buttons, select Full Lock. • To lock all buttons except the power button, select Partial Lock. You see a - Epson PowerLite Pro G6570WU | User Manual - Page 146
• Use the security slot on the projector to attach a Kensington lock. See your local computer or electronics dealer for purchase information. • Use the security cable attachment point on the projector to attach a wire cable and secure it to a room fixture or heavy furniture. Note: Do not pass drop- - Epson PowerLite Pro G6570WU | User Manual - Page 147
1. Press the Split button on the remote control. The currently selected input source moves to the left side of the screen. 2. Press the Menu button. You see this screen: 3. To select an input source for the other image, select the Source setting, press Enter, select the input source, select Execute, - Epson PowerLite Pro G6570WU | User Manual - Page 148
7. To exit the split screen feature, press the Split or Esc button. Parent topic: Adjusting Projector Features Using Multiple Projectors You can combine the projected images from two or more projectors to create one large image. The following two options are available: • Project different images - Epson PowerLite Pro G6570WU | User Manual - Page 149
Follow the instructions in these sections to setup and project from multiple projectors. Projector Identification System for Multiple Projector Control Adjusting the Position of the Projected Image From - Epson PowerLite Pro G6570WU | User Manual - Page 150
4. Select Projector ID and press Enter. 5. Use the arrow buttons on the remote control to select the identification number you want to use for the projector. Then press Enter. Repeat these steps for all the other projectors you want to operate from one remote control. Parent topic: Projector - Epson PowerLite Pro G6570WU | User Manual - Page 151
3. Hold down the ID button on the remote control while you press the numeric button that matches the projector's ID. Then release the buttons. Note: If you don't know the projector's ID, hold down the ID button and press the Help button to temporarily display the projector's ID on the screen. If the - Epson PowerLite Pro G6570WU | User Manual - Page 152
Parent topic: Using Multiple Projectors Related concepts Projector Placement Related tasks Displaying a Test Pattern Adjusting the Image Position Using Lens Shift Resizing the Image with the Zoom Ring Correcting Image Shape with Quick Corner Correcting Image Shape with Point Correction Scaling an - Epson PowerLite Pro G6570WU | User Manual - Page 153
5. Select the Scale Mode setting and select one of the following options: • Zoom Display: Maintains the image aspect ratio as you scale the image • Full Display: Adjusts the image to the projector's screen size as you scale the image 6. Select one or more of the following scaling options and adjust - Epson PowerLite Pro G6570WU | User Manual - Page 154
Select the Multi-Projection setting and press Enter. 7. Select the Brightness Level setting and press Enter (not available for the PowerLite Pro G6470WU) . 8. Select a brightness level. 9. Press Esc to return to the previous screen. Parent topic: Using Multiple Projectors Related concepts Color Mode - Epson PowerLite Pro G6570WU | User Manual - Page 155
Select the Edge Blending setting and press Enter. You see this screen: 5. Turn on the Edge Blending, Guide Display, and Pattern Guide settings. Note: If the projected guide is unclear, try changing the Guide Colors setting. 6. Select the edge you want to blend and press Enter. You see a screen like - Epson PowerLite Pro G6570WU | User Manual - Page 156
back to the previous screen. 10. Select the Blend Curve setting (PowerLite Pro G6070W/G6170/G6270W/G6470WU/G6570WU/G6770WU) and select a gradient for the shaded area. 11. When the edges are blended, turn off the Guide Display and Pattern Guide settings to check the final settings. 12. When you are - Epson PowerLite Pro G6570WU | User Manual - Page 157
the areas that do not overlap. You can use the projector's Black Level setting to reduce this difference and make it less noticeable (PowerLite Pro G6870/G6970WU). Note: • You cannot adjust the black level when a test pattern displayed. • The brightness and tone of the overlapping areas may differ - Epson PowerLite Pro G6570WU | User Manual - Page 158
You see this screen: 5. Select the Black Level setting and press Enter. You see this screen: 6. Select the Area Correction setting and press Enter. 158 - Epson PowerLite Pro G6570WU | User Manual - Page 159
The points you can use to set the range for black level adjustments are displayed. Note: The points displayed differ depending on the edge settings (Top Edge, Bottom Edge, Right Edge, Left Edge) and the selected Geometric Correction setting. For example, if Left Edge is set and 5 × 5 is selected for - Epson PowerLite Pro G6570WU | User Manual - Page 160
8. Use the arrow buttons to move the point to the edge of the blending area. 9. To move another point, press the Esc button and repeat the previous two steps. 10. When you are finished, press the Esc button twice and select Yes when you see the confirmation message to return to the Black Level menu - Epson PowerLite Pro G6570WU | User Manual - Page 161
13. When you are finished, press the Menu button to exit. Parent topic: Using Multiple Projectors Matching the Image Colors You can match the display quality of multiple projectors that will project next to each other. Note: Make sure you select Multi-Projection or 3D Multi-Projection (for 3D images - Epson PowerLite Pro G6570WU | User Manual - Page 162
Mode Viewing 3D Images Using an optional polarizer and 3D glasses, you can use two projectors to project and view passive 3D images. See the instructions supplied with the optional equipment for setup and use. For optimal viewing, select the 3D Images setting from the Signal menu and select one of - Epson PowerLite Pro G6570WU | User Manual - Page 163
You see this screen: 5. Select one of the following options: • Load Memory: Overwrites your current settings with saved settings • Save Memory: Saves your current settings to memory (10 memories with different names are available) Note: A memory name that has already been used is indicated by a - Epson PowerLite Pro G6570WU | User Manual - Page 164
3. Select the Schedule Settings setting and press Enter. The Schedule Settings screen appears. 4. Select the Schedule menu and press Enter. 5. Select Add New and press Enter. 6. In the Event Settings section, select the events you want to have occur. (Select No Change for events that you do not want - Epson PowerLite Pro G6570WU | User Manual - Page 165
One-time event Reoccurring event Communication is on/off Event is invalid Parent topic: Saving a Scheduled Event Editing a Scheduled Event You can edit any currently scheduled event. 1. Press the Menu button. 2. Select the Extended menu and press Enter. 3. Select the Schedule Settings setting and - Epson PowerLite Pro G6570WU | User Manual - Page 166
the EasyMP Network Updater software. See the EasyMP Network Updater Operation Guide for instructions. You can download the latest software and documentation from the Epson web site. Go to epson.com/support (U.S.) or epson.ca/support (Canada) and select your projector. Saving Settings to a USB Flash - Epson PowerLite Pro G6570WU | User Manual - Page 167
Saving Settings to a USB Flash Drive You can save the projector settings you want to transfer to a USB flash drive (PowerLite Pro G6070W/G6170/G6270W/G6470WU/G6570WU/G6770WU). Note: Use an empty flash drive. If the drive contains other files, the transfer may not complete correctly. 1. Turn off the - Epson PowerLite Pro G6570WU | User Manual - Page 168
Flash Drive After saving projector settings to a USB flash drive, you can transfer them to another projector of the same model (PowerLite Pro G6070W/G6170/G6270W/G6470WU/G6570WU/G6770WU). Note: Make sure the USB flash drive contains only a single settings transfer from another projector of the same - Epson PowerLite Pro G6570WU | User Manual - Page 169
2. Insert the flash drive into the wireless LAN module port. Note: Connect the flash drive directly to the projector. Do not use a hub. 3. Press and hold the Menu button on the control panel or remote control as you connect the power cord to the projector's power inlet. 4. When the power, Lamp, and - Epson PowerLite Pro G6570WU | User Manual - Page 170
To a Computer You can save the projector settings you want to transfer to a computer (PowerLite Pro G6870/G6970WU). Your computer must be running one of the following operating systems: • Windows cord from the projector's power inlet. 2. Connect a USB cable to your projector's Service port. 170 - Epson PowerLite Pro G6570WU | User Manual - Page 171
Settings From a Computer After saving projector settings to a computer, you can transfer them to another projector of the same model (PowerLite Pro G6870/G6970WU). Your computer must be running one of the following operating systems: • Windows Vista • Windows 7 • Windows 8.x • OS X 10.5.8 171 - Epson PowerLite Pro G6570WU | User Manual - Page 172
to repeat your adjustments. 1. Turn off the projector and unplug the power cord from the projector's power inlet. 2. Connect a USB cable to your projector's Service port. 3. Connect the other end to any available USB port on your computer. 4. Press and hold the Menu button on the control panel or - Epson PowerLite Pro G6570WU | User Manual - Page 173
5. When the power, Lamp, and Temp lights turn orange, release the Menu button. The projector shows up as a removable disk on your computer. 6. Copy the pjconfdata.bin file from your computer to the removable disk. Note: Do not copy any other files to the removable disk. 7. Once the file has copied, - Epson PowerLite Pro G6570WU | User Manual - Page 174
Adjusting the Menu Settings Follow the instructions in these sections to access the projector menu system and change projector settings. Using the Projector's Menus Image Quality Settings - Image Menu Input Signal Settings - - Epson PowerLite Pro G6570WU | User Manual - Page 175
You see the menu screen displaying the Image menu settings. 2. Press the up or down arrow button to move through the menus listed on the left. The settings for each menu are displayed on the right. Note: The available settings depend on the current input source. 3. To change settings in the - Epson PowerLite Pro G6570WU | User Manual - Page 176
Image Quality Settings - Image Menu Settings on the Image menu let you adjust the quality of your image for the input source you are currently using. The available settings depend on the currently selected input source. To change settings for an input source, make sure the source is connected and - Epson PowerLite Pro G6570WU | User Manual - Page 177
Setting Sharpness Color Temp. (absolute color temperature) Advanced Options Varying levels available Varying levels available Various options available Auto Iris Off Normal High Speed Description Adjusts the sharpness or softness of image details Sets the color tone based on color temperature - Epson PowerLite Pro G6570WU | User Manual - Page 178
Input Signal Settings - Signal Menu Normally the projector detects and optimizes the input signal settings automatically. If you need to customize the settings, you can use the Signal menu. The available settings depend on the currently selected input source. Note: You can restore the default - Epson PowerLite Pro G6570WU | User Manual - Page 179
signal resolution from an analog RGB computer connection Auto: detects the resolution automatically Normal: for 4:3 or 5:4 screens Wide: for widescreen Manual: allows you to specify a resolution Adjusts signal to eliminate vertical stripes in images from an analog RGB computer connection Adjusts - Epson PowerLite Pro G6570WU | User Manual - Page 180
Setting Options Frame Interpolation Off (PowerLite Pro G6470WU/ Low G6570WU/G6770WU/G6970WU ) Normal High the setting of the device connected to the DisplayPort, HDMI, HDBaseT and SDI (PowerLite Pro G6970WU) input ports Specifies the signal type from input sources connected to computer ports - Epson PowerLite Pro G6570WU | User Manual - Page 181
images in higher quality Adjusts the input signal level for the device connected to the DisplayPort connector; change to reduce interference or correct other image problems 181 - Epson PowerLite Pro G6570WU | User Manual - Page 182
Projector Feature Settings - Settings Menu Options on the Settings menu let you customize various projector features. 182 - Epson PowerLite Pro G6570WU | User Manual - Page 183
Lock Options Description H/V-Keystone Adjusts the projected image Quick Corner shape Arc Correction H/V Keystone: lets you manually correct the angles of the (PowerLite Pro horizontal and vertical sides G6070W/G6170/G6270W/G6470 WU/G6570WU/G6770WU/) Quick Corner: select to adjust the - Epson PowerLite Pro G6570WU | User Manual - Page 184
Setting Power Consumption Volume Remote Receiver User Button Test Pattern Memory Options Normal Temp Interlock ECO Varying levels available Front/Rear Front Rear Off User Button 1 User Button 2 User Button 3 - Load Memory Save Memory Erase Memory Rename Memory 184 Description Selects the - Epson PowerLite Pro G6570WU | User Manual - Page 185
Parent topic: Adjusting the Menu Settings Projector Setup Settings - Extended Menu Settings on the Extended menu let you customize various projector setup features that control its operation. Setting Display Closed Caption User's Logo Options - Off CC1 CC2 - 185 Description See the next table in - Epson PowerLite Pro G6570WU | User Manual - Page 186
Setting Projection Direction Operation A/V Settings Options Front Front/Ceiling Rear Rear Ceiling Varying levels available - A/V Output Monitor Out Audio Settings Description Selects the way the projector faces the screen so the image is oriented correctly Selects the installation angle for the - Epson PowerLite Pro G6570WU | User Manual - Page 187
Setting Standby Mode HDBaseT Options Communication On Communication Off Control Communications Extron XTP Description Enable this setting to allow the following operations to occur when the projector is in standby mode: • Monitor and control the projector over a network • Output audio and video to - Epson PowerLite Pro G6570WU | User Manual - Page 188
Multi-Projection Schedule Settings Language Display settings Setting Menu Position Messages Options Brightness Level (not available for PowerLite Pro G6470WU) Edge Blending Multi-screen Projector ID - Various languages available Description Select various options when projecting from multiple - Epson PowerLite Pro G6570WU | User Manual - Page 189
Setting Display Background Startup Screen A/V Mute Standby Confirmation Air Filter Notice Screen Panel Alignment Color Uniformity Operation settings Setting Direct Power On Sleep Mode Sleep Mode Timer High Altitude Mode Description Selects the screen color or logo to display when no signal is - Epson PowerLite Pro G6570WU | User Manual - Page 190
such as for switchers is necessary) Select Normal to use the remote control that came with the projector or Simple to use a different Epson projector remote control and disable the remote control that came with the projector Enable this setting if you installed the projector on a ceiling and - Epson PowerLite Pro G6570WU | User Manual - Page 191
Setting Date & Time Options - Description Adjusts the projector's system time and date settings Parent topic: Adjusting the Menu Settings Projector Network Settings - Network Menu Settings on the Network menu let you view network information and set up the projector for monitoring and control - Epson PowerLite Pro G6570WU | User Manual - Page 192
Setting Options Net. Info - Wireless LAN Connection mode (PowerLite Pro Antenna level G6070W/G6170/G6270W/ G6470WU/G6570WU/G6770WU Projector Name ) SSID DHCP IP Address Subnet Mask Gateway Address MAC Address Region Code Net. Info - Wired LAN Projector Name DHCP IP Address - Epson PowerLite Pro G6570WU | User Manual - Page 193
Projector Information Display - Info Menu You can display information about the projector and input sources by viewing the Info menu. However, you cannot change any settings in the menu. Note: The lamp usage timer does not register any hours until you have used the lamp for at least 10 hours. - Epson PowerLite Pro G6570WU | User Manual - Page 194
Power Consumption modes; if the information is displayed in yellow, obtain a genuine Epson replacement lamp soon Displays the name of the port to which the current needed by a service technician Displays information about projector problems that may be needed by a service technician Displays the - Epson PowerLite Pro G6570WU | User Manual - Page 195
If the Event ID option on the Info menu displays a code number, check this list of Event ID codes for the solution to the projector problem associated with the code. Event ID code 0432 0435 0434 0481 0482 0485 0433 0484 04FE 04FF 0891 0892 0893 0894 Cause and solution The - Epson PowerLite Pro G6570WU | User Manual - Page 196
Event ID code 0898 0899 089A 089B 089C 089D Cause and solution Failed to acquire DHCP. Make sure the DHCP server is operating correctly. If you are not using DHCP, turn off the DHCP setting in the Network menus. Communication error. Restart the EasyMP Network Projection program. The projector's EAP - Epson PowerLite Pro G6570WU | User Manual - Page 197
You can also reset the projector's lamp usage timer to zero when you replace the lamp using the Reset Lamp Hours option, or reset the saved names and settings in the Save Memory list using the Reset Memory option. You cannot reset the following settings using the Reset All option: • Input Signal • - Epson PowerLite Pro G6570WU | User Manual - Page 198
and Transporting the Projector Follow the instructions in these sections to maintain your projector Epson servicer. Warning: Before cleaning any part of the projector, turn it off and unplug the power cord. Never open any cover on the projector, except as specifically explained in this manual - Epson PowerLite Pro G6570WU | User Manual - Page 199
your projector and make regular maintenance simple. Filter maintenance intervals will depend on the environment. If regular maintenance is not performed, your Epson projector will notify you when the temperature inside the projector has reached a high level. Do not wait until this warning appears to - Epson PowerLite Pro G6570WU | User Manual - Page 200
Cleaning the Air Filter You need to clean the projector's air filter in the following situations: • The filter or vents get dusty. • You see a message telling you to clean it. • The projector's filter light flashes green. 1. Turn off the projector and unplug the power cord. 2. Slide the air filter - Epson PowerLite Pro G6570WU | User Manual - Page 201
3. Pull the air filter out of the projector. 4. Tap each side of the air filter 4 to 5 times to shake off any excess dust. Caution: Do not use excessive force when tapping the air filter, or it may crack and become unusable. Do not rinse the air filter in water, or use any detergent or solvent to - Epson PowerLite Pro G6570WU | User Manual - Page 202
5. Vacuum the front of the air filter (the side with the tabs) to remove any remaining dust. Note: If dust is difficult to remove or the air filter is damaged, replace the air filter. 6. Place the air filter back in the projector as shown and push gently until it clicks into place. 7. Close the air - Epson PowerLite Pro G6570WU | User Manual - Page 203
Related references Projector Light Status Replacing the Air Filter You need to replace the air filter in the following situations: • After cleaning the air filter, you see a message telling you to clean or replace it • The air filter is torn or damaged You can replace the air filter while the - Epson PowerLite Pro G6570WU | User Manual - Page 204
3. Pull the air filter out of the projector. Note: Air filters contain polypropylene. Dispose of used air filters according to local regulations. 4. Place the new air filter in the projector as shown and push gently until it clicks into place. 5. Close the air filter cover. 204 - Epson PowerLite Pro G6570WU | User Manual - Page 205
Parent topic: Air Filter and Vent Maintenance Related references Projector Light Status Optional Equipment and Replacement Parts Projector Lamp Maintenance The projector keeps track of the number of hours the lamp is used and displays this information in the projector's menu system. Replace the lamp - Epson PowerLite Pro G6570WU | User Manual - Page 206
3. Use the screwdriver included with the replacement lamp to loosen the screws securing the lamp cover, and then remove the lamp cover. Warning: If the lamp is broken, glass fragments may be loose inside the lamp chamber. Be careful removing any broken glass to avoid injury. 4. Loosen the screws - Epson PowerLite Pro G6570WU | User Manual - Page 207
5. Hold the lamp by its handle and gently pull it out of the projector. Note: The lamp(s) in this product contain mercury. Please consult your state and local regulations regarding disposal or recycling. Do not put in the trash. 6. Gently insert the new lamp into the projector. If it does not fit - Epson PowerLite Pro G6570WU | User Manual - Page 208
Caution: Do not touch any glass on the lamp assembly to avoid premature lamp failure. 7. Push in the lamp firmly and tighten the screws to secure it. 8. Replace the lamp cover and tighten the screws to secure it. Note: Be sure the lamp cover is securely installed or the lamp will not come on. Reset - Epson PowerLite Pro G6570WU | User Manual - Page 209
Related references Optional Equipment and Replacement Parts Related tasks Resetting the Lamp Timer Resetting the Lamp Timer You must reset the lamp timer after replacing the projector's lamp to clear the lamp replacement message and to keep track of lamp usage correctly. Note: Do not reset the lamp - Epson PowerLite Pro G6570WU | User Manual - Page 210
two AA manganese or alkaline batteries. Replace the batteries as soon as they run out. Caution: Use only the type of batteries specified in this manual. Do not install batteries of different types, or mix new and old batteries. 1. Open the battery cover as shown. 2. Remove the old batteries. Warning - Epson PowerLite Pro G6570WU | User Manual - Page 211
3. Insert the batteries with the + and - ends facing as shown. 4. Close the battery cover and press it down until it clicks into place. Warning: Dispose of used batteries according to local regulations. Do not expose batteries to heat or flame. Keep batteries out of the reach of children; they are - Epson PowerLite Pro G6570WU | User Manual - Page 212
its original packing materials, if possible, or use equivalent materials with cushioning around the projector. Mark the box "Fragile." Note: Epson shall not be liable for any damages incurred during transportation. Parent topic: Maintaining and Transporting the Projector Related tasks Adjusting the - Epson PowerLite Pro G6570WU | User Manual - Page 213
may indicate what the problem is. • The projector's Help system can display information about common problems, if the projector is operating. • The solutions in this manual can help you solve many problems. If none of these solutions help, you can contact Epson for technical support. Parent topic - Epson PowerLite Pro G6570WU | User Manual - Page 214
Projector Light Status The lights on the projector's control panel indicate the projector status and let you know when a problem occurs. Check the status and color of the lights and look for a solution in the table here. 1 Power light 2 Lamp light 3 Temp (temperature) light 4 Filter - Epson PowerLite Pro G6570WU | User Manual - Page 215
or replace the air filter. • If operating the projector at high altitude, turn on High Altitude Mode. • If the problem persists, unplug the projector and contact Epson for help. Lamp has a problem. • Check to see if the lamp is burned out, broken, or installed incorrectly. Reseat or replace the lamp - Epson PowerLite Pro G6570WU | User Manual - Page 216
vents and air filter are not clogged with dust or obstructed by nearby objects. • Clean or replace the air filter. • If the problem persists, unplug the projector and contact Epson for help. The lamp is past its replacement period and needs to be replaced to avoid damage. Do not continue using the - Epson PowerLite Pro G6570WU | User Manual - Page 217
. Note: If the lights display a pattern not listed in the table above, turn the projector off, unplug it, and contact Epson for help. Parent topic: Solving Problems Related references Projector Setup Settings - Extended Menu Where to Get Help Related tasks Cleaning the Air Filter Replacing the Air - Epson PowerLite Pro G6570WU | User Manual - Page 218
Check the solutions in these sections if you have any problems with projected images or sound. Solutions When No Image Appears Solutions When "No Signal" Message Appears Solutions When "Not Supported" Message Appears Solutions When Only a Partial Image Appears Solutions When the Image is Not - Epson PowerLite Pro G6570WU | User Manual - Page 219
Displaying From a Mac Laptop Parent topic: Solving Image or Sound Problems Related concepts Projector Connections Displaying From a PC Laptop If you see press the key labelled with a monitor icon or CRT/LCD. (See your laptop manual for details.) Wait a few seconds for an image to appear. 2. To - Epson PowerLite Pro G6570WU | User Manual - Page 220
extended desktop mode is disabled. (See your computer or Windows manual for instructions.) 4. If necessary, check your video card settings and set Parent topic: Solving Image or Sound Problems Related references Input Signal Settings - Signal Menu Supported Video Display Formats Solutions When Only - Epson PowerLite Pro G6570WU | User Manual - Page 221
set the resolution within the projector's limits. (See your computer manual for details.) • Check the resolution assigned to your presentation files Image or Sound Problems Related references Input Signal Settings - Signal Menu Projector Setup Settings - Extended Menu Supported Video Display Formats - Epson PowerLite Pro G6570WU | User Manual - Page 222
the tracking and sync. If the problem remains, display a uniformly patterned image on the screen and manually adjust the Tracking and Sync settings. topic: Solving Image or Sound Problems Related references Input Signal Settings - Signal Menu Supported Video Display Formats Related tasks Displaying - Epson PowerLite Pro G6570WU | User Manual - Page 223
overall blurriness remain, display a uniformly patterned image on the screen and manually adjust the Tracking and Sync settings. • If you are projecting from Sound Problems Related references Input Signal Settings - Signal Menu Image Quality Settings - Image Menu Projection Distance Supported Video - Epson PowerLite Pro G6570WU | User Manual - Page 224
Settings - Settings Menu Solutions to Sound Problems If there is no sound when you hear sound from an HDMI source, make sure your Mac supports audio through the HDMI port. If not, you need external speakers to the projector to hear sound (PowerLite Pro G6870/G6970WU). • Make sure the Audio Settings - Epson PowerLite Pro G6570WU | User Manual - Page 225
sure the Remote Receiver setting is turned on in the projector's menu, if available. • The power cord may be defective. Disconnect the cord and contact Epson. Parent topic: Solving Projector or Remote Control Operation Problems Related references Projector Feature Settings - Settings Menu 225 - Epson PowerLite Pro G6570WU | User Manual - Page 226
came with the projector. • If you lose the remote control, you can order another one from Epson. Parent topic: Solving Projector or Remote Control Operation Problems Related references Projector Feature Settings - Settings Menu Optional Equipment and Replacement Parts Remote Control Operation 226 - Epson PowerLite Pro G6570WU | User Manual - Page 227
the remote control you cannot enter a password. Order a new one from Epson. Parent topic: Solving Projector or Remote Control Operation Problems Solving Network Problems Check the solutions in these sections if you have problems using the projector on a network. Solutions When You Cannot Access the - Epson PowerLite Pro G6570WU | User Manual - Page 228
support services, use the following support options. Internet Support Visit Epson's support website at epson.com/support (U.S.) or epson.ca/support (Canada) for solutions to common problems with your projector. You can download utilities and documentation, get FAQs and troubleshooting advice - Epson PowerLite Pro G6570WU | User Manual - Page 229
Representative To use the Epson PrivateLine Support service, call (800) 637-7661. This service is available for the duration of your warranty period. You may also speak with a projector support specialist by dialing (562) 276-4394 (U.S.) or (905) 709-3839 (Canada). Support hours are 6 AM to 8 PM - Epson PowerLite Pro G6570WU | User Manual - Page 230
Supported Video Display Formats General Projector Specifications Type of display Resolution Lens Color reproduction Brightness Poly-silicon TFT active matrix PowerLite Pro G6070W/G6270W: 1280 × 800 pixels (WXGA) PowerLite Pro G6170/G6870: 1024 × 768 pixels (XGA) PowerLite Pro G6470WU - Epson PowerLite Pro G6570WU | User Manual - Page 231
lumens (ISO 21118 standard) Color light output 6500 lumens ECO Power Consumption mode: White light output 4550 lumens (ISO 21118 standard) PowerLite Pro G6470WU: Normal or Temp Interlock Power Consumption mode: White light output 4500 lumens (ISO 21118 standard) Color light output 4500 lumens ECO - Epson PowerLite Pro G6570WU | User Manual - Page 232
:1 with Auto Iris on and Normal Power Consumption mode 50 inches (1.27 m) to 300 inches (7.62 m) PowerLite Pro G6170/G6870: 51 inches (1.30 m) to 570 inches (14.47 m) PowerLite Pro G6070W/G6270W/G6470WU/G6570WU/G6770WU/G6970WU: 53 inches (1.35 m) to 591 inches (15.01 m) Front, rear, ceiling-mounted - Epson PowerLite Pro G6570WU | User Manual - Page 233
) Internal sound system Noise level Keystone correction angle Lens shift range (approximate) Manual Manual 1:1.8 PowerLite Pro G6070W/G6170/G6270W/G6470WU/G6570WU/G6770WU: 10 W monaural PowerLite Pro G6870/G6970WU: N/A PowerLite Pro G6070W/G6170/G6570WU: 37 dB (Normal Power Consumption mode) 31 dB - Epson PowerLite Pro G6570WU | User Manual - Page 234
Type Power consumption Lamp life UHE (Ultra High Efficiency) 380 W PowerLite Pro G6070W/G6470WU: Normal Power Consumption mode: Up to about 3000 hours ECO Power Consumption mode: Up to about 4000 hours PowerLite Pro G6170/G6570WU: Normal Power Consumption mode: Up to about 2500 hours - Epson PowerLite Pro G6570WU | User Manual - Page 235
lens and without cable cover) 5.7 inches (144 mm) 19.9 inches (505 mm) 15.0 inches (382 mm) PowerLite Pro G6070W/G6170/G6270W/G6470WU/G6570WU/G6770WU: 21.8 lb (9.9 kg) PowerLite Pro G6870/G6970WU: 21.4 lb (9.7 kg) (The standard lens weighs approximately 1.61 lbs [0.73 kg].) Parent topic: Technical - Epson PowerLite Pro G6570WU | User Manual - Page 236
/G6570WU: Normal Power Consumption mode: 528 W ECO Power Consumption mode: 421 W PowerLite Pro G6470WU: Normal Power Consumption mode: 468 W ECO Power Consumption mode: 421 W PowerLite Pro G6270W/G6770WU/G6870/G6970WU: Normal Power Consumption mode: 568 W ECO Power Consumption mode: 421 W Standby - Epson PowerLite Pro G6570WU | User Manual - Page 237
/G6570WU: Normal Power Consumption mode: 504 W ECO Power Consumption mode: 405 W PowerLite Pro G6470WU: Normal Power Consumption mode: 449 W ECO Power Consumption mode: 405 W PowerLite Pro G6270W/G6770WU/G6870/G6970WU: Normal Power Consumption mode: 542 W ECO Power Consumption mode: 405 W Standby - Epson PowerLite Pro G6570WU | User Manual - Page 238
Epson's SizeWise chip that supports other computer display resolutions, so your image will be resized to fit automatically. Your computer's monitor port or video card refresh rate (vertical frequency) must be compatible with the projector. (See your computer or video card manual - Epson PowerLite Pro G6570WU | User Manual - Page 239
Display format Refresh rate (in Hz) SXGA+ 60/75 WSXGA+1 60 UXGA 60 WUXGA2, 3 60 MAC13" 67 MAC16" 75 MAC19" 75 59 MAC21" 75 Composite video TV (NTSC) 60 TV (PAL) 50/60 TV (SECAM) 50 Component video SDTV (480i) 60 SDTV (576i) 50 SDTV (480p) 60 SDTV (576p) 50 HDTV ( - Epson PowerLite Pro G6570WU | User Manual - Page 240
× 576 1280 × 720 1920 × 1080 1920 × 1080 1 Only compatible when Wide is selected as the Resolution setting (PowerLite Pro G6070W/G6270W/G6470WU/G6570WU/G6770WU/G6970WU only) 2 PowerLite Pro G6470WU/G6570WU/G6770WU/G6970WU only 3 Compatible only with VESA CVT-RB (Reduced Blanking) input signal 240 - Epson PowerLite Pro G6570WU | User Manual - Page 241
4 Input signals only from the Computer port (PowerLite Pro G6070W/G6170/G6270W/G6870) 5 DisplayPort input only 6 PowerLite Pro G6070W/G6270W/G6470WU/G6570WU/G6770WU/G6970WU only 7 Input signals only from the HDMI port (PowerLite Pro G6070W/G6170/G6270W/G6870) 8 HDMI input only Parent topic: - Epson PowerLite Pro G6570WU | User Manual - Page 242
Information Important Safety Instructions FCC Compliance Statement Trademarks Open Source Software License Copyright Notice Recycling Epson offers a explained in this User's Guide, do not attempt to service this product yourself. Refer all servicing to qualified service personnel. Warning: The - Epson PowerLite Pro G6570WU | User Manual - Page 243
Important Safety Instructions Follow these safety instructions when setting up and using the projector: • Do not look into the lens when the projector is on. The bright light can damage your eyes. - Epson PowerLite Pro G6570WU | User Manual - Page 244
Except as specifically explained in this manual, do not attempt to service this product yourself. Refer all servicing to qualified personnel. Opening or servicing to qualified service personnel under the following conditions: if it does not operate normally when you follow the operating instructions, - Epson PowerLite Pro G6570WU | User Manual - Page 245
• Do not store the projector outside of the required temperature range of 14 to 140 °F (-10 to 60 °C) or in direct sunlight for long periods of time. Doing so may cause damage to the case. • Do not place anything that can become warped or damaged by heat near the exhaust vents. Do not bring your - Epson PowerLite Pro G6570WU | User Manual - Page 246
related to direct medical care, please make your own judgment on this product's suitability after a full evaluation. Parent topic: Important Safety Instructions FCC Compliance Statement For United States Users This equipment has been tested and found to comply with the limits for a Class B digital - Epson PowerLite Pro G6570WU | User Manual - Page 247
Off®, PowerLite®, and Quick Corner® are registered trademarks, and EPSON Exceed Your Vision is a registered logomark of Seiko Epson Corporation. PrivateLine® is a registered trademark; DuetTM and SizeWiseTM are trademarks; and Epson StoreSM and Extra CareSM are service marks of Epson America, Inc - Epson PowerLite Pro G6570WU | User Manual - Page 248
The list of GPL Programs busybox-1.13.4 iptables-1.4.4 libgcc1(gcc-4.3.3) libstdc++-6.0.10 linux-2.6.27 patches udhcp 0.9.8 uvc rev.219 wireless_tools 29 EPSON original drivers The GNU General Public License Version 2 is as follows. You also can see the GNU General Public License Version 2 at - Epson PowerLite Pro G6570WU | User Manual - Page 249
this service if you wish), that you receive source code or can get it passed on, we want its recipients to know that what they have is not the original, so that any problems introduced by others will not reflect on the original authors' reputations. Finally, any free program is threatened constantly - Epson PowerLite Pro G6570WU | User Manual - Page 250
You may charge a fee for the physical act of transferring a copy, and you may at your option offer warranty protection in exchange for a fee. 2. You may modify your copy or copies of the Program or any portion of it, thus forming a work based on the Program, and copy and distribute such - Epson PowerLite Pro G6570WU | User Manual - Page 251
b) Accompany it with a written offer, valid for at least three years, to give any third party, for a charge no more than your cost of physically performing source distribution, a complete machine-readable copy of the corresponding source code, to be distributed under the terms of Sections 1 and 2 - Epson PowerLite Pro G6570WU | User Manual - Page 252
spirit to the present version, but may differ in detail to address new problems or concerns. Each version is given a distinguishing version number. If the Foundation; we sometimes make exceptions for this. Our decision will be guided by the two goals of preserving the free status of all derivatives - Epson PowerLite Pro G6570WU | User Manual - Page 253
RISK AS TO THE QUALITY AND PERFORMANCE OF THE PROGRAM IS WITH YOU. SHOULD THE PROGRAM PROVE DEFECTIVE, YOU ASSUME THE COST OF ALL NECESSARY SERVICING, REPAIR OR CORRECTION. 12. IN NO EVENT UNLESS REQUIRED BY APPLICABLE LAW OR AGREED TO IN WRITING WILL ANY COPYRIGHT HOLDER, OR ANY OTHER PARTY - Epson PowerLite Pro G6570WU | User Manual - Page 254
projector product. If you desire to receive the source code of the LGPL Programs, please see the "EPSON Projector Contact List" in the User's Guide, and contact the customer support of your region. These LGPL Programs are WITHOUT ANY WARRANTY; without even the implied warranty of MERCHANTABILITY - Epson PowerLite Pro G6570WU | User Manual - Page 255
price. Our General Public Licenses are designed to make sure that you have the freedom to distribute copies of free software (and charge for this service if you wish); that you receive source code or can get it if you want it; that you can change the software and use pieces - Epson PowerLite Pro G6570WU | User Manual - Page 256
have is not the original version, so that the original author's reputation will not be affected by problems that might be introduced by others. Finally, software patents pose a constant threat to the existence of any free program. We wish to make sure that a - Epson PowerLite Pro G6570WU | User Manual - Page 257
0. This License Agreement applies to any software library or other program which contains a notice placed by the copyright holder or other authorized party saying it may be distributed under the terms of this Lesser General Public License (also called "this License"). Each licensee is addressed as " - Epson PowerLite Pro G6570WU | User Manual - Page 258
(For example, a function in a library to compute square roots has a purpose that is entirely well-defined independent of the application. Therefore, Subsection 2d requires that any application-supplied function or table used by this function must be optional: if the application does not supply it, - Epson PowerLite Pro G6570WU | User Manual - Page 259
However, linking a "work that uses the Library" with the Library creates an executable that is a derivative of the Library (because it contains portions of the Library), rather than a "work that uses the library". The executable is therefore covered by this License. Section 6 states terms for - Epson PowerLite Pro G6570WU | User Manual - Page 260
c) Accompany the work with a written offer, valid for at least three years, to give the same user the materials specified in Subsection 6a, above, for a charge no more than the cost of performing this distribution. d) If distribution of the work is made by offering access to copy from a designated - Epson PowerLite Pro G6570WU | User Manual - Page 261
License from time to time. Such new versions will be similar in spirit to the present version, but may differ in detail to address new problems or concerns. Each version is given a distinguishing version number. If the Library specifies a version number of this License which applies to it and "any - Epson PowerLite Pro G6570WU | User Manual - Page 262
exceptions for this. Our decision will be guided by the two goals of preserving the free status THE LIBRARY IS WITH YOU. SHOULD THE LIBRARY PROVE DEFECTIVE, YOU ASSUME THE COST OF ALL NECESSARY SERVICING, REPAIR OR CORRECTION. 16. IN NO EVENT UNLESS REQUIRED BY APPLICABLE LAW OR AGREED TO IN WRITING - Epson PowerLite Pro G6570WU | User Manual - Page 263
You should have received a copy of the GNU Lesser General Public License along with this library; if not, write to the Free Software Foundation, Inc., 51 Franklin Street, Fifth Floor, Boston, MA 02110-1301 USA Also add information on how to contact you by electronic and paper mail. You should also - Epson PowerLite Pro G6570WU | User Manual - Page 264
LIABLE FOR ANY DIRECT, INDIRECT, INCIDENTAL, SPECIAL, EXEMPLARY, OR CONSEQUENTIAL DAMAGES (INCLUDING, BUT NOT LIMITED TO, PROCUREMENT OF SUBSTITUTE GOODS OR SERVICES; LOSS OF USE, DATA, OR PROFITS; OR BUSINESS INTERRUPTION) HOWEVER CAUSED AND ON ANY THEORY OF LIABILITY, WHETHER IN CONTRACT, STRICT - Epson PowerLite Pro G6570WU | User Manual - Page 265
owned by IBM, AT&T, and Mitsubishi. Hence arithmetic coding cannot legally be used without obtaining one or more licenses. For this reason, support for arithmetic coding has been removed from the free JPEG software. (Since arithmetic coding provides only a marginal gain over the unpatented Huffman - Epson PowerLite Pro G6570WU | User Manual - Page 266
files. To avoid entanglement with the Unisys LZW patent, GIF reading support has been removed altogether, and the GIF writer has been simplified to the Copyright property of CompuServe Incorporated. GIF(sm) is a Service Mark property of CompuServe Incorporated." libpng This projector product includes - Epson PowerLite Pro G6570WU | User Manual - Page 267
Simon-Pierre Cadieux Eric S. Raymond Gilles Vollant and with the following additions to the disclaimer: There is no warranty against interference with your enjoyment of the library or against infringement. There is no warranty that our efforts or the library will fulfill any of your particular - Epson PowerLite Pro G6570WU | User Manual - Page 268
permit, without fee, and encourage the use of this source code as a component to supporting the PNG file format in commercial products. If you use this source code in a A PARTICULAR PURPOSE. List of zlib programs zlib-1.1.4 zlib-1.2.3 (PowerLite Pro G6070W/G6170/G6270W/G6470WU/G6570WU/G6770WU) 268 - Epson PowerLite Pro G6570WU | User Manual - Page 269
minzip 1.01e (PowerLite Pro G6070W/G6170/G6270W/G6470WU/G6570WU/G6770WU) License terms of conditions of each program which are provided by owner of the copyright to the "zlib" are as follows. Copyright notice: (c) - Epson PowerLite Pro G6570WU | User Manual - Page 270
Apache License Version 2.0, January 2004 http://www.apache.org/licenses/ TERMS AND CONDITIONS FOR USE, REPRODUCTION, AND DISTRIBUTION 1. Definitions. "License" shall mean the terms and conditions for use, reproduction, and distribution as defined by Sections 1 through 9 of this document. "Licensor" - Epson PowerLite Pro G6570WU | User Manual - Page 271
the Work, but excluding communication that is conspicuously marked or otherwise designated in writing by the copyright owner as "Not a Contribution." "Contributor" shall mean Licensor and any individual or Legal Entity on behalf of whom a Contribution has been received by Licensor and subsequently - Epson PowerLite Pro G6570WU | User Manual - Page 272
This License does not grant permission to use the trade names, trademarks, service marks, or product names of the Licensor, except as required for may choose to offer, and charge a fee for, acceptance of support, warranty, indemnity, or other liability obligations and/or rights consistent with - Epson PowerLite Pro G6570WU | User Manual - Page 273
The text should be enclosed in the appropriate comment syntax for the file format. We also recommend that a file or class name and description of purpose be included on the same "printed page" as the copyright notice for easier identification within third-party archives. Copyright [yyyy] [name of - Epson PowerLite Pro G6570WU | User Manual - Page 274
(INCLUDING, BUT NOT LIMITED TO, PROCUREMENT OF SUBSTITUTE GOODS OR SERVICES; LOSS OF USE, DATA, OR PROFITS; OR BUSINESS INTERRUPTION) HOWEVER a copy or modification of this software and in all copies of the supporting documentation for such software. THIS SOFTWARE IS BEING PROVIDED "AS IS", WITHOUT - Epson PowerLite Pro G6570WU | User Manual - Page 275
copyright notice and this permission notice and warranty disclaimer appear in supporting documentation, and that the name of Lucent or any of may benefit from your experience, please report any problems or suggestions about this software to the 29K Technical Support Center at 800-29-29-AMD (800-292- - Epson PowerLite Pro G6570WU | User Manual - Page 276
Copyright (C) 1993 C.W. Sandmann This file may be freely distributed as long as the author's name remains. (6) Eric Backus (C) Copyright 1992 Eric Backus This software may be used freely so long as this copyright notice is left intact. There is no warrantee on this software. (7) Sun Microsystems - Epson PowerLite Pro G6570WU | User Manual - Page 277
(INCLUDING, BUT NOT LIMITED TO, PROCUREMENT OF SUBSTITUTE GOODS OR SERVICES; LOSS OF USE, DATA, OR PROFITS; OR BUSINESS INTERRUPTION) may benefit from your experience, please report any problems or suggestions about this software to the SuperH Support Center via e-mail at [email protected] . - Epson PowerLite Pro G6570WU | User Manual - Page 278
LIABLE FOR ANY DIRECT, INDIRECT, INCIDENTAL, SPECIAL, EXEMPLARY, OR CONSEQUENTIAL DAMAGES (INCLUDING, BUT NOT LIMITED TO, PROCUREMENT OF SUBSTITUTE GOODS OR SERVICES; LOSS OF USE, DATA, OR PROFITS; OR BUSINESS INTERRUPTION) HOWEVER CAUSED AND ON ANY THEORY OF LIABILITY, WHETHER IN CONTRACT, STRICT - Epson PowerLite Pro G6570WU | User Manual - Page 279
LIABLE FOR ANY DIRECT, INDIRECT, INCIDENTAL, SPECIAL, EXEMPLARY, OR CONSEQUENTIAL DAMAGES (INCLUDING, BUT NOT LIMITED TO, PROCUREMENT OF SUBSTITUTE GOODS OR SERVICES; LOSS OF USE, DATA, OR PROFITS; OR BUSINESS INTERRUPTION) HOWEVER CAUSED AND ON ANY THEORY OF LIABILITY, WHETHER IN CONTRACT, STRICT - Epson PowerLite Pro G6570WU | User Manual - Page 280
(INCLUDING, BUT NOT LIMITED TO, PROCUREMENT OF SUBSTITUTE GOODS OR SERVICES; LOSS OF USE, DATA, OR PROFITS; OR BUSINESS INTERRUPTION) HOWEVER a copy or modification of this software and in all copies of the supporting documentation for such software. THIS SOFTWARE IS BEING PROVIDED "AS IS", WITHOUT - Epson PowerLite Pro G6570WU | User Manual - Page 281
LIABLE FOR ANY DIRECT, INDIRECT, INCIDENTAL, SPECIAL, EXEMPLARY, OR CONSEQUENTIAL DAMAGES (INCLUDING, BUT NOT LIMITED TO, PROCUREMENT OF SUBSTITUTE GOODS OR SERVICES; LOSS OF USE, DATA, OR PROFITS; OR BUSINESS INTERRUPTION) HOWEVER CAUSED AND ON ANY THEORY OF LIABILITY, WHETHER IN CONTRACT, STRICT - Epson PowerLite Pro G6570WU | User Manual - Page 282
that both the copyright notice and this permission notice appear in supporting documentation. In addition, Intel grants this permission provided that DAMAGES (INCLUDING, BUT NOT LIMITED TO, PROCUREMENT OF SUBSTITUTE GOODS OR SERVICES; LOSS OF USE, DATA, OR PROFITS; OR BUSINESS INTERRUPTION) HOWEVER - Epson PowerLite Pro G6570WU | User Manual - Page 283
LIABLE FOR ANY DIRECT, INDIRECT, INCIDENTAL, SPECIAL, EXEMPLARY, OR CONSEQUENTIAL DAMAGES (INCLUDING, BUT NOT LIMITED TO, PROCUREMENT OF SUBSTITUTE GOODS OR SERVICES; LOSS OF USE, DATA, OR PROFITS; OR BUSINESS INTERRUPTION) HOWEVER CAUSED AND ON ANY THEORY OF LIABILITY, WHETHER IN CONTRACT, STRICT - Epson PowerLite Pro G6570WU | User Manual - Page 284
LIABLE FOR ANY DIRECT, INDIRECT, INCIDENTAL, SPECIAL, EXEMPLARY, OR CONSEQUENTIAL DAMAGES (INCLUDING, BUT NOT LIMITED TO, PROCUREMENT OF SUBSTITUTE GOODS OR SERVICES; LOSS OF USE, DATA, OR PROFITS; OR BUSINESS INTERRUPTION) HOWEVER CAUSED AND ON ANY THEORY OF LIABILITY, WHETHER IN CONTRACT, STRICT - Epson PowerLite Pro G6570WU | User Manual - Page 285
LIABLE FOR ANY DIRECT, INDIRECT, INCIDENTAL, SPECIAL, EXEMPLARY, OR CONSEQUENTIAL DAMAGES (INCLUDING, BUT NOT LIMITED TO, PROCUREMENT OF SUBSTITUTE GOODS OR SERVICES; LOSS OF USE, DATA, OR PROFITS; OR BUSINESS INTERRUPTION) HOWEVER CAUSED AND ON ANY THEORY OF LIABILITY, WHETHER IN CONTRACT, STRICT - Epson PowerLite Pro G6570WU | User Manual - Page 286
LIABLE FOR ANY DIRECT, INDIRECT, INCIDENTAL, SPECIAL, EXEMPLARY, OR CONSEQUENTIAL DAMAGES (INCLUDING, BUT NOT LIMITED TO, PROCUREMENT OF SUBSTITUTE GOODS OR SERVICES; LOSS OF USE, DATA, OR PROFITS; OR BUSINESS INTERRUPTION) HOWEVER CAUSED AND ON ANY THEORY OF LIABILITY, WHETHER IN CONTRACT, STRICT - Epson PowerLite Pro G6570WU | User Manual - Page 287
LIABLE FOR ANY DIRECT, INDIRECT, INCIDENTAL, SPECIAL, EXEMPLARY, OR CONSEQUENTIAL DAMAGES (INCLUDING, BUT NOT LIMITED TO, PROCUREMENT OF SUBSTITUTE GOODS OR SERVICES; LOSS OF USE, DATA, OR PROFITS; OR BUSINESS INTERRUPTION) HOWEVER CAUSED AND ON ANY THEORY OF LIABILITY, WHETHER IN CONTRACT, STRICT - Epson PowerLite Pro G6570WU | User Manual - Page 288
(INCLUDING, BUT NOT LIMITED TO, PROCUREMENT OF SUBSTITUTE GOODS OR SERVICES; LOSS OF USE, DATA, OR PROFITS; OR BUSINESS INTERRUPTION) OF THE POSSIBILITY OF SUCH DAMAGE. /* WPA Supplicant (PowerLite Pro G6070W/G6170/G6270W/G6470WU/G6570WU/G6770WU) The copyright owner of the WPA Supplicant open - Epson PowerLite Pro G6570WU | User Manual - Page 289
LIABLE FOR ANY DIRECT, INDIRECT, INCIDENTAL, SPECIAL, EXEMPLARY, OR CONSEQUENTIAL DAMAGES (INCLUDING, BUT NOT LIMITED TO, PROCUREMENT OF SUBSTITUTE GOODS OR SERVICES; LOSS OF USE, DATA, OR PROFITS; OR BUSINESS INTERRUPTION) HOWEVER CAUSED AND ON ANY THEORY OF LIABILITY, WHETHER IN CONTRACT, STRICT - Epson PowerLite Pro G6570WU | User Manual - Page 290
LICENSE IS GRANTED OR SHALL BE IMPLIED FOR ANY OTHER USE. ADDITIONAL INFORMATION MAY BE OBTAINED FROM MPEG LA, L.L.C. SEE HTTP://WWW.MPEGLA.COM MIT License This projector product includes the open source software program which applies the terms and conditions provided by owner of the copyright to - Epson PowerLite Pro G6570WU | User Manual - Page 291
above copyright display, these terms of utilization, and the following stipulation of no guarantee shall be inserted in documentation accompanying redistribution (user's manual, etc.). (3) When this software is redistributed in a form in which it cannot be used in the development of other software - Epson PowerLite Pro G6570WU | User Manual - Page 292
LIABLE FOR ANY DIRECT, INDIRECT, INCIDENTAL, SPECIAL, EXEMPLARY, OR CONSEQUENTIAL DAMAGES (INCLUDING, BUT NOT LIMITED TO, PROCUREMENT OF SUBSTITUTE GOODS OR SERVICES; LOSS OF USE, DATA, OR PROFITS; OR BUSINESS INTERRUPTION) HOWEVER CAUSED AND ON ANY THEORY OF LIABILITY, WHETHER IN CONTRACT, STRICT - Epson PowerLite Pro G6570WU | User Manual - Page 293
above copyright display, these terms of utilization, and the following stipulation of no guarantee shall be inserted in documentation accompanying redistribution (user's manual, etc.). (3) When this software is redistributed in a form in which it cannot be used in the development of other software - Epson PowerLite Pro G6570WU | User Manual - Page 294
or alterations to this product, or (excluding the U.S.) failure to strictly comply with Seiko Epson Corporation's operating and maintenance instructions. Seiko Epson Corporation shall not be liable for any damages or problems arising from the use of any options or any consumable products other than
-
 1
1 -
 2
2 -
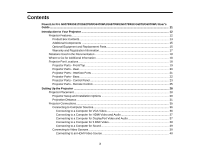 3
3 -
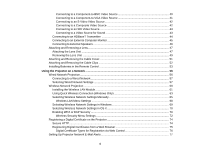 4
4 -
 5
5 -
 6
6 -
 7
7 -
8
-
9
-
10
-
11
-
12
-
13
-
14
-
15
-
16
-
17
-
18
-
19
-
20
-
21
-
22
-
23
-
24
-
25
-
26
-
27
-
28
-
29
-
30
-
31
-
32
-
33
-
34
-
35
-
36
-
37
-
38
-
39
-
40
-
41
-
42
-
43
-
44
-
45
-
46
-
47
-
48
-
49
-
50
-
51
-
52
-
53
-
54
-
55
-
56
-
57
-
58
-
59
-
60
-
61
-
62
-
63
-
64
-
65
-
66
-
67
-
68
-
69
-
70
-
71
-
72
-
73
-
74
-
75
-
76
-
77
-
78
-
79
-
80
-
81
-
82
-
83
-
84
-
85
-
86
-
87
-
88
-
89
-
90
-
91
-
92
-
93
-
94
-
95
-
96
-
97
-
98
-
99
-
100
-
101
-
102
-
103
-
104
-
105
-
106
-
107
-
108
-
109
-
110
-
111
-
112
-
113
-
114
-
115
-
116
-
117
-
118
-
119
-
120
-
121
-
122
-
123
-
124
-
125
-
126
-
127
-
128
-
129
-
130
-
131
-
132
-
133
-
134
-
135
-
136
-
137
-
138
-
139
-
140
-
141
-
142
-
143
-
144
-
145
-
146
-
147
-
148
-
149
-
150
-
151
-
152
-
153
-
154
-
155
-
156
-
157
-
158
-
159
-
160
-
161
-
162
-
163
-
164
-
165
-
166
-
167
-
168
-
169
-
170
-
171
-
172
-
173
-
174
-
175
-
176
-
177
-
178
-
179
-
180
-
181
-
182
-
183
-
184
-
185
-
186
-
187
-
188
-
189
-
190
-
191
-
192
-
193
-
194
-
195
-
196
-
197
-
198
-
199
-
200
-
201
-
202
-
203
-
204
-
205
-
206
-
207
-
208
-
209
-
210
-
211
-
212
-
213
-
214
-
215
-
216
-
217
-
218
-
219
-
220
-
221
-
222
-
223
-
224
-
225
-
226
-
227
-
228
-
229
-
230
-
231
-
232
-
233
-
234
-
235
-
236
-
237
-
238
-
239
-
240
-
241
-
242
-
243
-
244
-
245
-
246
-
247
-
248
-
249
-
250
-
251
-
252
-
253
-
254
-
255
-
256
-
257
-
258
-
259
-
260
-
261
-
262
-
263
-
264
-
265
-
266
-
267
-
268
-
269
-
270
-
271
-
272
-
273
-
274
-
275
-
276
-
277
-
278
-
279
-
280
-
281
-
282
-
283
-
284
-
285
-
286
-
287
-
288
-
289
-
290
-
291
-
292
-
293
-
294
 |
 |

PowerLite
®
Pro
G6070W/G6170/G6270W/G6470WU/
G6570WU/G6770WU/G6870/G6970WU
User's Guide