Epson PowerLite Pro Z8050WNL User's Guide
Epson PowerLite Pro Z8050WNL Manual
 |
View all Epson PowerLite Pro Z8050WNL manuals
Add to My Manuals
Save this manual to your list of manuals |
Epson PowerLite Pro Z8050WNL manual content summary:
- Epson PowerLite Pro Z8050WNL | User's Guide - Page 1
PowerLite® Pro Z8000WUNL/Z8050WNL User's Guide - Epson PowerLite Pro Z8050WNL | User's Guide - Page 2
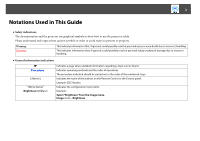
2 Notations Used in This Guide • Safety indications The documentation and the projector use graphical symbols to show how to use the projector safely. Please understand and respect these caution symbols in order to avoid injury to persons or property. Warning: Caution: This indicates information - Epson PowerLite Pro Z8050WNL | User's Guide - Page 3
Guide Introduction About Your Documentation 8 Projector Features 9 Ease of use when installed on a ceiling mount 9 Reliability you can depend on 10 Large Projection Area and Precise Colors 10 Enhanced security functions 11 Easy to handle 11 Using the projector over a network (PowerLite Pro - Epson PowerLite Pro Z8050WNL | User's Guide - Page 4
Lens Operation Lock 63 Theft Deterrent Lock 64 Installing the wire lock 64 Configuration Menu Using the Configuration Menu 66 List of Functions 67 Image Menu 67 Signal Menu 69 Settings Menu 71 Extended Menu 73 Network Menu (PowerLite Pro Z8000WUNL 75 Network Menu (PowerLite Pro Z8050WNL - Epson PowerLite Pro Z8050WNL | User's Guide - Page 5
Access Point (PowerLite Pro Z8050WNL only 133 Connection Setup Method 133 Making a Connection Using the Push Button Method 134 Making a connection using the PIN Code Method 135 Connecting a LAN Cable 138 Connecting to an external monitor 139 Removing and Attaching the Projector Lens Unit 140 - Epson PowerLite Pro Z8050WNL | User's Guide - Page 6
Reading Problem Mail Notification Function 144 ESC/VP21 Commands 146 Command List 146 Cable Layouts 147 Serial Connection 147 Communications protocol 147 About PJLink 148 Supported Monitor Displays 149 Supported Monitor Displays for PowerLite Pro Z8000WUNL 149 Computer signals (analog RGB - Epson PowerLite Pro Z8050WNL | User's Guide - Page 7
7 Introduction This chapter explains the projector's documentation, features, and part names. - Epson PowerLite Pro Z8050WNL | User's Guide - Page 8
, using the remote control, and solving display problems. • On-screen EasyMP Monitor Operation Guide Provides information for monitoring and controlling the projector over a network. • On-screen Network Operation Guide (PowerLite Pro Z8050WNL only) Provides information for projecting images over - Epson PowerLite Pro Z8050WNL | User's Guide - Page 9
balanced and is easy to mount on a ceiling. This also makes it easy to line up the screen and the projector. Equipped with electric lens shift, zoom and focus functions The lens shift function allows you to adjust the position of the projected image along the horizontal and vertical axes which opens - Epson PowerLite Pro Z8050WNL | User's Guide - Page 10
with a high-resolution WUXGA panel (PowerLite Pro Z8000WUNL only) You can project a large amount of information on the screen. Viewers can see the information at a glance without having to scroll or switch screens. Epson Cinema Filter supports the color gamut for digital cinema. Select Theater or - Epson PowerLite Pro Z8050WNL | User's Guide - Page 11
Security cable installation point Using the projector over a network (PowerLite Pro Z8050WNL only) You can use the included software to deliver presentations and meetings over a network. See your Network Operation Guide for more information. Connect to the projector from computers via a network You - Epson PowerLite Pro Z8050WNL | User's Guide - Page 12
cover 8 Projection lens 9 Interface cover open/close switch Function Use these handles when carrying the projector. Also, projector internally. If dust collects here it can cause the internal temperature to rise, and this can lead to problems with operation and shorten the optical engine's service - Epson PowerLite Pro Z8050WNL | User's Guide - Page 13
Part Names and Functions 13 Name 10 Ceiling mount attachment points (Four points) Function Attach the optional Ceiling mount here when suspending the projector from a ceiling. - Epson PowerLite Pro Z8050WNL | User's Guide - Page 14
input to any port other than the Computer input port or the BNC input port. 12 LAN port (PowerLite Connects to a LAN cable and then to a network. Pro Z8000WUNL only) 13 DVI-D input port For digital RGB signals from a computer's DVI-D output port. This projector is compatible with HDCP signals. - Epson PowerLite Pro Z8050WNL | User's Guide - Page 15
color of the indicators and whether they are flashing or lit indicate the status of the projector. The illustration shows the PowerLite Pro Z8050WNL. The PowerLite Pro Z8000WUNL does not have a wireless indicator. Corrects horizontal Keystone distortion. If pressed while the configuration menu or - Epson PowerLite Pro Z8050WNL | User's Guide - Page 16
Name 10 [Enter] button 11 [Menu] button 12 [Source Search] button 13 [Lens] button 14 [t] button Function If pressed during projection of computer analog RGB signals, next input source that is connected to the projector and is sending an image. Press this button to cycle through the focus, zoom, and - Epson PowerLite Pro Z8050WNL | User's Guide - Page 17
] button 4 [Video] button 5 [S-Video] button 6 [Menu] button 7 [h] button 8 [Enter] button 9 [Page] buttons [[][]] 10 [Shutter] button 11 [Auto] button Function Turns the projector power On or Off. Changes to images from the Computer input port. Changes to images from the BNC input port. Changes to - Epson PowerLite Pro Z8050WNL | User's Guide - Page 18
on the PowerLite Pro Z8000WUNL. Use this switch to enable (On)/disable (Off) ID settings for the remote control. Each time you press this button, the image on the screen changes between the DVI-D and HDMI input ports. Changes to the next input source that is connected to the projector and is - Epson PowerLite Pro Z8050WNL | User's Guide - Page 19
Part Names and Functions 19 When you use the remote control, make sure you are within the operating range of the projector's front or back remote receiver as shown in the diagram below. 49 ft (15 m) 49 ft (15 m) 49 ft (15 m) 49 ft (15 m) - Epson PowerLite Pro Z8050WNL | User's Guide - Page 20
to another location. Before you move the projector, see the moving and transportation instructions. s p.130 Projector and lens cap Remote control and 2 AA batteries Power cord VGA cable foot covers PDF manuals and registration CD-ROM Projector software Password Protected CD-ROM sticker - Epson PowerLite Pro Z8050WNL | User's Guide - Page 21
it. Try to leave as much space as possible between the projector and the screen to get a good-size image. Use the illustrations lens shift. C Center of lens PowerLite Pro Z8000WUNL, 16:10 image, Rear projection wide lens (ELPLR04) Screen or image size Projection distance (1) Offset from lens - Epson PowerLite Pro Z8050WNL | User's Guide - Page 22
Positioning the Projector 22 Screen or image size Projection distance (1) Offset from lens center (2) 200 inches 133 inches (337 cm) 53 inches (135 cm) 300 inches 200 inches (508 cm) 79.5 inches (202 cm) 500 inches 335 inches (852 cm) 132.5 inches (337 cm) PowerLite Pro Z8000WUNL, 16:10 - Epson PowerLite Pro Z8050WNL | User's Guide - Page 23
Positioning the Projector 23 Screen or image size Projection distance (1) (Wide to Tele) Offset from lens center -142 cm) PowerLite Pro Z8000WUNL, 16:10 image, Middle throw zoom lens 1 (ELPLM06) Screen or image size Projection distance (1) (Wide to Tele) Offset from lens center (2) 60 inches - Epson PowerLite Pro Z8050WNL | User's Guide - Page 24
Positioning the Projector 24 Screen or image size Projection distance (1) (Wide to Tele) Offset from lens center (2) to -142 cm) PowerLite Pro Z8000WUNL, 16:10 image, Long throw zoom lens (ELPLL07) Screen or image size Projection distance (1) (Wide to Tele) Offset from lens center (2) 60 inches - Epson PowerLite Pro Z8050WNL | User's Guide - Page 25
Positioning the Projector 25 Screen or image size Projection distance (1) Offset from lens center (2) 100 (808 to -135 cm) PowerLite Pro Z8050WNL, 16:10 image, Standard zoom lens (ELPLS04) Screen or image size Projection distance (1) (Wide to Tele) Offset from lens center (2) 60 inches 86 - Epson PowerLite Pro Z8050WNL | User's Guide - Page 26
Positioning the Projector 26 Screen or image size Projection distance (1) (Wide to Tele) Offset from lens center to -135 cm) PowerLite Pro Z8050WNL, 16:10 image, Middle throw zoom lens 1 (ELPLM06) Screen or image size Projection distance (1) (Wide to Tele) Offset from lens center (2) 60 inches - Epson PowerLite Pro Z8050WNL | User's Guide - Page 27
Positioning the Projector 27 Screen or image size Projection distance (1) (Wide to Tele) Offset from lens center (2) to -135 cm) PowerLite Pro Z8050WNL, 16:10 image, Long throw zoom lens (ELPLL07) Screen or image size Projection distance (1) (Wide to Tele) Offset from lens center (2) 60 inches - Epson PowerLite Pro Z8050WNL | User's Guide - Page 28
power cord into the projector (s p.34), attach the interface cover as described below. 1 Loosen the screw. 2 While pulling up the interface cover open switch, pull the interface cover straight out. 1 Remove the top of the interface cover. 2 Install the cover along the guide. 3 Tighten the screws - Epson PowerLite Pro Z8050WNL | User's Guide - Page 29
to Your Equipment The illustrations in this section show the PowerLite Pro Z8000WUNL. If you are using the PowerLite Pro Z8050WNL, the projector and interfaces are slightly different. Connecting to a Computer Connecting to the BNC Ports Procedure A Attach the BNC connectors on one end of your - Epson PowerLite Pro Z8050WNL | User's Guide - Page 30
's HDMI port. Connecting to the DVI-D Port Procedure A Connect one end of your DVI-D cable (not included) to the projector's DVI-D port, and the other end to your computer's DVI-D port. B Turn the projector on (s p.34), select the image source (s p.43), and adjust the image (s p.35). B Turn the - Epson PowerLite Pro Z8050WNL | User's Guide - Page 31
to Your Equipment 31 Connecting to Video Equipment Connecting to the HDMI Port Procedure A Connect one end of your HDMI cable (not included) to the projector's HDMI port, and the other end to the HDMI connector on your equipment. Connecting to the DVI-D Port Procedure A Connect one end of your - Epson PowerLite Pro Z8050WNL | User's Guide - Page 32
to Your Equipment 32 Connecting a Component Video Source Procedure A Connect one end of your cable (not included) to either the projector's BNC ports or Computer port (depending on the type of component video cable you're using). Connect the other end of the cable to your - Epson PowerLite Pro Z8050WNL | User's Guide - Page 33
Connecting the Projector to Your Equipment 33 Connecting a Composite Video Source Procedure A Connect one end of your cable (not included) to the projector's Video port, and the other end to your equipment. B Turn the projector on (s p.34), select the image source (s p.43), and adjust the image - Epson PowerLite Pro Z8050WNL | User's Guide - Page 34
. Procedure A Plug one end of the power cord into the projector, and the other end into an electrical outlet. Warning: When the lamp is on, never look into the lens or allow children or pets to look into the lens. This can damage your eyes, and is especially dangerous for children. B Remove - Epson PowerLite Pro Z8050WNL | User's Guide - Page 35
Adjusting the Image Adjusting the Image Adjusting the Position Procedure A Press the [Lens Shift] button on the remote control or press the [Lens] button on the back of the projector until "Adjust Lens Shift" is displayed on the screen. 35 B To adjust the position, use the [h] button on the remote - Epson PowerLite Pro Z8050WNL | User's Guide - Page 36
Adjust Focus" is displayed on the screen. Zooming the Image Procedure A Press the [Zoom] button on the remote control or press the [Lens] button on the back of the projector until "Adjust Zoom" is displayed on the screen. B To adjust the focus, use the [h] button on the remote control or the arrow - Epson PowerLite Pro Z8050WNL | User's Guide - Page 37
Adjusting the Image 37 Fixing a Tilted Image If you've placed your projector on a table in front of the screen and the image is tilted as shown below, you can use the four adjustable feet to correct the tilt. - Epson PowerLite Pro Z8050WNL | User's Guide - Page 38
38 Useful Functions This chapter explains useful tips for giving presentations, and the Security functions. - Epson PowerLite Pro Z8050WNL | User's Guide - Page 39
projected images. • Quick Corner This allows you to manually correct each of the four corners of the projected image projector's control panel, as shown below. Before performing horizontal or vertical keystone, use the lens shift function to horizontally center the lens and vertically move the lens - Epson PowerLite Pro Z8050WNL | User's Guide - Page 40
Correcting Distortion in the Projected Image Correcting Distortion with Quick Corner Procedure A Press the Menu button, and then from the configuration menu select Settings - Keystone. Using the Remote Control Using the Control panel 40 B Select "Quick Corner", and then press the [Enter] button - Epson PowerLite Pro Z8050WNL | User's Guide - Page 41
Correcting Distortion in the Projected Image C Use the [h] button on the remote control or the [w/ ], [v/ ], [/ ] buttons on the control panel to select the corner you want to adjust, and then press the [Enter] button. 41 D To adjust the shape, use the [h] button on the remote control - Epson PowerLite Pro Z8050WNL | User's Guide - Page 42
Correcting Distortion in the Projected Image 42 E Repeat steps 3 and 4 as needed to adjust any remaining corners. F When you are done, press the [Esc] button to exit the correction menu. Because the correction method was changed to Quick Corner from Keystone in the configuration menu, when [w/ ], - Epson PowerLite Pro Z8050WNL | User's Guide - Page 43
ignored when you change by pressing the Source Search button. 1 Computer 2 BNC 3 DVI-D 4 S-Video 5 Video 6 HDMI 7 LAN (PowerLite Pro Z8050WNL only): When using EasyMP Network Projection, the image from a computer connected to the projector via a network Skipped when no image signal is being input. - Epson PowerLite Pro Z8050WNL | User's Guide - Page 44
. 3 Changes to images from the S-Video input port. 4 Changes to images from EasyMP Network Projection (PowerLite Pro Z8050WNL only). This button does not function when you are using the PowerLite Pro Z8000WUNL. 5 Each time the button is pressed, switches between images from the DVI-D and HDMI input - Epson PowerLite Pro Z8050WNL | User's Guide - Page 45
a natural tone almost like an original source. (When computer images (analog RGB/digital RGB) are input) Ideal for projecting still pictures, such as photos, in R,G,B,C,M,Y from Color Adjustment in the configuration menu. * The Epson Cinema Filter deploys automatically when Theatre or sRGB is 45 - Epson PowerLite Pro Z8050WNL | User's Guide - Page 46
press the buttons, the electric shutter closes or opens. When the shutter is closed and no operations are performed for about 120 minutes, the projector enters Sleep Mode and turns off automatically. If you do not want Sleep Mode to activate, change the Shutter Timer setting to Off from Operation - Epson PowerLite Pro Z8050WNL | User's Guide - Page 47
. Procedure Remote Control Changing the Aspect Ratio Change the Aspect Ratio when video equipment is connected so that images that have been recorded in digital video or onto DVDs can be viewed in 16:9 wide-screen format. Change the Aspect Ratio when projecting computer images at full size. The - Epson PowerLite Pro Z8050WNL | User's Guide - Page 48
Functions for Enhancing Projection 48 Changing the Aspect for video equipment images Each time the button is pressed, the aspect changes in the order Normal, 16:9, Full, Zoom, and Native. 1 Normal 2 16:9 3 Full 4 Zoom 5 Native - Epson PowerLite Pro Z8050WNL | User's Guide - Page 49
from the Computer, DVI-D, or HDMI input port as follows. The default aspect ratio is 16:10 because of the wide panel mounted on the projector. When projecting onto 16:9 screens, set the Aspect to 16:9. If parts of the image are missing or the image is not projected properly, set - Epson PowerLite Pro Z8050WNL | User's Guide - Page 50
input Zoom Projects the input image enlarged to When a 1024x768 signal is input the full lateral direction size as the aspect ratio remains. Parts that PowerLite Pro Z8000WUNL extend beyond the projection size are not projected - Epson PowerLite Pro Z8050WNL | User's Guide - Page 51
the screen. This is ideal for projecting clear images. When an 2048x1536 signal is input If the image resolution exceeds the panel resolution of your projector, the edges of the image are not projected. - Epson PowerLite Pro Z8050WNL | User's Guide - Page 52
Functions for Enhancing Projection 52 Pointer Function (Pointer) This allows you to move a Pointer icon on the projected image, and helps you draw attention to the area you are talking about. B Move the Pointer icon ( ). Remote Control Procedure A Display the Pointer. Remote Control You can - Epson PowerLite Pro Z8050WNL | User's Guide - Page 53
Functions for Enhancing Projection Enlarging Part of the Image (E-Zoom) This is useful when you want to expand images to see them in greater detail, such as graphs and tables. 53 B Move the ( ) to the area of the image that you want to enlarge. Remote Control Procedure A Start E-Zoom. Remote - Epson PowerLite Pro Z8050WNL | User's Guide - Page 54
Functions for Enhancing Projection 54 C Enlarge. Remote Control Each time the button is pressed, the area is expanded. You can expand quickly by holding the button down. You can reduce the enlarged image by pressing the [x] button. Press the [Esc] button to cancel. The enlargement ratio appears - Epson PowerLite Pro Z8050WNL | User's Guide - Page 55
ID is "0", you can operate with the remote control ID switch: On regardless of the Remote control ID: 0 Projector ID setting. Projector ID: 1 When the remote control switch is On, and Projector ID and remote control ID do ID switch: On not match, you cannot Remote control ID: 3 operate - Epson PowerLite Pro Z8050WNL | User's Guide - Page 56
ID" from the configuration menu. Using the Remote Control Using the Control panel Checking the Projector ID Use the following procedure to check the projector ID. Procedure A Set the remote control ID switch to On. B During projection, while holding the [ID] button, press the [Help] button - Epson PowerLite Pro Z8050WNL | User's Guide - Page 57
, it is reset to the default value (ID0). B While holding the [ID] button, press a number button to select a number to match the ID of the projector you want to operate. Once this setting has been made, the projector that can be operated by the remote control is limited. - Epson PowerLite Pro Z8050WNL | User's Guide - Page 58
(Multi-Screen Color Adjustment) When multiple projectors are lined up and projecting images, you can manually correct the brightness and color tone of each projector's image so that the colors projected from each projector match closely. Set each projector to the same Color Mode before using - Epson PowerLite Pro Z8050WNL | User's Guide - Page 59
Correcting Color for Multiple Projectors (Multi-Screen Color Adjustment) 59 E Correct the color using Color Correct. (G/R) and Color Correct. (B/Y). Because each time the [Enter] button is pressed the image displayed - Epson PowerLite Pro Z8050WNL | User's Guide - Page 60
. • Password Protect You can limit who can use the projector. • Control Panel Lock/Lens Operation Lock You can prevent people changing the settings on the projector without permission. s p.62 • Theft Deterrent Lock The projector is equipped with various types of theft deterrent security devices - Epson PowerLite Pro Z8050WNL | User's Guide - Page 61
Password is set, stick the Password protect sticker in a visible position on the projector as a further theft deterrent. B Turn on Power On Protect. (1) Select Power down the [Num] button, enter a four digit number using the numeric buttons. The number entered is displayed as "* * * *". When - Epson PowerLite Pro Z8050WNL | User's Guide - Page 62
wrong Password thirty times in succession, the following message is displayed and the projector does not accept any more Password entries. The projector's operation will be locked. Contact Epson. s p.116 • Lens Operation Lock This function deactivates all buttons on the remote control related to - Epson PowerLite Pro Z8050WNL | User's Guide - Page 63
on the Control panel for about seven seconds, a message is displayed and the lock is released. Lens Operation Lock This function locks the following buttons on the remote control related to the lens operation. Remote Control B Select either Full Lock or Partial Lock according to your purpose. - Epson PowerLite Pro Z8050WNL | User's Guide - Page 64
through the handle to secure the projector to a desk or pillar. Installing the wire lock Pass an theft deterrent wire lock through the handle. See the documentation supplied with the wire lock for locking instructions. B Select On. The buttons related to the lens operation are locked according to - Epson PowerLite Pro Z8050WNL | User's Guide - Page 65
65 Configuration Menu This chapter explains how to use the configuration menu and its functions. See s p.96 for a table that summarizes the options you can select based on the projector menu you are viewing. For more information on these menus and options, continue reading this chapter. - Epson PowerLite Pro Z8050WNL | User's Guide - Page 66
Using the Configuration Menu 66 Using the Configuration Menu Selecting from the top Selecting from the sub Changing the selected Exit menu menu item - Epson PowerLite Pro Z8050WNL | User's Guide - Page 67
currently being projected as shown in the following screen shots. Setting details are saved for each image signal. Analog RGB/Digital RGB Analog/Digital Component Video/ Composite video/S-Video Sub Menu Color Mode Brightness Contrast Color Saturation Tint Sharpness Abs. Color Temp. Function You - Epson PowerLite Pro Z8050WNL | User's Guide - Page 68
List of Functions 68 Sub Menu Color Adjustment Auto Iris Reset Function (This item cannot be selected if sRGB is selected as the Color Mode setting from the Image menu.) When you use any Color Mode other than Customized: Red, Green, Blue: You can adjust the saturation of each color individually. - Epson PowerLite Pro Z8050WNL | User's Guide - Page 69
are saved for each image signal. Analog RGB Digital RGB/ Digital Component Video Analog Component Video Composite video/S-Video connected computer for wide screens, or set to Normal for 4:3 or 5:4 screens. Manual: You can specify the resolution. This is ideal when connected computer is fixed, - Epson PowerLite Pro Z8050WNL | User's Guide - Page 70
be set when a digital RGB signal is input.) When the projector's DVI-D input port or HDMI input port is connected to a DVD player, the projector's video range is are recognized automatically. If interference appears in the image or a problem occurs such as no image is being projected when set to Auto - Epson PowerLite Pro Z8050WNL | User's Guide - Page 71
and corrects the four corners of the projected image. s p.40 You can use this to restrict operation of the projector's Control panel. s p.62 You can use this to restrict the lens operation of the remote control. s p.63 You can select the shape of the pointer. s p.52 Pointer 1: Pointer 2: Pointer - Epson PowerLite Pro Z8050WNL | User's Guide - Page 72
one of the following six items to the [User] button. Power Consumption, Info, Progressive, Test Pattern, Multi-screen, and Resolution When the projector is setup, a Test Pattern is displayed so that you can adjust the projection without connecting other equipment. While the Test Pattern is displayed - Epson PowerLite Pro Z8050WNL | User's Guide - Page 73
Screen*1: You can set whether or not (On/Off) the Startup Screen (the registered User's Logo displays when starting the projector) is displayed. Menu Size (PowerLite Pro Z8000WUNL only): You can select Normal or Larger for the display size of the configuration menu, Help, and other messages. You - Epson PowerLite Pro Z8050WNL | User's Guide - Page 74
of remote control. Set this item to Normal to use the remote control provided with the projector. When Simple is selected, you can use the remote control provided with other Epson projectors to operate this projector. This is useful if you want to use a remote control that you are already familiar - Epson PowerLite Pro Z8050WNL | User's Guide - Page 75
can adjust the hue and brightness of images projected from a row of the several projectors.s p.58 Adjustment Level: You can adjust from black to white in five stages called Control Type. Network Menu (PowerLite Pro Z8000WUNL) For information on the PowerLite Pro Z8050WNL Network menu, see s p.78. - Epson PowerLite Pro Z8050WNL | User's Guide - Page 76
use DHCP. If this is set to On you cannot set any more addresses. IP Address: You can input the IP address assigned to the projector.* You can enter a number from 0 to 255 in each field of the address. However, the following IP Addresses cannot be used. 0.0.0.0, 0.x.x.x, 127.x.x.x, 224.0.0.0 to 255 - Epson PowerLite Pro Z8050WNL | User's Guide - Page 77
set up and control the projector using your computer's web browser. For more information, see the EasyMP Monitor Operation Guide. You can make SNMP this is set, you receive an e-mail notification if a problem or warning occurs in the projector. For information on the contents of the sent email. Mail - Epson PowerLite Pro Z8050WNL | User's Guide - Page 78
case letters. Each time the SYM1/2 key is selected, it sets and changes the symbol keys for the section enclosed by the frame. Network Menu (PowerLite Pro Z8050WNL) For information on the PowerLite Pro Z8000WUNL Network menu, see s p.75. - Epson PowerLite Pro Z8050WNL | User's Guide - Page 79
LAN, Mail, Others, Reset and Setup complete. By using the Web browser of a computer connected to the projector on a network, you can set the projector's functions and control the projector. This function is called "Web control". You can easily enter text using a keyboard to make settings for Web - Epson PowerLite Pro Z8050WNL | User's Guide - Page 80
List of Functions 80 Notes on operating the network menu Selecting from the top menu and sub menus, and changing of selected items are the same as operations in the configuration menu. When done, make sure you go to the Setup complete, and select Yes, No, or Cancel. When you select Yes or No, you - Epson PowerLite Pro Z8050WNL | User's Guide - Page 81
during setup. In this case, the following software keyboard is displayed. Use the [h] button on the remote control or [w/ ], [v/ ], [/ ] on the projector to move the cursor to the desired key, and then press the [Enter] button to enter the alphanumeric. Enter figures by holding down the - Epson PowerLite Pro Z8050WNL | User's Guide - Page 82
-byte alphanumeric characters. Web control is a computer function that allows you to set up and control the projector by using the Web browser on a computer connected on a network. See your Network Operation Guide for more information. When set to On, you have to enter the keyword when you try to - Epson PowerLite Pro Z8050WNL | User's Guide - Page 83
When an SSID is provided for the wireless LAN system in which the projector participates, enter the SSID. You can enter up to 32 single-byte cannot set any more addresses. You can input the IP addressg assigned to the projector. You can input a number from 0 to 255 in each field of the address - Epson PowerLite Pro Z8050WNL | User's Guide - Page 84
List of Functions 84 Sub Menu Subnet Mask Gateway Address MAC Address SSID Display IP Address Function You can input the Subnet Maskg for the projector. You can input a number from 0 to 255 in each field of the address. However, the following subnet masks cannot be used. 0.0.0.0, 255.255.255.255 - Epson PowerLite Pro Z8050WNL | User's Guide - Page 85
/b/g Module is installed and being used in Manual Mode, it is strongly recommended that you following security methods. When setting up security, follow the instructions from the administrator of the network system you are point without a server. This projector supports the latter method, without a - Epson PowerLite Pro Z8050WNL | User's Guide - Page 86
files are not supported. • If using EAP, you need to make settings at the projector that match the authentication server settings. Check with your network administrator for details on RADIUS settings. • Open "Network Menu" - "Certificate" in "Web Control" to register a digital certificate and a CA - Epson PowerLite Pro Z8050WNL | User's Guide - Page 87
method of inputting the encrypted WEP with text differs depending on the access point. Check with the network administrator for the network in which the projector participates, and then set to "ASCII". HEX: Input in hexadecimal. Selects the WEP encryption ID key. - Epson PowerLite Pro Z8050WNL | User's Guide - Page 88
Function You can enter the key used for WEP encryption. Enter the key in single-byte characters following instructions from the network administrator for the network in which the projector participates. The type of character and the number that can be entered differ according to the WEP encryption - Epson PowerLite Pro Z8050WNL | User's Guide - Page 89
more than 32 characters on the configuration menu. When setting from Web Control, you can enter more than 32 characters. See your Network Operation Guide for more information. You can enter an authentication password in single-byte alphanumeric characters. You can enter up to 64 characters. When the - Epson PowerLite Pro Z8050WNL | User's Guide - Page 90
cannot set any more addresses. You can input the IP addressg assigned to the projector. You can input a number from 0 to 255 in each field of the x is a number from 0 to 255) You can input the Subnet Maskg for the projector. You can input a number from 0 to 255 in each field of the address. However - Epson PowerLite Pro Z8050WNL | User's Guide - Page 91
List of Functions 91 Mail Menu When this is set, you receive an e-mail notification if a problem or warning occurs in the projector. For information on the contents of the sent e-mail, s p.144 Sub Menu Mail Notification SMTP Server Port Number Email Address 1/Email Address 2/Email Address 3 - Epson PowerLite Pro Z8050WNL | User's Guide - Page 92
IP addresses cannot be used. 127.x.x.x, 224.0.0.0 to 255.255.255.255 (where x is a number from 0 to 255) To use SNMP to monitor the projector, you need to install the SNMP manager program on your computer. SNMP should be managed by a network administrator. For the priority gateway, select either - Epson PowerLite Pro Z8050WNL | User's Guide - Page 93
List of Functions 93 Reset Menu Resets all of the network settings. Sub Menu Reset network settings. To reset all of the network settings, select Yes. After you reset all the settings, the Basic menu appears. Function - Epson PowerLite Pro Z8050WNL | User's Guide - Page 94
status of the projector. Items that can be displayed vary depending on the image signal being projected as shown in the following screen shots. Analog RGB/Digital RGB/ Component Video/Digital Component Video can display the image signal Info. This information may be needed if service is required. - Epson PowerLite Pro Z8050WNL | User's Guide - Page 95
of Functions 95 Sub Menu Status Serial Number Function This is Info about errors that have occurred on the projector. This information may be needed if service is required. Displays the projector's serial number. * The cumulative use time is displayed as "0H" for the first 10 hours. 10 hours and - Epson PowerLite Pro Z8050WNL | User's Guide - Page 96
Menu Settings Extended Network Options Keystone Control Panel Lock Lens Operation Lock Pointer Shape Power Consumption Remote Receiver User User's Logo Projection Direction Operation Standby Mode Air Filter Notice Projector ID Multi-screen Language Reset Basic*1 Wireless LAN*2 Security*2 Wired - Epson PowerLite Pro Z8050WNL | User's Guide - Page 97
List 97 Menu Info Reset Lamp Hours Lamp Status Source Input Signal Resolution Video Signal Refresh Rate Sync Info Status Serial Number Reset All Options *1 PowerLite Pro Z8050WNL only *2 PowerLite Pro Z8050WNL with optional Wireless 801.11a/b/g Module only *3 PowerLite Pro Z8000WUNL only - Epson PowerLite Pro Z8050WNL | User's Guide - Page 98
98 Troubleshooting This chapter explains how to identify problems and what to do if a problem is found. - Epson PowerLite Pro Z8050WNL | User's Guide - Page 99
Using the Help Screen 99 Using the Help Screen If a problem occurs with the projector, press the [Help] button to display the Help screen. You can solve problems by answering the questions. Procedure A Press the [Help] button. The Help screen is displayed. Remote Control B Select a menu item. - Epson PowerLite Pro Z8050WNL | User's Guide - Page 100
Using the Help Screen 100 C Confirm the selection. Remote Control Questions and solutions are displayed as shown on the screen below. Press the [Help] button to exit Help. If the Help screen does not provide a solution to the problem, refer to "Problem Solving" p.101. - Epson PowerLite Pro Z8050WNL | User's Guide - Page 101
Problem Solving 101 Problem Solving If you are having a problem with the projector, first check the projector's indicators and refer to "Reading the Indicators". s p.102 If the indicators do not show clearly what the problem might be, refer to "When the Indicators Provide No Help". s p.107 - Epson PowerLite Pro Z8050WNL | User's Guide - Page 102
Problem Solving 102 Reading the Indicators These indicators indicate the operating status of the projector. 1 Indicates the operating status. wireless LAN when the optional Wireless 802.11a/b/g Module is connected. (Powerlite Pro Z8050WNL only) 3 Indicates the air filter status. 4 Indicates the - Epson PowerLite Pro Z8050WNL | User's Guide - Page 103
see what the indicators mean and how to remedy problems that they indicate. If all indicators are off, error continues after checking the points above, stop using the projector, disconnect the power cable from the electrical outlet, and contact Epson. s p.116 When using at an altitude of 4900 - Epson PowerLite Pro Z8050WNL | User's Guide - Page 104
Problem Solving 104 Status Cause Lamp Error Lamp Failure Filter Airflow the error continues: Stop using the projector, disconnect the power cable from the electrical outlet, and contact Epson. s p.116 If it is cracked: Replace it with a new lamp, or contact Epson for further advice s p.116. If - Epson PowerLite Pro Z8050WNL | User's Guide - Page 105
Problem Solving 105 m o n Indicator is flashing or lit : Lit : Flashing : Off : Varies according to the projector status Status the projector, disconnect the power cable from the electrical outlet, and contact Epson. s p.116 If it is cracked: Replace it with a new lamp, or contact Epson for - Epson PowerLite Pro Z8050WNL | User's Guide - Page 106
Problem Solving 106 Status Cause Low Air Flow Air Filter Notice Remedy or one. If the error continues after checking the points above, stop using the projector, disconnect the power cable from the electrical outlet, and contact Epson. s p.116 The message "Time to clean the air filter. Clean or - Epson PowerLite Pro Z8050WNL | User's Guide - Page 107
" s p.109 • "The message "Not supported" is displayed." s p.109 • ""No • "Interference or distortion appear in images" s p.110 Problems such as interference, distortion, or black & white checked LCD screens have different color reproduction performance, so that the colors projected by the projector - Epson PowerLite Pro Z8050WNL | User's Guide - Page 108
108 Problems relating connected correctly or power is not being supplied normally. Connect the projector's power cable correctly. Check that your electrical outlet or power Remedy Is the computer's image signal being output to the LCD and Change the image signal to external output only. For - Epson PowerLite Pro Z8050WNL | User's Guide - Page 109
Problem Solving 109 Projection stops automatically Check Is Sleep Mode set to On? that the air filter is securely installed. The projector automatically turns off about one minute after it detects that there is no air filter. The message "Not supported" is displayed. Check Is the image signal - Epson PowerLite Pro Z8050WNL | User's Guide - Page 110
Problem Solving 110 Check Are the image signals being output to the projector? Only when projecting images from a laptop computer or a computer with a built-in LCD screen Remedy If the image signals are only being output to the computer's LCD monitor or to the accessory monitor, you need to - Epson PowerLite Pro Z8050WNL | User's Guide - Page 111
If an extension cable is used, electrical interference may affect the signals. Use the cables supplied with the projector to check if the cables you are using may be causing the problem. Is the correct resolution selected? Set the computer so that the signals being output are compatible with the - Epson PowerLite Pro Z8050WNL | User's Guide - Page 112
Problem Solving 112 Image colors are not right Check Do the input signal settings match the signals from the connected device? Is the image Brightness set - Epson PowerLite Pro Z8050WNL | User's Guide - Page 113
or the power cable may be defective. Reinsert the touched? power cable. If this does not solve the problem, stop using the projector, disconnect the power cable from the electrical outlet, and contact Epson. s p.116 Is the Control Panel Lock set to Full Lock? Press the [t] button on the Remote - Epson PowerLite Pro Z8050WNL | User's Guide - Page 114
Solving 114 Other problems The Remote Control does not work Check Remedy Is the remote control light-emitting area pointing towards Point the remote control towards the Remote Receiver. the remote receiver on the projector when it is operated? Operating range s p.19 Is the remote control - Epson PowerLite Pro Z8050WNL | User's Guide - Page 115
Menu - Standby Mode p.73 When the projector comes to a sudden stop, e-mail cannot be sent. If the abnormal state continues, contact your Epson. s p.116 Check that your electrical outlet or power source is functioning correctly. Mail notification of problems is sent according to the Mail settings in - Epson PowerLite Pro Z8050WNL | User's Guide - Page 116
Toll or long distance charges may apply. Before you call for support, please have the following information ready: • Product name (PowerLite Pro Z8000WUNL or PowerLite Pro Z8050WNL) • Product serial number (located on the projector) • Proof of purchase (such as a store receipt) and date of purchase - Epson PowerLite Pro Z8050WNL | User's Guide - Page 117
117 Appendix This chapter provides information on maintenance procedures to ensure the best level of performance from the projector for a long time to come. - Epson PowerLite Pro Z8050WNL | User's Guide - Page 118
adhesives on the Ceiling mount fixing points to prevent the screws from loosening, or if you use things such as lubricants or oils on the projector, the projector case may crack causing it to fall from its ceiling mount. This could cause serious injury to anyone under the ceiling mount and could - Epson PowerLite Pro Z8050WNL | User's Guide - Page 119
Installation Methods 119 Do not install the projector at any angles other than those shown in the following illustration. When the projector is mounted, you can remove the projector's feet and attach the foot covers, as shown below. - Epson PowerLite Pro Z8050WNL | User's Guide - Page 120
is adhering to parts such as the lens or filter of the projector. This could cause a fire due to the high temperature of the air filter it can cause the internal temperature of the projector to rise, and this can lead to problems with operation. Clean the air filter immediately when the message is - Epson PowerLite Pro Z8050WNL | User's Guide - Page 121
Cleaning B Remove the air filter cover. Grip the air filter cover tab between your fingers, and pull up and remove the cover while pressing the tab. 121 D With the front (the side with tabs) of the air filter facing down, tap the air filter four or five times to shake off the dust. Turn it over and - Epson PowerLite Pro Z8050WNL | User's Guide - Page 122
Cleaning 122 E Remove any dust remaining on the air filter by using a vacuum cleaner on the front side. G Reinsert the air filter cover. Press the cover until it clicks into place. F Reinsert the air filter. If a message is frequently displayed, even after cleaning, it is time to replace the - Epson PowerLite Pro Z8050WNL | User's Guide - Page 123
are becoming drained. When this happens, replace them with two new AA size alkaline batteries. Caution: Make sure you read the Safety Instructions before handling the batteries. s p.165 Procedure A Remove the battery cover. While pushing the battery compartment cover catch, lift the cover up - Epson PowerLite Pro Z8050WNL | User's Guide - Page 124
ceiling. Warning: • When replacing a lamps because it has stopped illuminating, there is a possibility that the lamp may be broken. When replacing the lamp of a projector that is installed on the ceiling, you should always assume that the lamp is broken, and you should stand to the side of the lamp - Epson PowerLite Pro Z8050WNL | User's Guide - Page 125
B Wait until the lamps have cooled down sufficiently before removing the lamp cover on the back of the projector. Pinch the tabs on the front of the lamp cover together to release the lock. When the lock lamp is cracked, replace it with a new lamp, or contact Epson. s p.116 1 Lamp 1 2 Lamp 2 - Epson PowerLite Pro Z8050WNL | User's Guide - Page 126
Install the new lamp. Insert the new lamp along the guide rail in the correct direction so that it fits in place regarding disposal or recycling. Do not put in the trash. Resetting the Lamp Hours The projector records lamp life and a message and indicator notify you when it is time to replace - Epson PowerLite Pro Z8050WNL | User's Guide - Page 127
, and then press the [Enter] button. 127 Procedure A Press the [t] power button on the remote control or the back of the projector to turn off the projector's power. After the confirmation buzzer beeps twice, disconnect the power cable. B Remove the air filter cover. Grip the air filter cover tab - Epson PowerLite Pro Z8050WNL | User's Guide - Page 128
Replacing Consumables C Remove the air filter. D Install the new air filter. 128 E Reinsert the air filter cover. Press until it clicks into place. Caution: The air filter contains Polypropylene. Dispose of used air filters properly in accordance with your local regulations. - Epson PowerLite Pro Z8050WNL | User's Guide - Page 129
(ELPLR04) Wide zoom lens (ELPLW04) Flush Ceiling Mount Bracket Mount Bracket with Extended Pipe Kensington security lock Hardware remote control cable set Replacement remote control Wireless IR mouse receiver for remote control Wireless 802.11a/b/g Module (PowerLite Pro Z8050WNL only) Part Number - Epson PowerLite Pro Z8050WNL | User's Guide - Page 130
are needed to unpack or carry the projector. When Transporting Preparing packaging Use the lens shift function to horizontally and vertically center the lens. Then, follow the instructions in "Moving Nearby" and the additional instructions below. • Remove the lens unit. • Attach the cover that was - Epson PowerLite Pro Z8050WNL | User's Guide - Page 131
Saving a User's Logo Saving a User's Logo You can save the image that is currently being projected as a User's Logo. When a User's Logo is saved, the previous User's Logo is erased and the logo cannot be returned to the factory default. Procedure A Project the image you want to use as the User's - Epson PowerLite Pro Z8050WNL | User's Guide - Page 132
the PowerLite Pro Z8000WUNL. G When the message "Save this image as the User's Logo?" is displayed, select "Yes". The image is saved. After the image has been saved, the message "Completed. " is displayed. Saving the user's logo may take approximately 15 seconds. Do not use the projector or any - Epson PowerLite Pro Z8050WNL | User's Guide - Page 133
PowerLite Pro Z8050WNL only) There are two methods for setting WPS. • Push Button Method SSID and security are set automatically when the [Enter] button is pressed on the projector are set automatically by inputting an 8-digit code that was assigned to the projector from the computer to the access - Epson PowerLite Pro Z8050WNL | User's Guide - Page 134
(PowerLite Pro Z8050WNL only) 134 B From "Wireless LAN" select "To Setup Wizard". Making a Connection Using the Push Button Method Procedure A Select "Push Button Method". The following screen is displayed. The Push Button Method screen is displayed. B Press the [Enter] button on the projector - Epson PowerLite Pro Z8050WNL | User's Guide - Page 135
Fi Protected Setup) Connection with a Wireless LAN Access Point (PowerLite Pro Z8050WNL only) 135 C Press the button on the access menu screen is displayed. This completes the setup of the connection between the projector and the access point. Press the [Menu] button to close the configuration - Epson PowerLite Pro Z8050WNL | User's Guide - Page 136
Making a WPS (Wi-Fi Protected Setup) Connection with a Wireless LAN Access Point (PowerLite Pro Z8050WNL only) 136 Procedure A Select "PIN Code Method". B Enter the PIN code displayed on the "PIN Code Method" screen from the computer to the access - Epson PowerLite Pro Z8050WNL | User's Guide - Page 137
(PowerLite Pro Z8050WNL only) 137 C The message "Setup by Wi-Fi Protected Setup complete." is displayed. Press the [Enter] button or the [Esc] button. The Wireless LAN menu screen is displayed. D Select "Yes" from "Setup complete". This completes the setup of the connection between the projector - Epson PowerLite Pro Z8050WNL | User's Guide - Page 138
with a 100BASE-TX or 10BASE-T LAN cable (not included). The illustration in this section shows the PowerLite Pro Z8000WUNL. If you are using the PowerLite Pro Z8050WNL, the projector and interfaces are slightly different. 1 To LAN port 2 LAN cable (commercially available) 3 To LAN port Caution - Epson PowerLite Pro Z8050WNL | User's Guide - Page 139
Connecting to an external monitor 139 Connecting to an external monitor Analog RGB images input through the Computer or BNC ports can be displayed on an external monitor and the screen at the same time. You can check projected images on an external monitor when giving presentations even if you - Epson PowerLite Pro Z8050WNL | User's Guide - Page 140
Unit B Remove the front cover. Removing Caution: • Only remove the lens unit when necessary. If dust or dirt enter the projector, projection quality deteriorates and it could cause a malfunction. • Try not to touch the lens with your hand or fingers. If fingerprints or oils are left on the surface - Epson PowerLite Pro Z8050WNL | User's Guide - Page 141
it counterclockwise. Procedure A Insert the lens unit straight into the lens insertion section with the white circle on the lens on top. D Once it is released, pull the lens unit straight out. Attaching Caution: Do not remove or attach the lens unit when the projector's lens area is facing up (for - Epson PowerLite Pro Z8050WNL | User's Guide - Page 142
Removing and Attaching the Projector Lens Unit 142 B While holding the lens unit firmly, turn the lock lever clockwise until it is locked. Check that the lens cannot be detached. C Replace the front cover. 1 Install the cover along the guide. 2 Tighten the screw. 3 Tighten the two screws. - Epson PowerLite Pro Z8050WNL | User's Guide - Page 143
Unit 143 D Replace the interface cover. 1 Install the cover along the guide. 2 Tighten the screws. Caution: • Install the front cover before using the projector. • Store the projector with the lens unit installed. If the projector is stored without the lens unit, dust and dirt may get inside the - Epson PowerLite Pro Z8050WNL | User's Guide - Page 144
the following e-mail is sent. Subject: EPSON Projector Line 1: The name of the projector where the problem has occurred Line 2: The IP address set for the projector where the problem has occurred. Line 3 and on: Details of the problem The details of the problem are listed line by line. The following - Epson PowerLite Pro Z8050WNL | User's Guide - Page 145
Error Cinema filter error Cinema filter error Cinema Filter Warning Cinema Filter Warning The projector can still be used but the cinema filter does not work. Clean Air or (-) appears at the start of the message. (+): A projector problem has occurred (-): A projector problem has been dealt with - Epson PowerLite Pro Z8050WNL | User's Guide - Page 146
Command List When the power ON command is transmitted to the projector, the power turns on and it enters warm-up mode. When the projector's power has turned on, a colon ":" (3Ah) is returned. When a command is input, the projector executes the command and returns a ":", and then accepts the next - Epson PowerLite Pro Z8050WNL | User's Guide - Page 147
> Communications protocol • Default baud rate setting: 9600 bps • Data length: 8 bit • Parity: None • Stop-bit: 1 bit • Flow control: None (PC serial cable) Signal Name GND TD RD Signal wire ground Transmit data Receive data Function - Epson PowerLite Pro Z8050WNL | User's Guide - Page 148
projector sources Computer BNC Video S-Video DVI-D HDMI Source PJLink Command INPT 11 INPT 13 INPT 23 INPT 22 INPT 31 INPT 32 • Manufacturer name displayed for "Manufacture name information query" EPSON • Model name displayed for "Product name information query" EB-Z8000WU/PowerLite Pro Z8000WU - Epson PowerLite Pro Z8050WNL | User's Guide - Page 149
Monitor Displays 149 Supported Monitor Displays Supported Monitor Displays for PowerLite Pro Z8000WUNL Computer signals (analog RGB) Signal Refresh Rate (Hz) VGA SVGA XGA WXGA WXGA+ WSXGA+ SXGA SXGA+ UXGA WUXGA*3 MAC13" MAC16" 60/72/75/85/iMac*1 56/60/72/75/85/iMac*1 60/70/75/85/iMac - Epson PowerLite Pro Z8050WNL | User's Guide - Page 150
. Even when signals other than those mentioned above are input, it is likely that the image can be projected. However, not all functions may be supported. Component Video Signal Refresh Rate (Hz) SDTV(480i) SDTV(576i) SDTV(480p) SDTV(576p) HDTV(720p) HDTV(1080i) HDTV(1080p) 60 50 60 50 50 - Epson PowerLite Pro Z8050WNL | User's Guide - Page 151
Supported Monitor Displays Composite Video/S-Video Signal Refresh Rate (Hz) TV(NTSC) 60 TV(PAL,SECAM) 50 151 Resolution - - Normal 1600x1200 1600x1200 16:9 1920x1080 1920x1080 Aspect Mode Full 1920x1200 1920x1200 Zoom 1920x1200 1920x1200 Native 640x480 768x576 - Epson PowerLite Pro Z8050WNL | User's Guide - Page 152
Supported Monitor Displays 152 Input signal from the HDMI/DVI-D input port Signal Refresh Rate (Hz) Resolution VGA SVGA XGA WXGA SXGA SXGA+ UXGA WUXGA* SDTV(480i) SDTV(480p) SDTV(576i) SDTV(576p) HDTV(720p) HDTV(1080i) HDTV(1080p) 60 60 60 60 60 60 60 60 60 60 60 - Epson PowerLite Pro Z8050WNL | User's Guide - Page 153
Monitor Displays 153 Supported Monitor Displays for PowerLite Pro Z8050WNL Computer signals (analog RGB) Signal Refresh Rate (Hz) VGAEGA VGA SVGA XGA WXGA WXGA+ WSXGA+ SXGA SXGA+ UXGA WUXGA*3 MAC13" MAC16" MAC19" MAC21" 70 60/72/75/85/iMac*1 56/60/72/75/85/iMac*1 60/70/75/85/iMac*1 60 - Epson PowerLite Pro Z8050WNL | User's Guide - Page 154
. Even when signals other than those mentioned above are input, it is likely that the image can be projected. However, not all functions may be supported. Component Video Signal Refresh Rate (Hz) SDTV(480i) SDTV(576i) SDTV(480p) SDTV(576p) HDTV(720p) HDTV(1080i) HDTV(1080p) 60 50 60 50 50 - Epson PowerLite Pro Z8050WNL | User's Guide - Page 155
Supported Monitor Displays Input signal from the HDMI/DVI-D input port Signal Refresh Rate (Hz) Resolution VGA SVGA XGA WXGA SXGA SXGA+ UXGA WUXGA* SDTV(480i) SDTV(480p) SDTV(576i) SDTV(576p) HDTV(720p) HDTV(1080i) HDTV(1080p) 60 60 60 60 60 60 60 60 60 60 60 - Epson PowerLite Pro Z8050WNL | User's Guide - Page 156
Specifications 156 Specifications Projector General Specifications Product name PowerLite Pro Z8000WUNL PowerLite Pro Z8050WNL Dimensions 21.0 inches (534 mm Light output 5600 lumens Focus adjustment Zoom adjustment*1 Lens shift*1 Powered Powered (1-1.6) Powered (Vertical direction: - Epson PowerLite Pro Z8050WNL | User's Guide - Page 157
is attached. When an optional lens is attached, check the User's Guide supplied with the optional lenses. *2 Turn off this product when not in use to prolong the life of the projector. Lamp life will vary depending upon mode selected, environmental conditions, and usage. Brightness decreases over - Epson PowerLite Pro Z8050WNL | User's Guide - Page 158
port 1 Monitor Out port 1 LAN Port 1 Wireless LAN Port 1 (PowerLite Pro 8050WNL only) RS-232C Port 1 Remote port 1 Mini D-Sub15-pin ( .11a/b/g Module Mini D-Sub 9-pin (male) Stereo mini jack * The projector can be connected to and project images from HDMI and DVI-D compatible equipment - Epson PowerLite Pro Z8050WNL | User's Guide - Page 159
Specifications 159 Angle of tilt Using the projector at angles not shown in the illustrations above may damage it or cause an accident. - Epson PowerLite Pro Z8050WNL | User's Guide - Page 160
System Requirements The software supplied with the projector runs on computers that meet the following requirements. OS CPU Amount of Memory Hard Disk Free space Display EasyMP Network Projection Windows series (32-bit versions only) • Windows 2000 (Service Pack 4) • Windows XP • Windows XP - Epson PowerLite Pro Z8050WNL | User's Guide - Page 161
Appearance 161 Appearance 21.0 (534) 18.0 (456) 1 Center of lens 2 Distance from center of lens to suspension bracket fixing point 1.5 (39) 9.3 (236) 21.4 (544.6) 28.9 (734) Units: inches (mm) - Epson PowerLite Pro Z8050WNL | User's Guide - Page 162
. It is used to prevent illegal copying and protect copyrights by encrypting digital signals sent over DVI and HDMI ports. Digital images protected by HDCP technology can be projected with this projector because the projector's DVI-D and HDMI input ports are compatible with HDCP. However, the - Epson PowerLite Pro Z8050WNL | User's Guide - Page 163
. The signals output from computers have a specific frequency. If the projector frequency does not match this frequency, the resulting images are not of . Normal stereo is a 2-channel format that uses two speakers. Dolby Digital is a 6- channel (5.1-channel) system which adds to this a center - Epson PowerLite Pro Z8050WNL | User's Guide - Page 164
Glossary Refresh Rate 164 The light-emitting element of a display maintains the same luminosity and color for an extremely short time. Because of this, the image must be scanned many times per second to refresh the light-emitting element. The number of refresh operations per second is called the - Epson PowerLite Pro Z8050WNL | User's Guide - Page 165
Epson Corporation's operating and maintenance instructions. Seiko Epson Corporation shall not be liable against any damages or problems Epson disclaims any and all rights in those marks. ©2010 Epson America, Inc. 2/10 Important Safety Instructions • Do not look into the lens when the projector - Epson PowerLite Pro Z8050WNL | User's Guide - Page 166
to parts such as the lens or filter of the projector. • Never spill liquid of any kind into the projector. • Do not use the projector where it may be exposed in this User's Guide. Replace the batteries as soon as they run out and remove the batteries if you will not be using the projector for a long - Epson PowerLite Pro Z8050WNL | User's Guide - Page 167
where the plug can be easily unplugged. • Unplug the projector from the wall outlet and refer servicing to qualified service personnel under the following conditions: If it does not operate normally when you follow the operating instructions, or exhibits a distinct change in performance; If smoke - Epson PowerLite Pro Z8050WNL | User's Guide - Page 168
the lens with bare hands. • Always attach the lens cover to the lens when not using the projector, to prevent the lens from becoming comply with the limits for a Class B digital device, pursuant to Part 15 of the and used in accordance with the instructions, may cause harmful interference to radio - Epson PowerLite Pro Z8050WNL | User's Guide - Page 169
General Notes 169 For Canadian Users This Class B digital apparatus complies with Canadian ICES-003. Cet appareil numérique de la classe B est conforme à la norme NMB-003 du Canada. CPD-27588R2
-
 1
1 -
 2
2 -
 3
3 -
 4
4 -
 5
5 -
 6
6 -
 7
7 -
8
-
9
-
10
-
11
-
12
-
13
-
14
-
15
-
16
-
17
-
18
-
19
-
20
-
21
-
22
-
23
-
24
-
25
-
26
-
27
-
28
-
29
-
30
-
31
-
32
-
33
-
34
-
35
-
36
-
37
-
38
-
39
-
40
-
41
-
42
-
43
-
44
-
45
-
46
-
47
-
48
-
49
-
50
-
51
-
52
-
53
-
54
-
55
-
56
-
57
-
58
-
59
-
60
-
61
-
62
-
63
-
64
-
65
-
66
-
67
-
68
-
69
-
70
-
71
-
72
-
73
-
74
-
75
-
76
-
77
-
78
-
79
-
80
-
81
-
82
-
83
-
84
-
85
-
86
-
87
-
88
-
89
-
90
-
91
-
92
-
93
-
94
-
95
-
96
-
97
-
98
-
99
-
100
-
101
-
102
-
103
-
104
-
105
-
106
-
107
-
108
-
109
-
110
-
111
-
112
-
113
-
114
-
115
-
116
-
117
-
118
-
119
-
120
-
121
-
122
-
123
-
124
-
125
-
126
-
127
-
128
-
129
-
130
-
131
-
132
-
133
-
134
-
135
-
136
-
137
-
138
-
139
-
140
-
141
-
142
-
143
-
144
-
145
-
146
-
147
-
148
-
149
-
150
-
151
-
152
-
153
-
154
-
155
-
156
-
157
-
158
-
159
-
160
-
161
-
162
-
163
-
164
-
165
-
166
-
167
-
168
-
169
 |
 |

PowerLite® Pro Z8000WUNL/Z8050WNL
User’s Guide