Epson PowerLite Pro Z9900W User Manual - Page 133
to adjust the red color convergence, setting and choose one of the following
 |
View all Epson PowerLite Pro Z9900W manuals
Add to My Manuals
Save this manual to your list of manuals |
Page 133 highlights
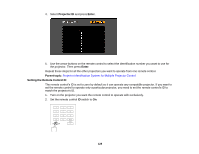
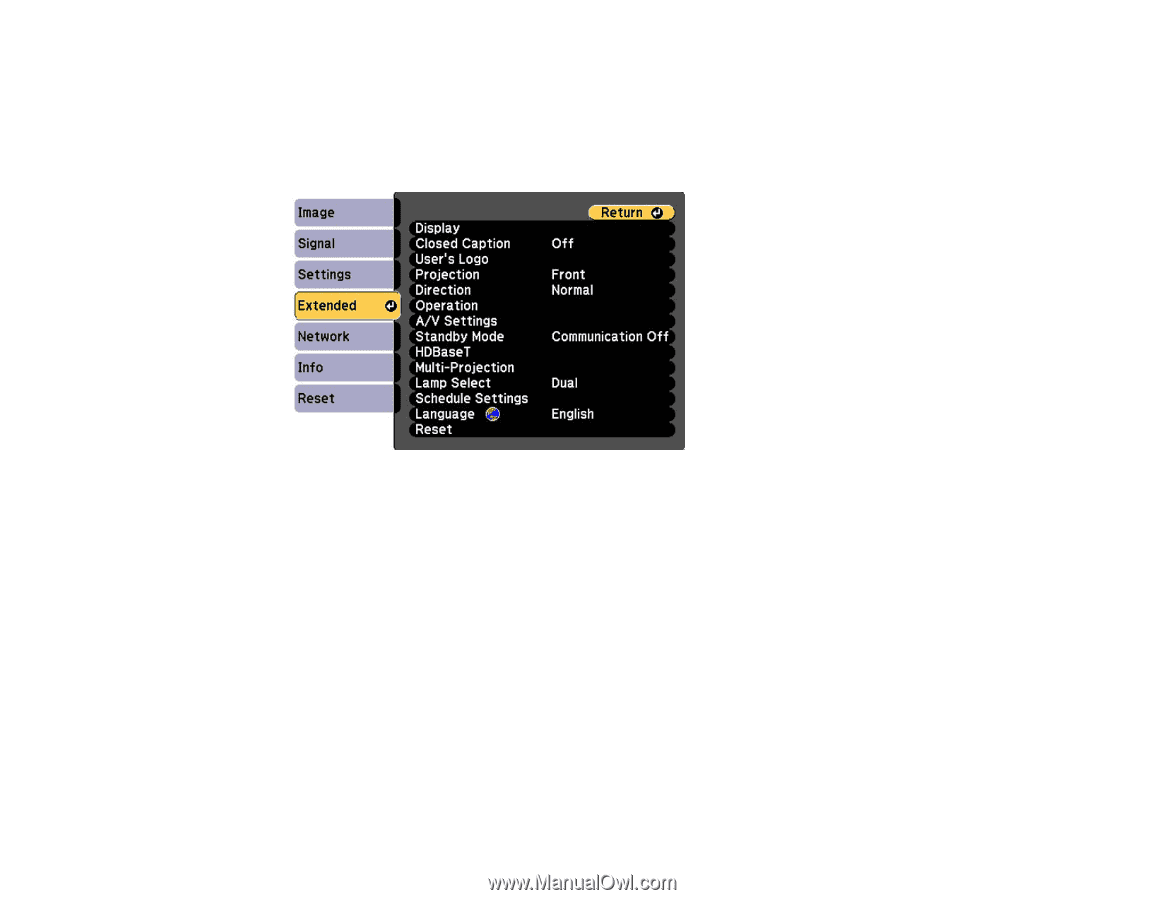
cm) diagonally and the projection surface should not be colored or textured; otherwise the adjustment grids are difficult to align. 1. Press the Menu button. 2. Select the Extended menu and press Enter. 3. Select the Display setting and press Enter. 4. Select the Panel Alignment setting and press Enter. 5. Press Enter and select On. 6. Press Esc. 7. Select the Select Color setting and choose one of the following: • R to adjust the red color convergence • B to adjust the blue color convergence Note: You can adjust only the red or blue color convergence; you cannot adjust the standard green color panel. 8. Select the Pattern Color setting and press Enter. 9. Select the pattern you want to use and press Esc. 133
-
 1
1 -
2
-
3
-
4
-
5
-
6
-
7
-
8
-
9
-
10
-
11
-
12
-
13
-
14
-
15
-
16
-
17
-
18
-
19
-
20
-
21
-
22
-
23
-
24
-
25
-
26
-
27
-
28
-
29
-
30
-
31
-
32
-
33
-
34
-
35
-
36
-
37
-
38
-
39
-
40
-
41
-
42
-
43
-
44
-
45
-
46
-
47
-
48
-
49
-
50
-
51
-
52
-
53
-
54
-
55
-
56
-
57
-
58
-
59
-
60
-
61
-
62
-
63
-
64
-
65
-
66
-
67
-
68
-
69
-
70
-
71
-
72
-
73
-
74
-
75
-
76
-
77
-
78
-
79
-
80
-
81
-
82
-
83
-
84
-
85
-
86
-
87
-
88
-
89
-
90
-
91
-
92
-
93
-
94
-
95
-
96
-
97
-
98
-
99
-
100
-
101
-
102
-
103
-
104
-
105
-
106
-
107
-
108
-
109
-
110
-
111
-
112
-
113
-
114
-
115
-
116
-
117
-
118
-
119
-
120
-
121
-
122
-
123
-
124
-
125
-
126
-
127
-
 128
128 -
 129
129 -
 130
130 -
 131
131 -
 132
132 -
 133
133 -
 134
134 -
 135
135 -
 136
136 -
 137
137 -
 138
138 -
139
-
140
-
141
-
142
-
143
-
144
-
145
-
146
-
147
-
148
-
149
-
150
-
151
-
152
-
153
-
154
-
155
-
156
-
157
-
158
-
159
-
160
-
161
-
162
-
163
-
164
-
165
-
166
-
167
-
168
-
169
-
170
-
171
-
172
-
173
-
174
-
175
-
176
-
177
-
178
-
179
-
180
-
181
-
182
-
183
-
184
-
185
-
186
-
187
-
188
-
189
-
190
-
191
-
192
-
193
-
194
-
195
-
196
-
197
-
198
-
199
-
200
-
201
-
202
-
203
-
204
-
205
-
206
-
207
-
208
-
209
-
210
-
211
-
212
-
213
-
214
-
215
-
216
-
217
-
218
-
219
-
220
-
221
-
222
-
223
-
224
-
225
-
226
-
227
-
228
-
229
-
230
-
231
-
232
-
233
-
234
-
235
-
236
-
237
-
238
-
239
-
240
-
241
-
242
-
243
-
244
-
245
-
246
-
247
-
248
-
249
-
250
-
251
-
252
-
253
-
254
-
255
-
256
-
257
-
258
-
259
-
260
-
261
-
262
-
263
-
264
-
265
-
266
-
267
-
268
-
269
-
270
-
271
-
272
-
273
-
274
-
275
-
276
-
277
-
278
-
279
-
280
-
281
-
282
-
283
-
284
-
285
-
286
-
287
-
288
 |
 |
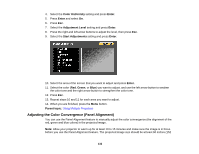
cm) diagonally and the projection surface should not be colored or textured; otherwise the adjustment
grids are difficult to align.
1.
Press the
Menu
button.
2.
Select the
Extended
menu and press
Enter
.
3.
Select the
Display
setting and press
Enter
.
4.
Select the
Panel Alignment
setting and press
Enter
.
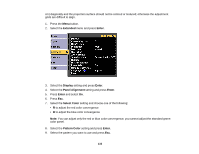
5.
Press
Enter
and select
On
.
6.
Press
Esc
.
7.
Select the
Select Color
setting and choose one of the following:
•
R
to adjust the red color convergence
•
B
to adjust the blue color convergence
Note:
You can adjust only the red or blue color convergence; you cannot adjust the standard green
color panel.
8.
Select the
Pattern Color
setting and press
Enter
.
9.
Select the pattern you want to use and press
Esc
.
133